Create a notebook
Create a notebook connected to CPU
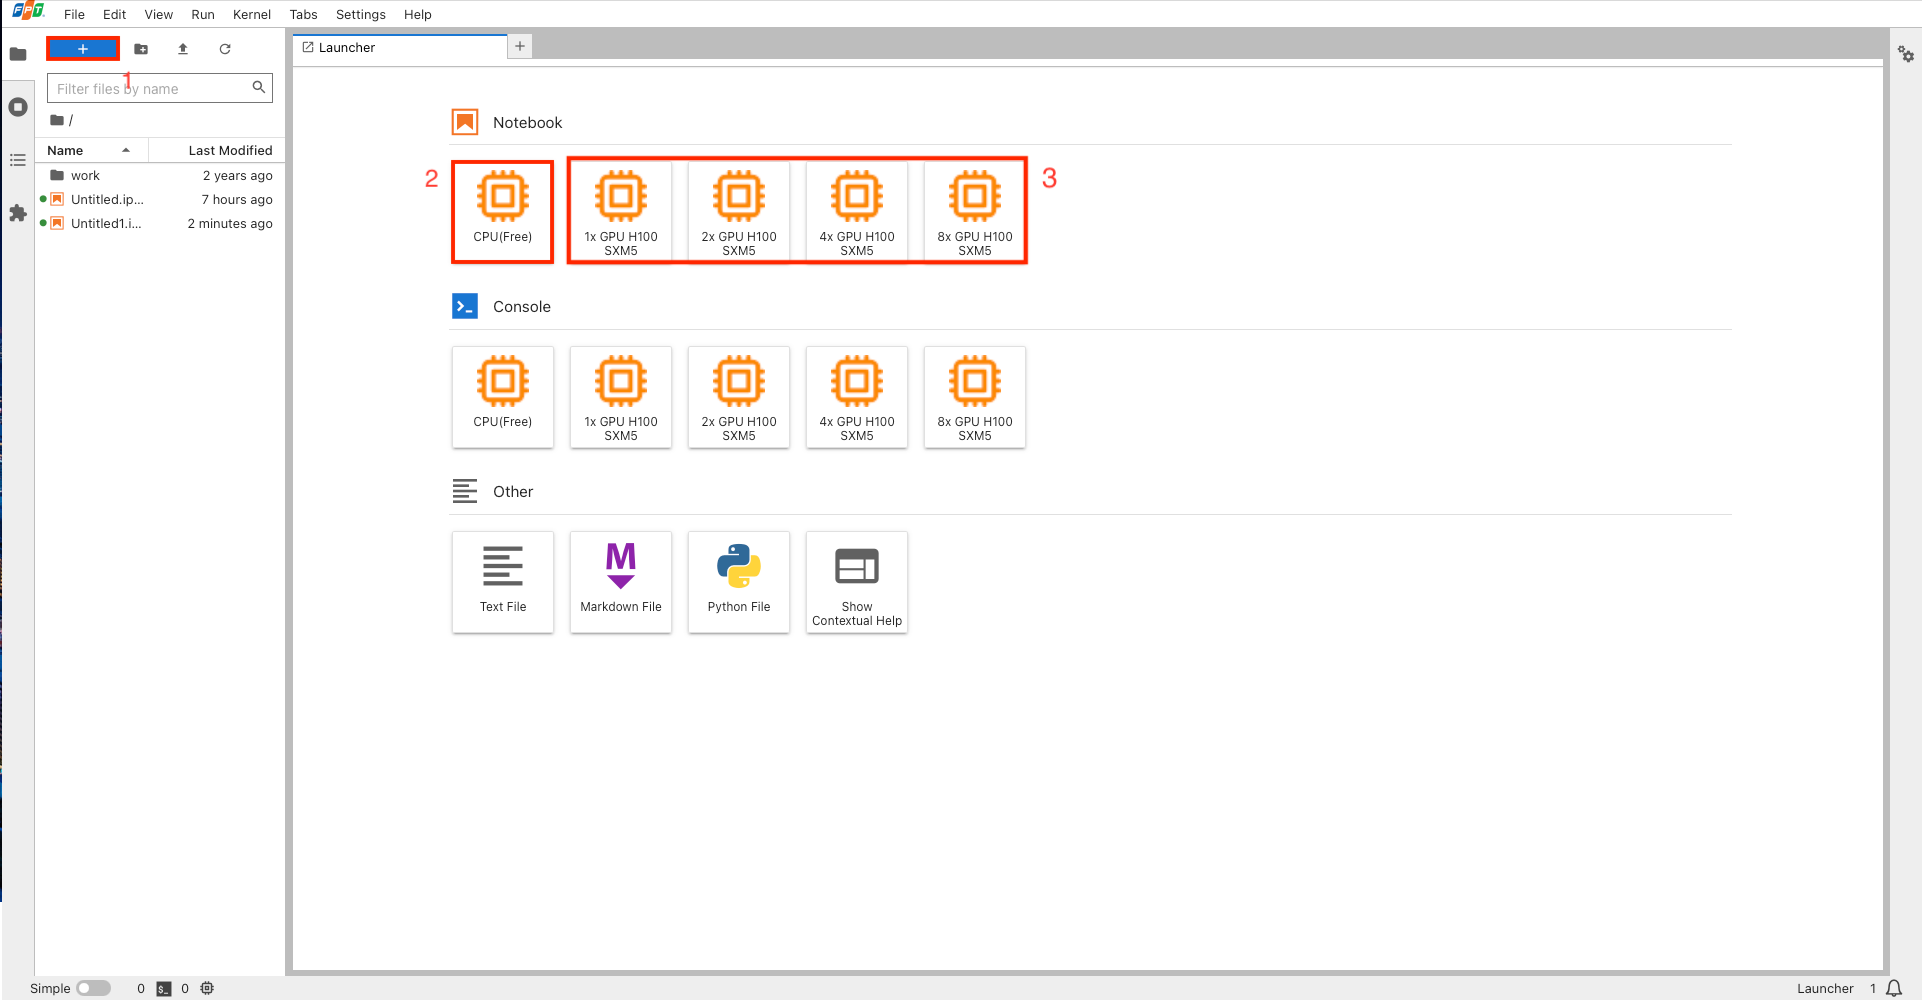
Step 1:
- Click + button (1)
- Choose CPU Notebook (2)
Step 2: Once your notebook is ready:
- The notebook will show
"CPU (free) | idle"on the bottom left - Your chosen flavor will appear as selected in the Running kernel section of the kernel configuration menu on the upper right
Step 3: Start coding.
Create a notebook connected to GPU
Step 1: Before you start, make sure your account has enough credits to cover at least one hour of GPU cost. Check out the detailed guide here/.
Step 2: Choose notebook with preferred GPU (3)
Step 3: Choose Confirm on the confirmation pop-up
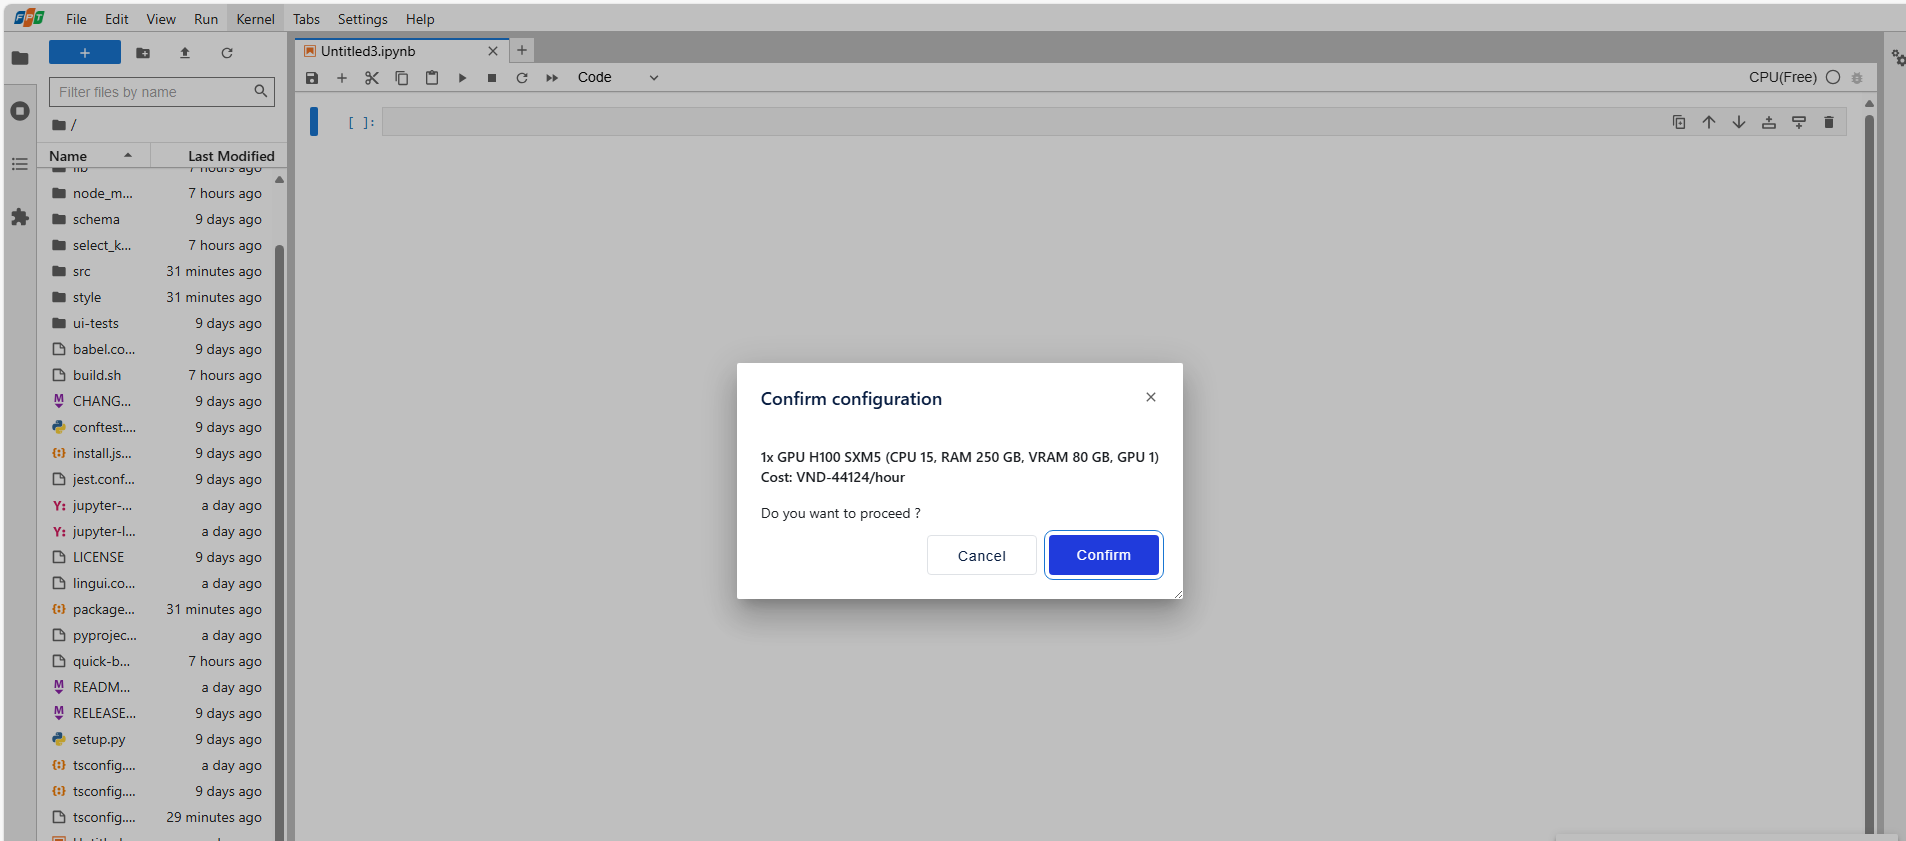
Step 4: Wait about 1–2 minutes for the notebook to be ready.
Step 5: Once your notebook is ready:
- The notebook will show
"GPU flavor name | idle"on the bottom left - Your chosen flavor will appear as selected in the Running kernel section of the kernel configuration menu on the upper right
Step 6: Start coding.