Initial setup
Before using FPT Cloud Server, complete the following setup steps to ensure your environment is ready for creating virtual machines.
Prerequisites
- ✅ You have an FPT Cloud account.
- ✅ You have been granted access to a Tenant, Region, and VPC.
Log in to FPT Cloud Portal
- Go to https://console.fptcloud.com.
- Log in with your FPT Cloud account credentials.
- Select the correct Tenant, Region, and VPC for the service you want to use.
If you do not have an FPT Cloud account, go to https://fptcloud.com, click Sign Up, and fill in your details as instructed. The support team will contact you to confirm and create your account.
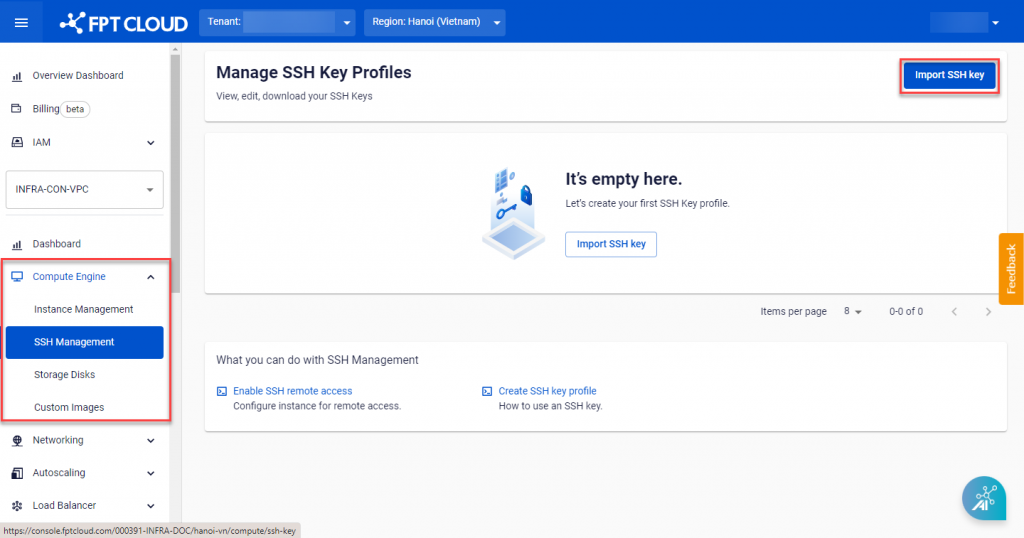
Create an SSH Key pair
FPT Cloud supports two authentication methods for Linux servers: Password and SSH Key. SSH Key is recommended because it is more secure than a password.
-
Select Compute Engine → SSH Management from the menu, then click Import SSH key.
-
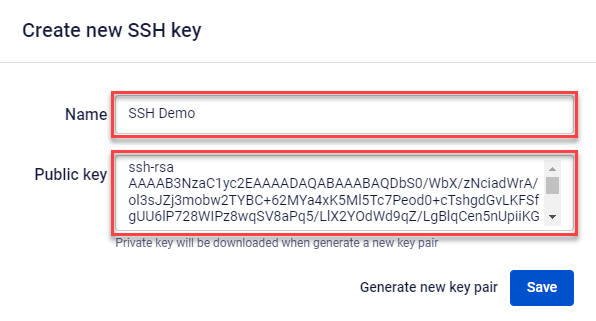
Enter the details:
- Name: Name for the SSH Key.
- Public Key: Paste an existing Public Key, or click Generate new key pair to let the system generate one automatically.

-
Click Save. The system creates the SSH Key pair and automatically downloads the Private Key file in
.pemformat.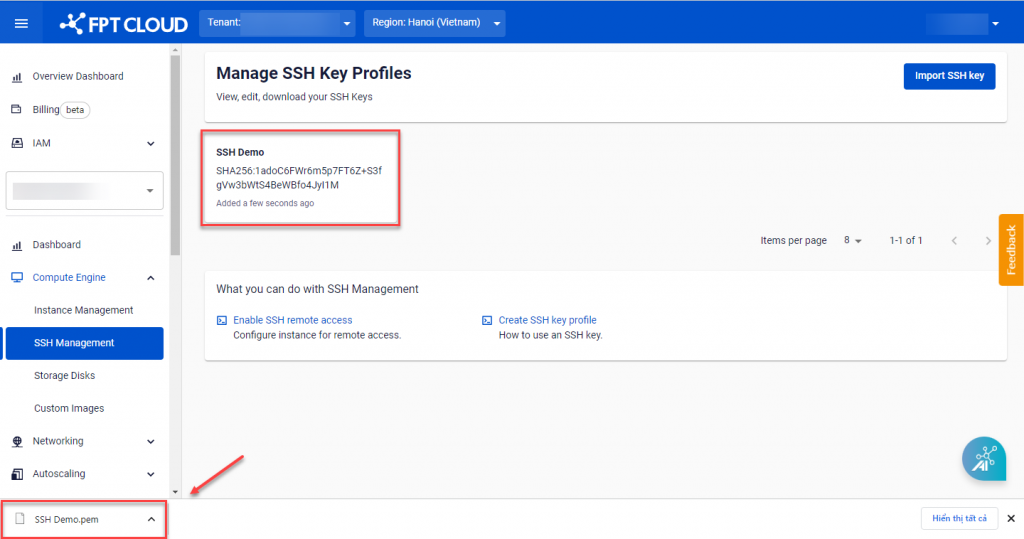


The Private Key .pem file is provided only once. Store it in a safe location to avoid losing access to your server.
Check and create a Subnet
To create a virtual machine, you need an active Subnet in your VPC — the system assigns a Private IP from this Subnet to the virtual machine.
-
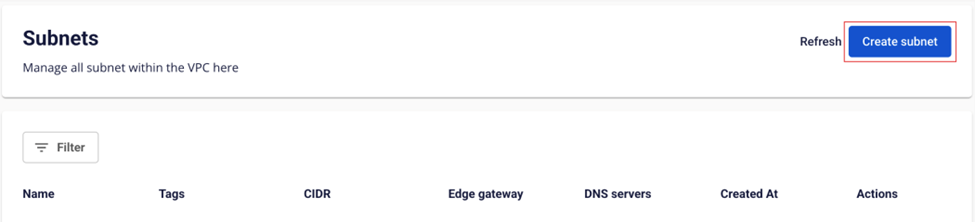
Select Networking → Subnets from the menu, then click Create subnet.
-
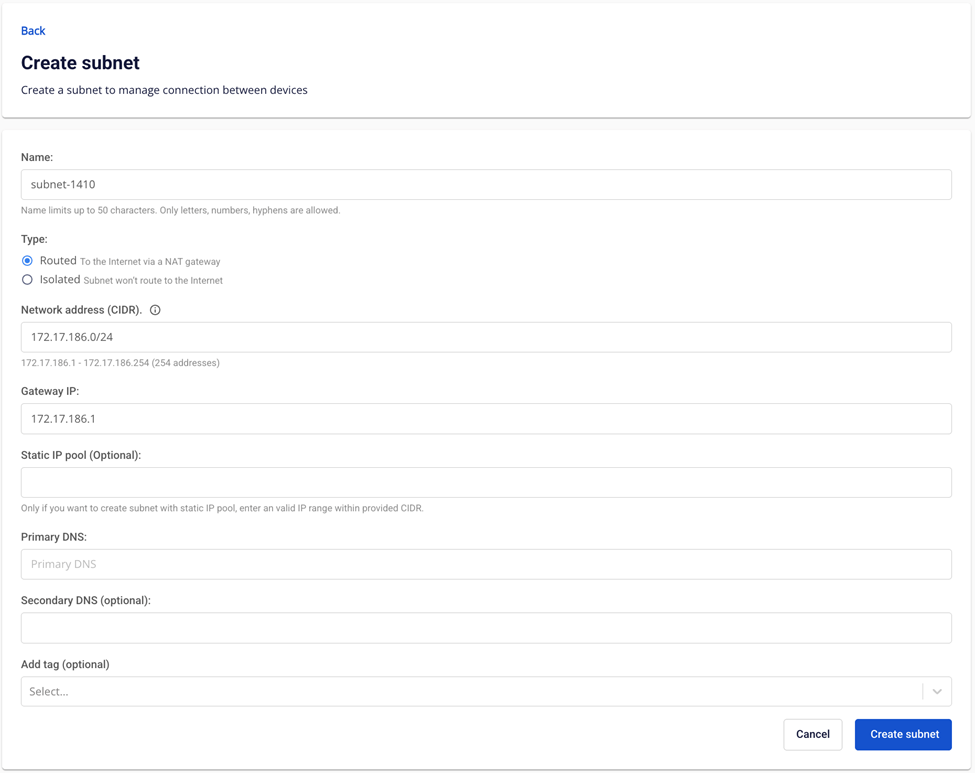
Enter the details:
- Name: A descriptive name for the Subnet.
- Type: Routed (routes internet traffic via NAT) or Isolated (no internet connection).
- Network Address (CIDR): Enter a valid CIDR.
- Gateway IP: Enter a valid Gateway address.
- Static IP Pool (optional): The IP range you want to use.
- Primary DNS: IPv4 DNS address (default 8.8.8.8).
- Secondary DNS (optional): Secondary DNS.
- Add tag (optional): Select tags to attach to the Subnet.

-
Click Create subnet.

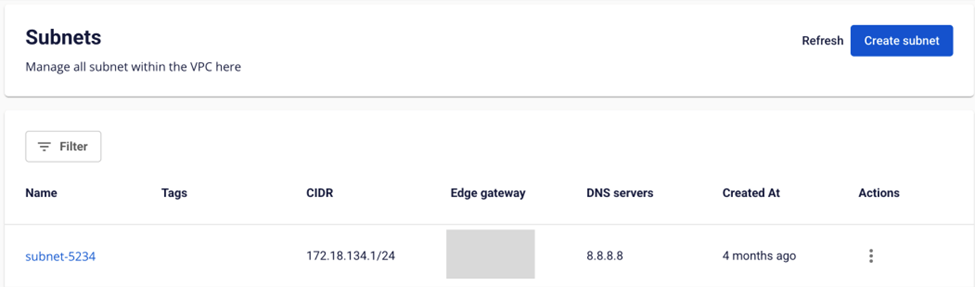
The new Subnet appears in the Subnets table.
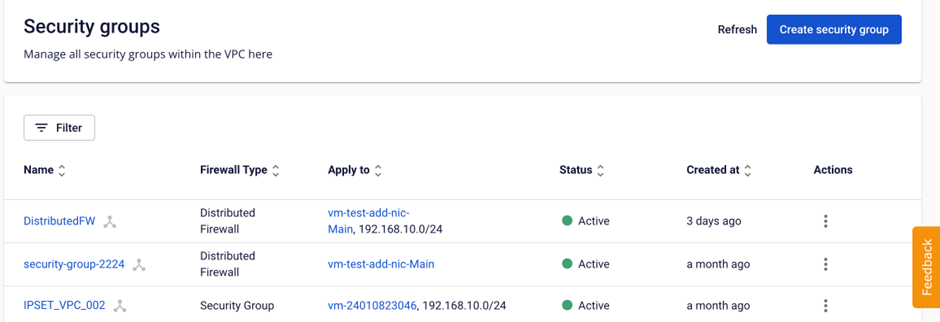
Create a Security Group
A Security Group acts as a virtual network firewall, controlling inbound and outbound traffic for your virtual machine — protecting it from internet-based attacks.
FPT Cloud supports two types:
- Security Group: Controls traffic to and from the internet.
- Distributed Firewall: Controls traffic within the internal network.
-
Select Networking → Security group from the menu, then click New Security Group.

-
Enter the details:
- Name: Name for the Security Group.
- Type: Security Group or Distributed Firewall.
- Subnet: Select a Subnet from the list.
- Applied CIDR / instances (optional): Select the virtual machines or CIDR range to apply.
- Configure security rule: Configure Inbound and Outbound rules as needed.

-
Click Create security group.
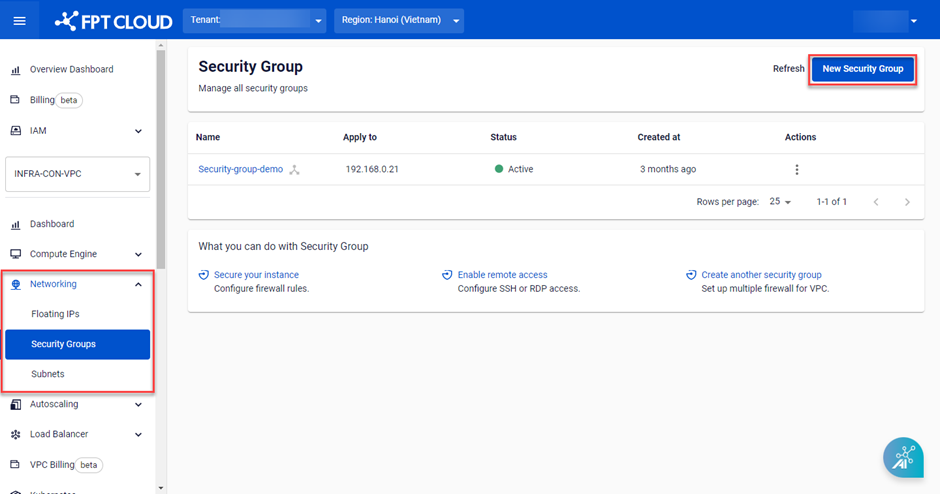

The new Security Group appears in the Security Group table.