Fine-tune with LoRA
How to create a fine-tuning job with LoRA?
To fine-tune a model with LoRA, follow the instructions below.
note
- You must log in before starting a fine-tune job.
- Ensure you have enough balance (credit).
- At least one base model must be available for fine-tuning.
Steps
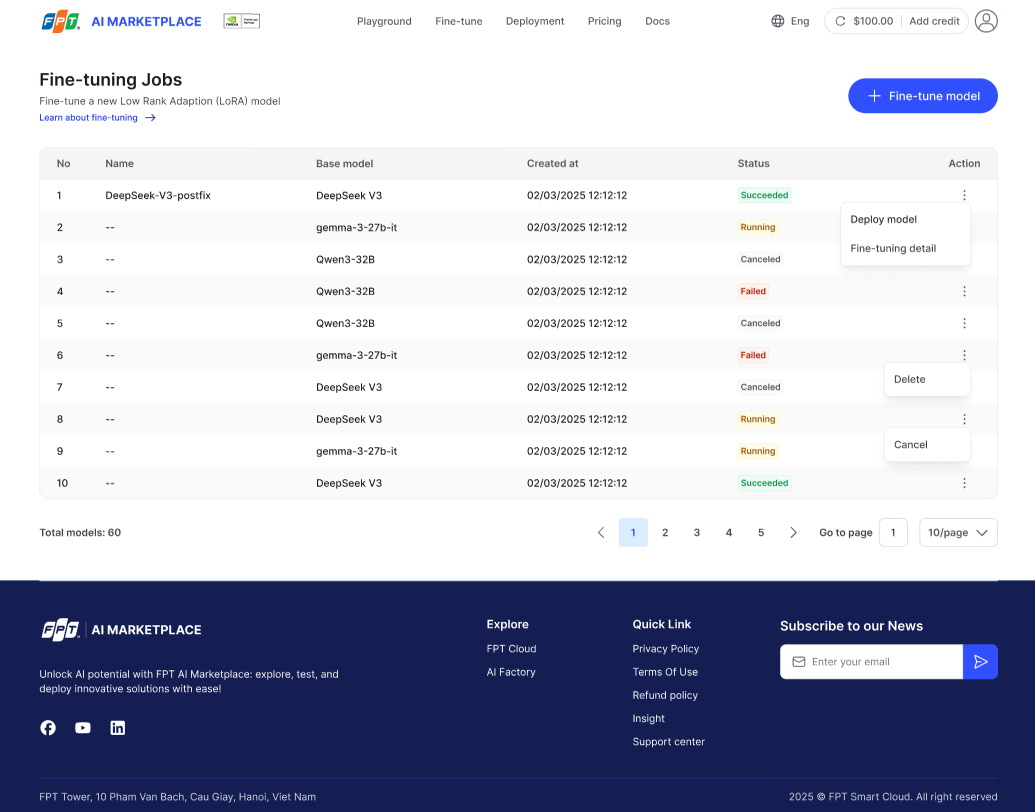
- Go to the Fine-tuning Jobs page and click + Fine-tune model.
- In the pop-up, enter the Name of your fine-tuning job.
- Validation: required, max 100 characters, supports Unicode letters, digits,
-,_,.
- Validation: required, max 100 characters, supports Unicode letters, digits,
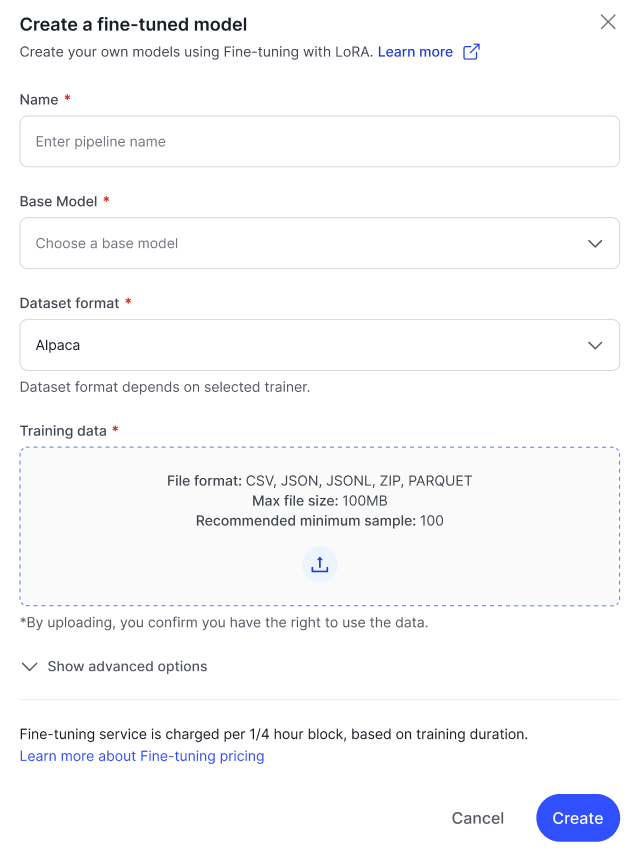
- Select a base model from the dropdown list.
- Examples:
gemma-3-27b-it,Qwen3-4B-Instruct-2507,Llama-3.3-70B-Instruct
- Examples:
- Select dataset format from the dropdown list: Alpaca / ShareGPT / ShareGPT_Image.
- Upload your training data file.
- Supported formats: CSV, JSON, JSONL, ZIP, Parquet (< 100 MB).
- (Optional) Upload validation data.
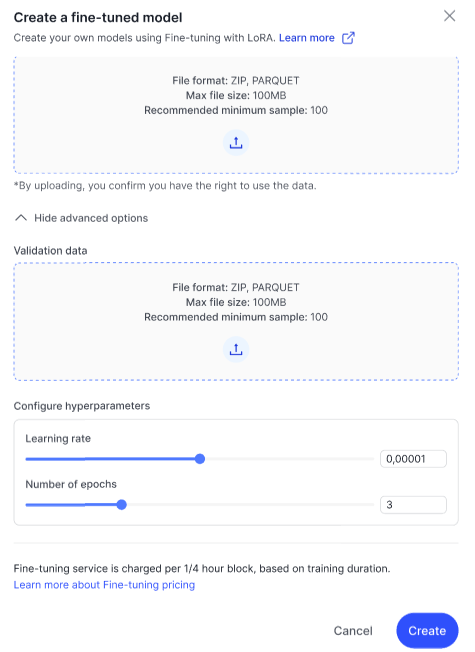
- (Optional) Configure hyperparameters:
- Learning rate: float,
1e-6 → 1e-4(e.g.,0.00001) - Number of epochs: integer
1–20(default =5)
- Learning rate: float,
- Click Create to start the fine-tuning job.
- The job will appear in the table with status Running.
tip
Fine-tuning with LoRA usually takes only a few minutes.
How to manage fine-tuning jobs?
On the Fine-tuning Jobs page, you can:
- View detail — open the pipeline detail in AI Studio.
- Deploy model — once training is completed, deploy the LoRA model.
- Cancel job — cancel a running job (requires confirmation).
- Delete job — permanently delete a job (requires confirmation).
Status badges
- Running (yellow)
- Succeeded (green)
- Failed (red)
- Canceled (gray)