Createschedule Snapshotstorage
Create a disk snapshot schedule
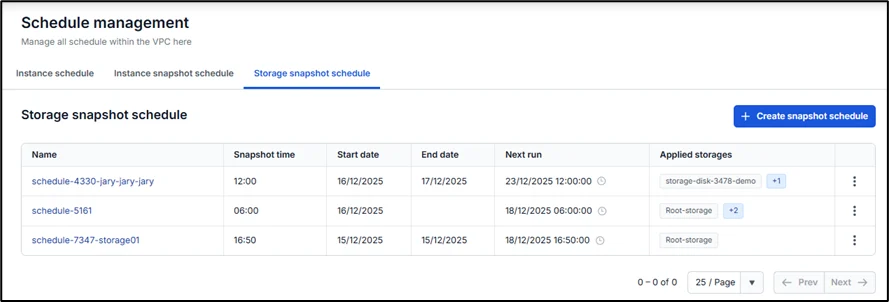
To create a new disk snapshot schedule, follow these steps. Step 1: In the menu, select Compute Engine > Schedule Management, then select the Storage snapshot schedule tab.

Step 2: Enter the required information as prompted by the system:
-
Name: schedule name
-
Time: you may only select a time at least 2 hours from the current time of editing to ensure the schedule runs correctly
-
Start date: the date the snapshot schedule begins repeating; if left blank, it starts from the moment the schedule is successfully created
-
End date: the date the snapshot schedule ends; if left blank, the schedule has no expiration
-
Frequency: the frequency at which the snapshot action is performed
-
* Daily: schedule runs hourly each day -
* Weekly: schedule runs weekly; you can select specific days of the week -
Applied Storage: the disks attached to the schedule (Note: each disk can only be attached to one schedule at a time)
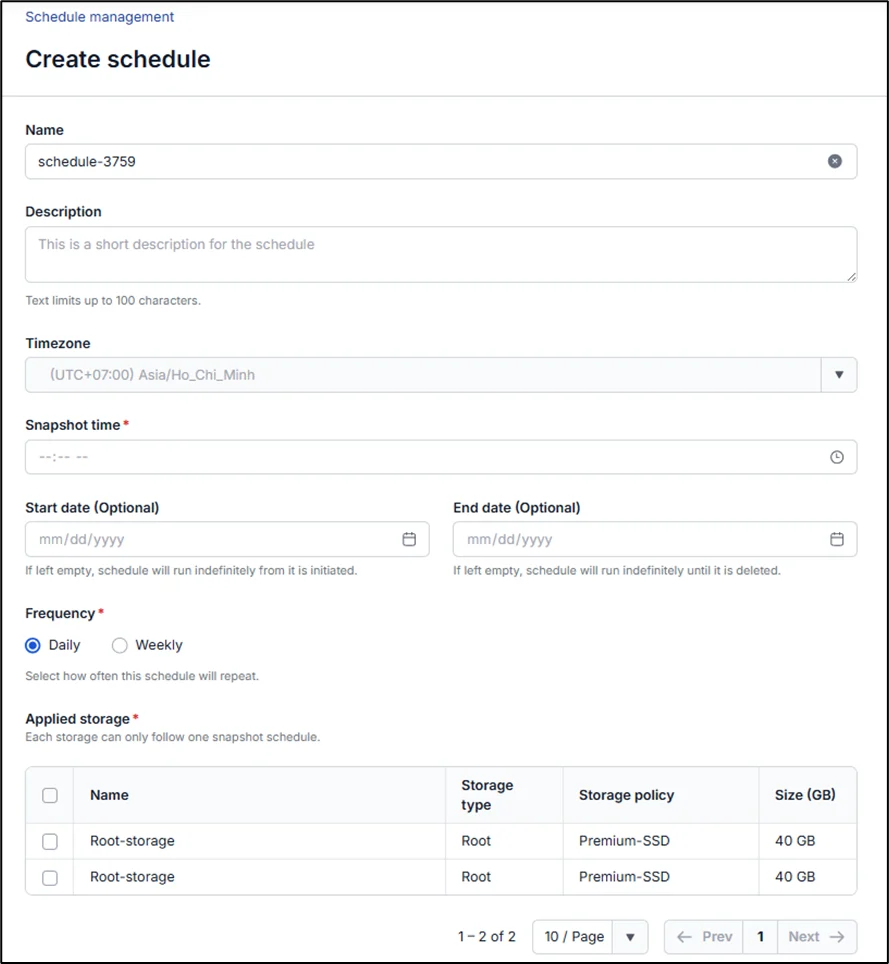
Step 3: Click Create Schedule. The system will proceed to initialize the schedule and notify you of the result. If successful, the new schedule will appear on the Storage snapshot schedule page.