Report Export
The Manual Report Export feature allows users to extract statistical data about backup activities for database clusters over a selected time period at the time of execution. This report helps track backup history, evaluate execution status, and support operational audits or internal archiving. To export a backup report file, follow these steps:
Step 1: Access the function
Select Database Platform on the menu bar, then select Advanced Feature s to open the Advanced Features screen.
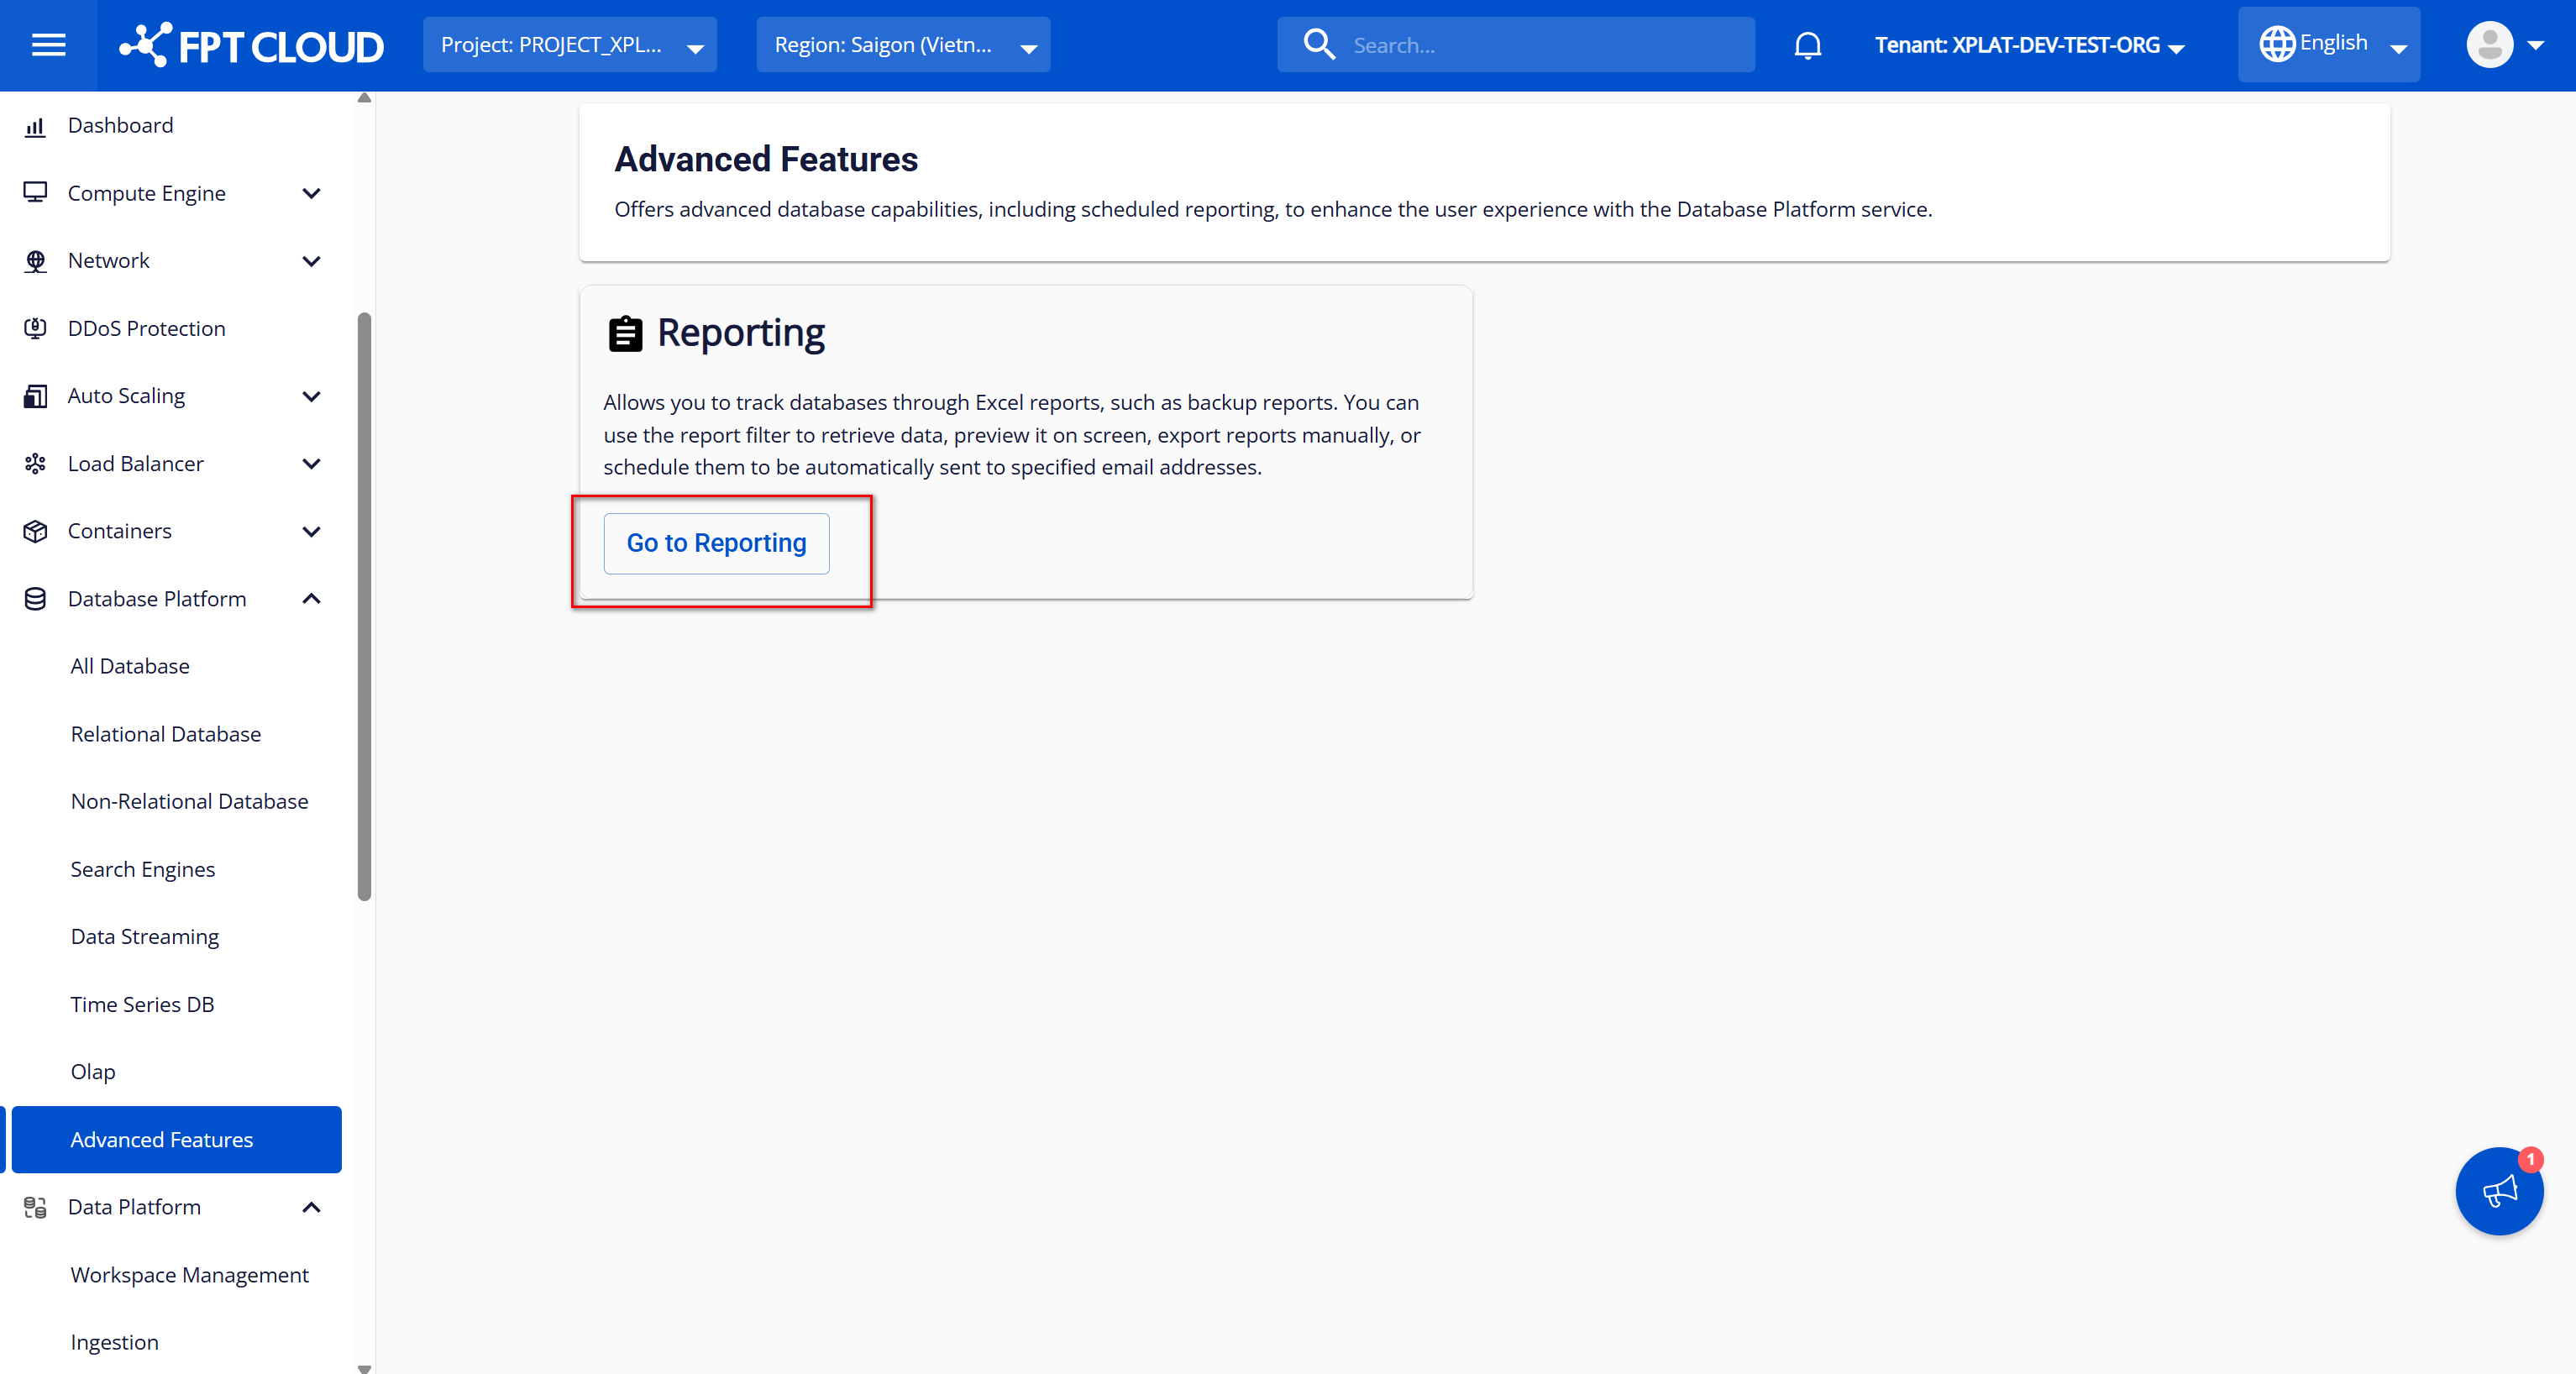
On the Advanced Features screen, click the Go to Reporting button to open the Reporting screen. When the Reporting interface appears, select the Report Export tab to access the manual report export feature.
Step 2: Enter filter conditions
On the Report Export screen, users enter the conditions for exporting report data.
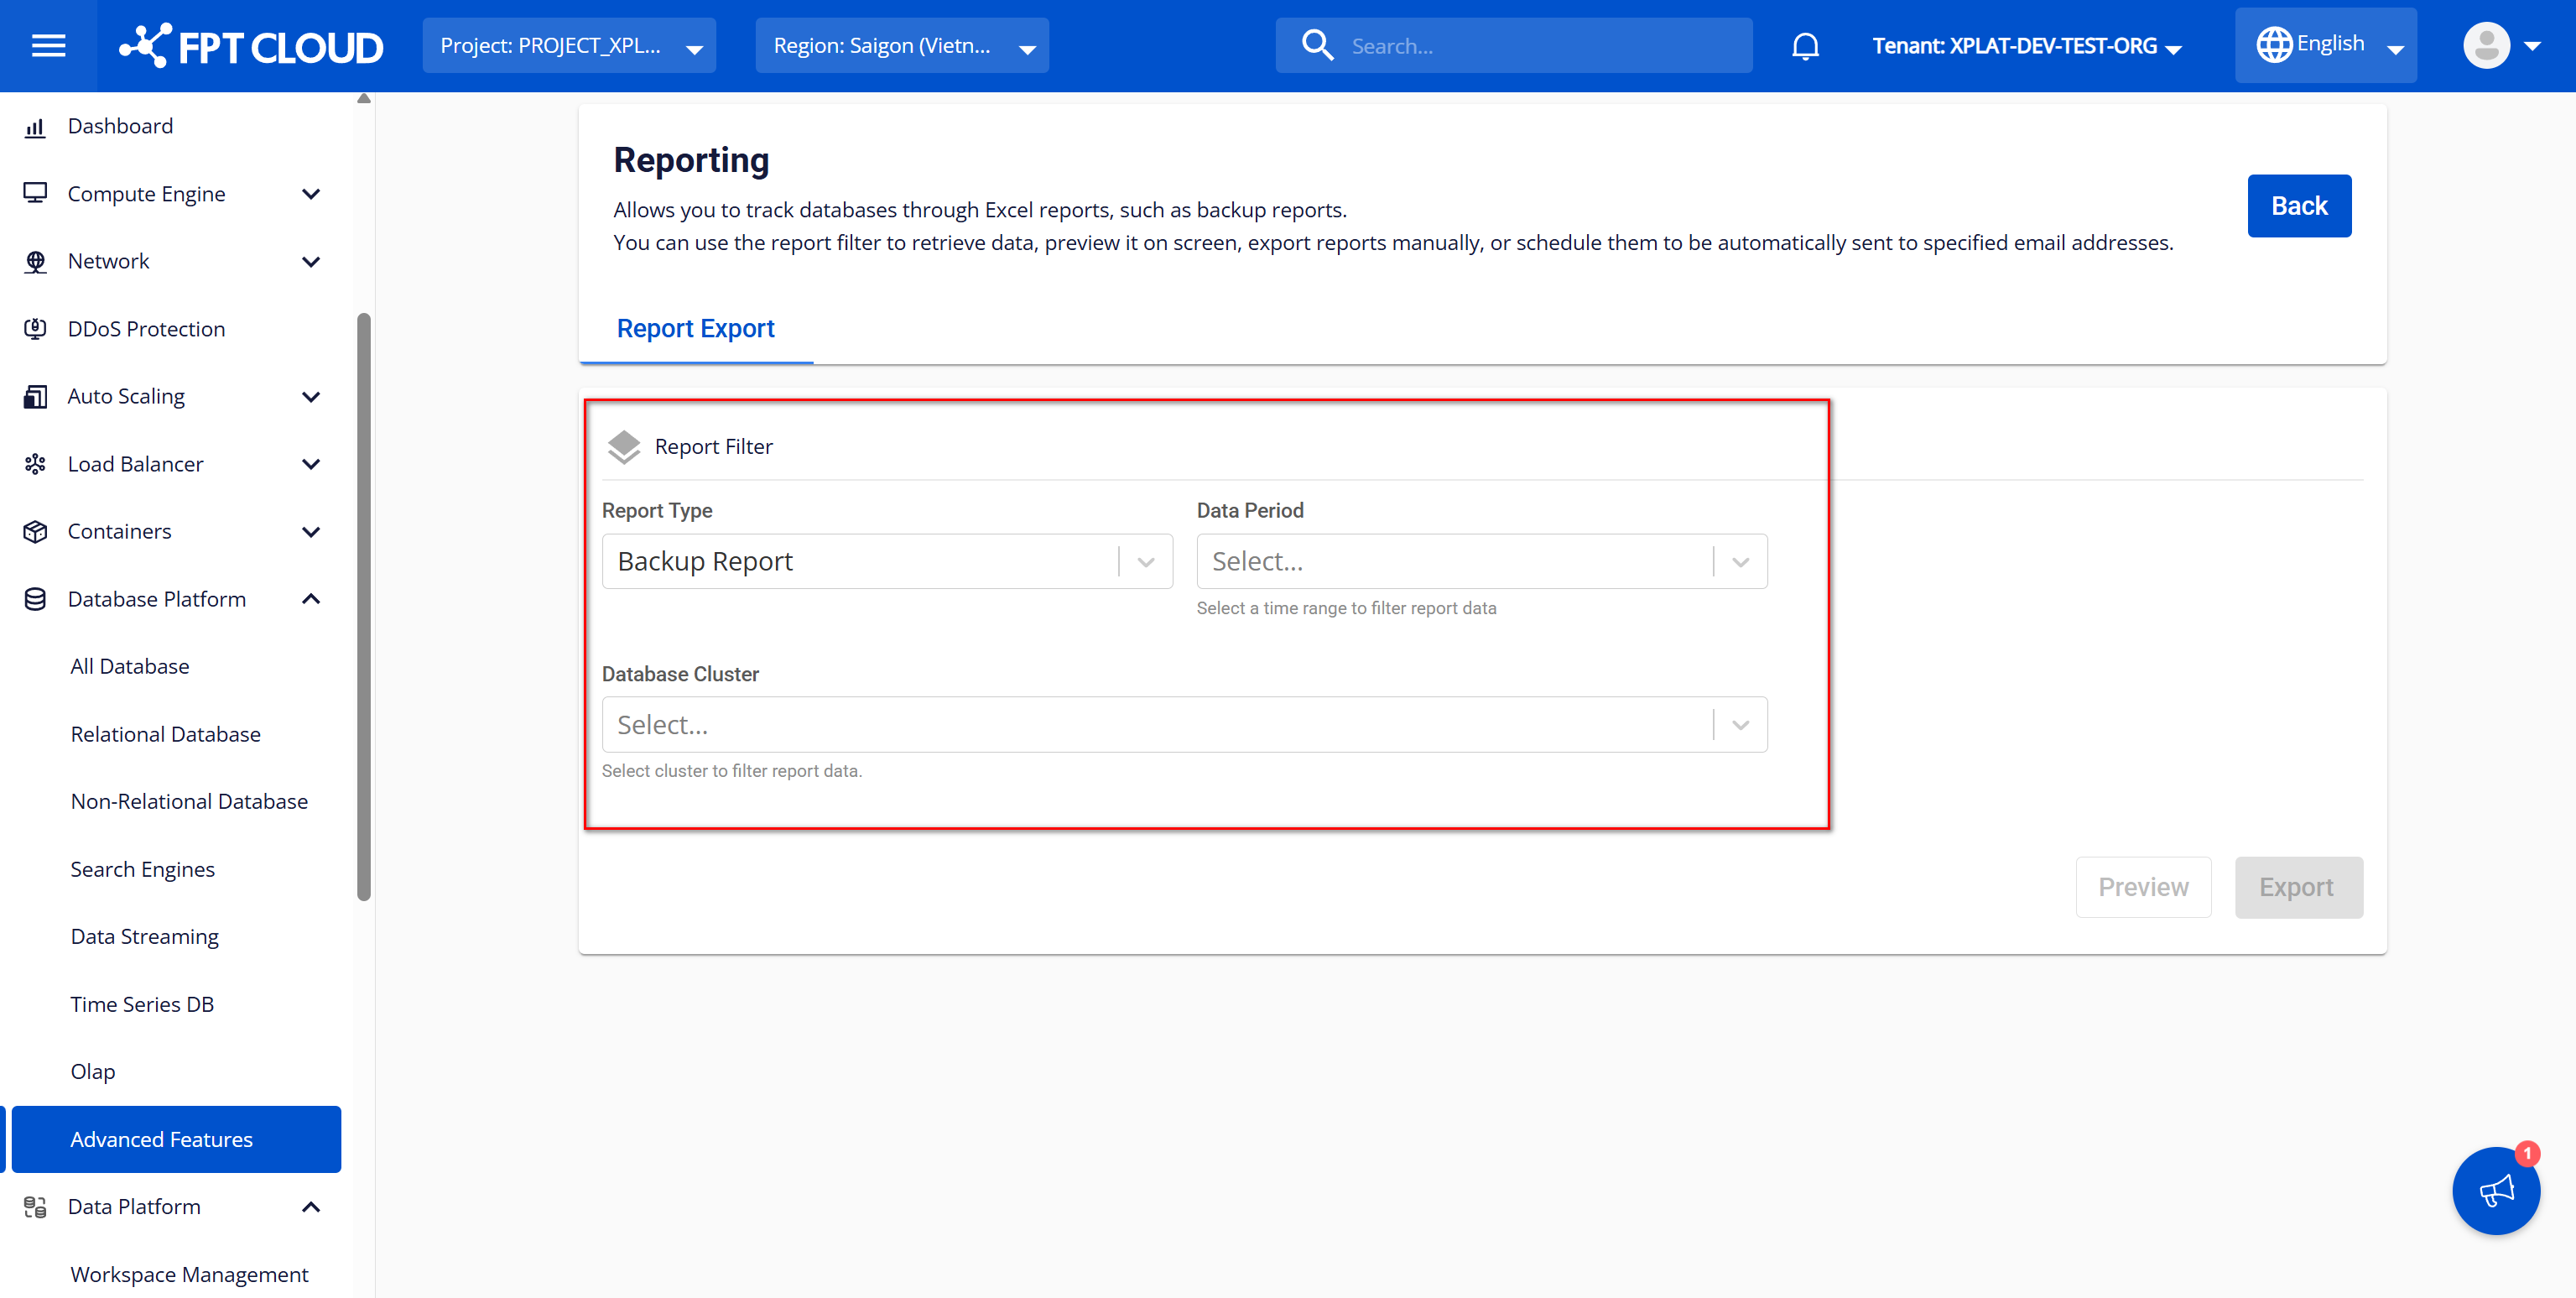
The required information includes:
- Report Type : Select the report type to export from the available list. Currently, only the backup service report is provided, so the list has only one value: Backup Report (selected by default). Additional values will be added when other report types become available.
- Data Period : Select the time period to filter data for the report. Options include:
- Yesterday : Collects data starting from 00:00:00 of the previous day up to the current time. Example: If the report is generated at 11:00:00 on April 17, 2025, the data will cover the period from 00:00:00 on April 16, 2025 to 11:00:00 on April 17, 2025.
- Last 7 days : Collects data for the seven consecutive days preceding the current time, starting from 00:00:00 of (current date − 7 days) up to the current time. Example: If the report is generated at 11:00:00 on April 17, 2025, the data will cover the period from 00:00:00 on April 10, 2025 to 11:00:00 on April 17, 2025.
- Last 30 days : Collects data for the thirty consecutive days preceding the current time, starting from 00:00:00 of (current date − 30 days) up to the current time. Example: If the report is generated at 11:00:00 on April 17, 2025, the data will cover the period from 00:00:00 on March 18, 2025 to 11:00:00 on April 17, 2025.
- Custom Range : Collects data for a user-defined time range, starting from 00:00:00 on the selected start date and ending at 23:59:59 on the selected end date. If the report is generated for the range April 15, 2025 to April 17, 2025, the data will cover the period from 00:00:00 on April 15, 2025 to 23:59:59 on April 17, 2025. When selecting Custom Range, the Date Range field appears as follows:
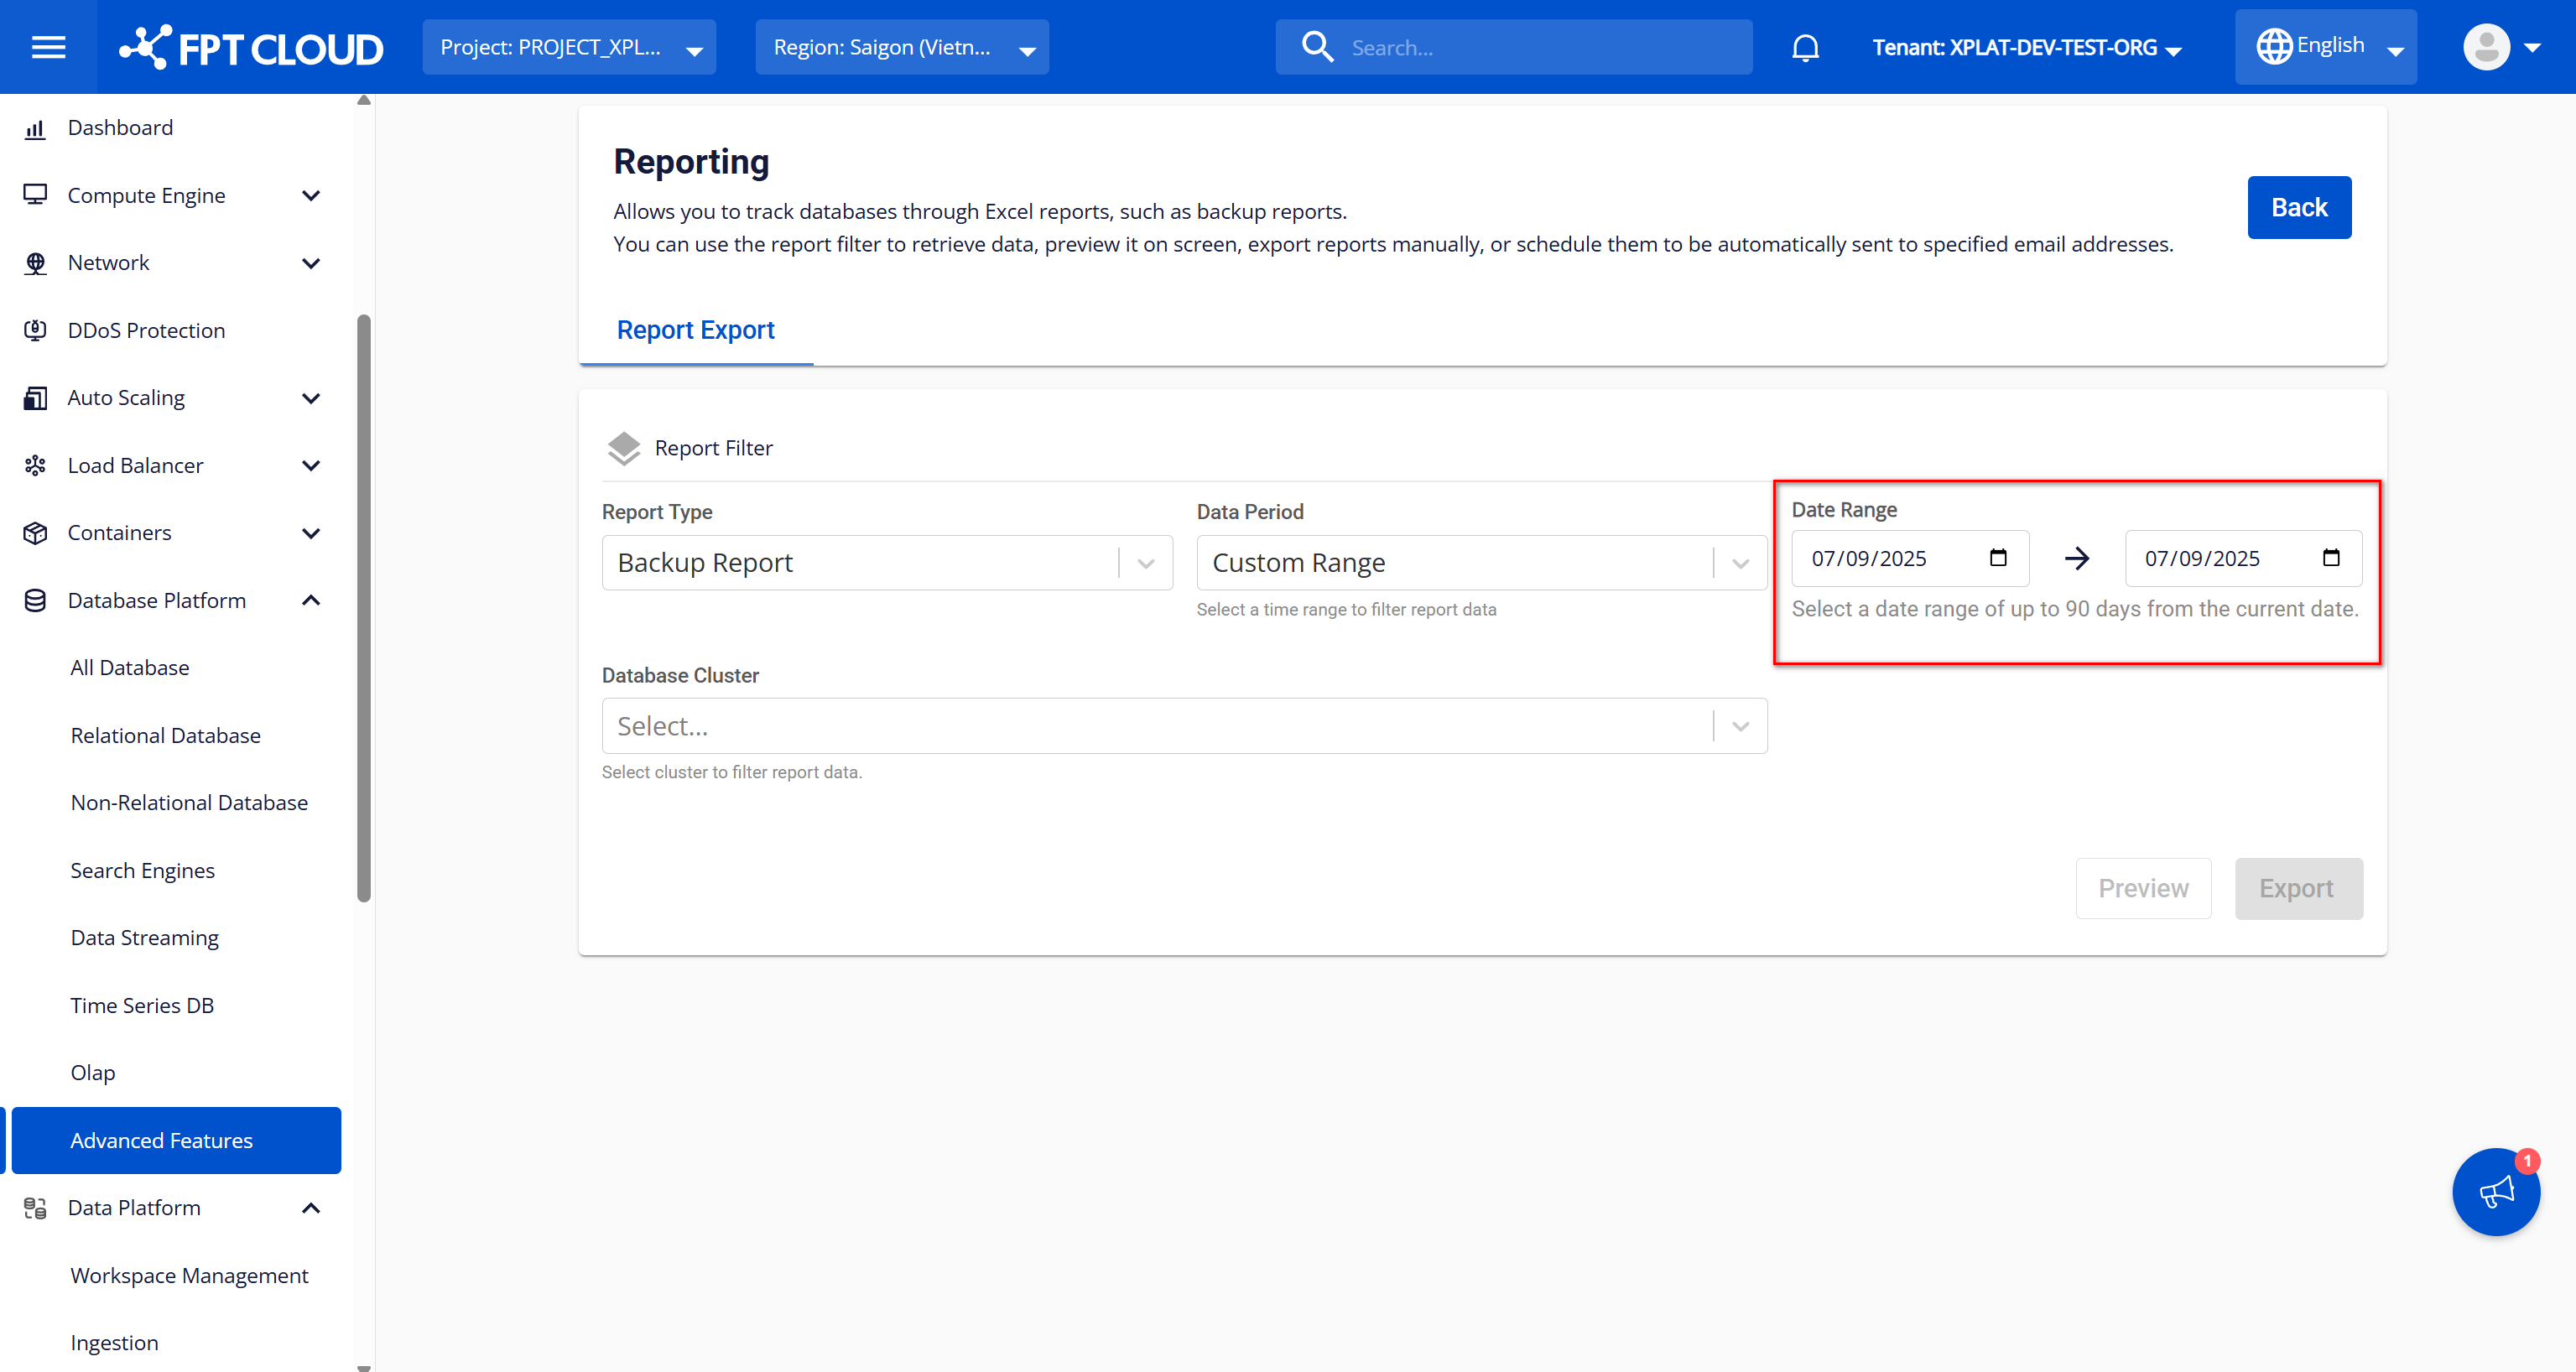
Date Range : Select the report export time period. Data can only be exported for a maximum of 90 days relative to the current date, and To Date cannot be after the current date. Notes when entering the time period: * Default value: Current date. * Only allows From Date and To Date satisfying (Current Date - 90) ≤ From Date ≤ To Date.
Note:
- If required fields are not fully and validly entered, the Preview and Export buttons will be disabled.
- The Report Preview is hidden whenever filter conditions change. To view data before exporting, click Preview after each filter change.
Step 3: Preview report data
After entering all input fields fully and validly, click Preview to preview the database backup report directly on the screen. The screen displays information about backup executions in the selected period. If no databases have run backup jobs in the selected period then displaying "Nothing Found."
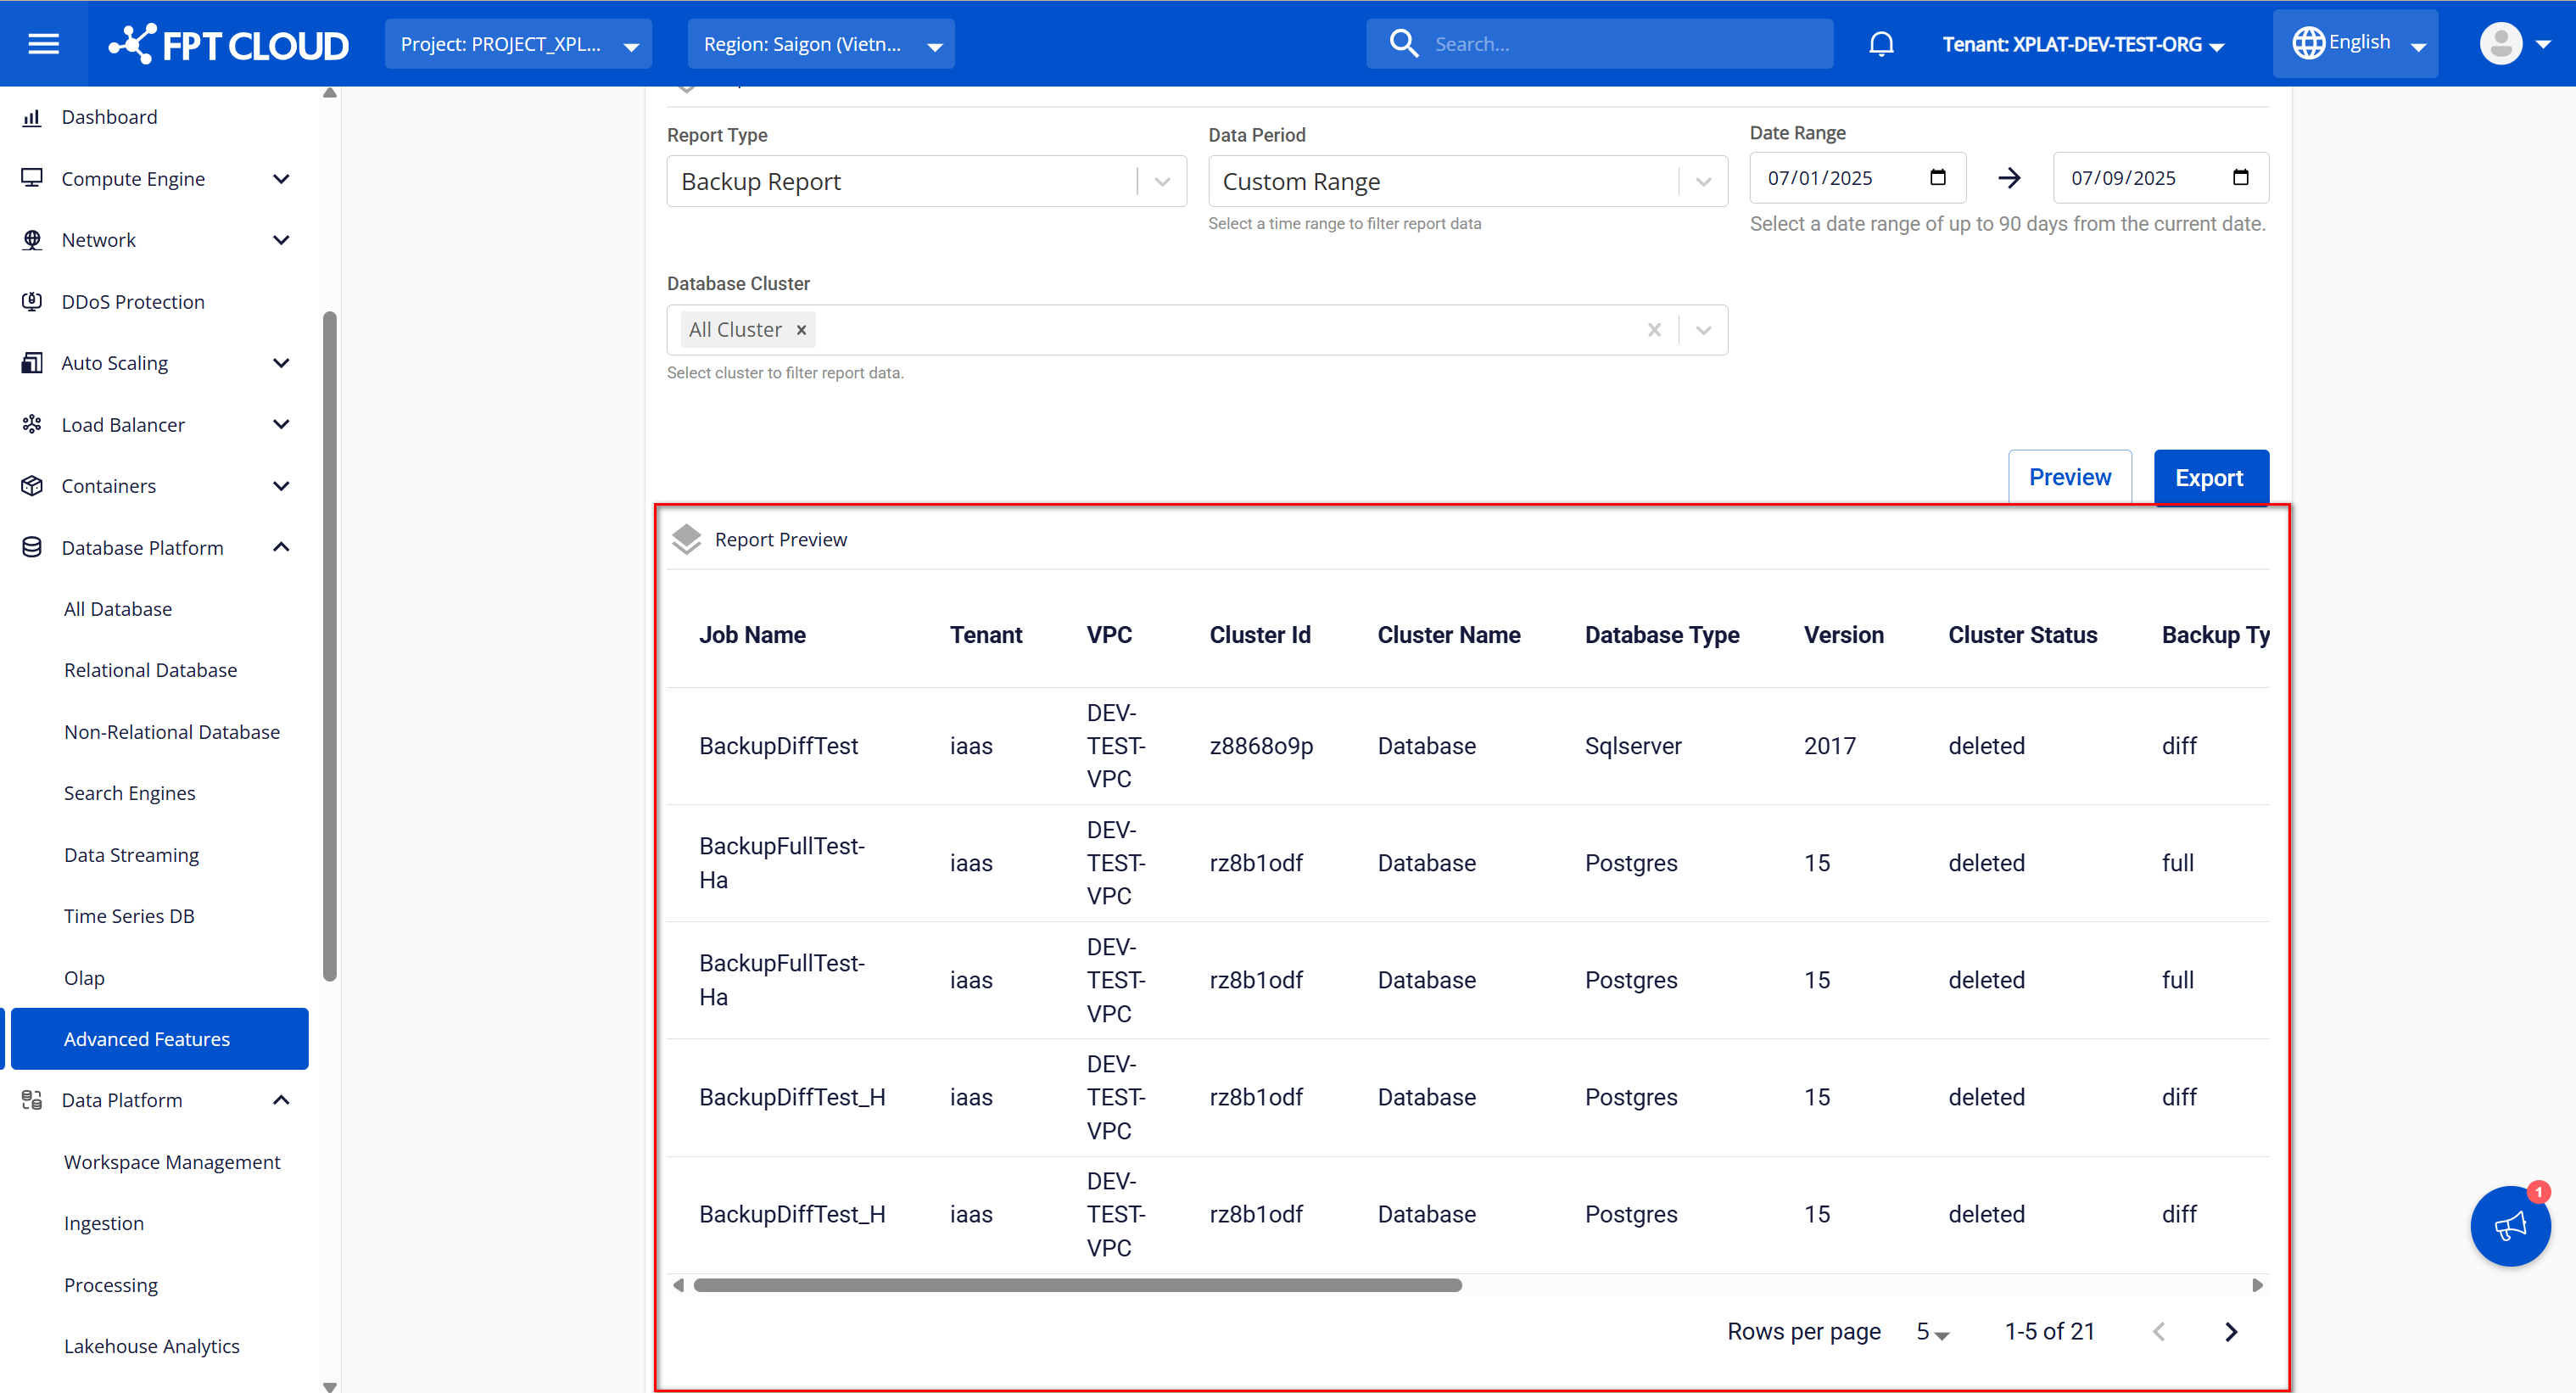
Description of fields in the Report Preview table:
| Column Name | Description |
|---|---|
| Job Name | Displays the backup job name. |
| Tenant | Displays the tenant |
| VPC | Displays the name of the VPC containing the database |
| Cluster Id | Displays the cluster ID of the database running the backup job |
| Cluster Name | Displays the cluster name of the database running the backup job |
| Database Type | Displays the engine type of the database running the backup job |
| Version | Displays the version of the database running the backup job |
| Cluster status | Displays the database status at the data retrieval time |
| Backup Type | Displays the backup job type ("full" for full backup; "diff" for differential backup) |
| Backup Retention | Displays the retention value for the backup file |
| Retention Type | Displays the retention type ("day"- if retention is counted based on the maximum storage days of backup file; "quantity" - if retention is counted based on the maximum number of backup files) |
| Backup Usage (GB) | Displays the used backup storage capacity in GB |
| Backup File Name | Displays the name of the backup file created after running the job |
| Backup State | Displays the backup job status ("successful" for success; "deleted" for deleted) |
| Start Time | Displays the backup start time |
| Finish Time | Displays the backup completion time |
Step 4: Export the report
After entering all fields fully and validly, click Export to export the report as a CSV file, which will automatically download to the user's local machine. The downloaded backup report file includes:
- File name: In the format
{reportType}{vpcName}{exportTime}, where:{reportType}= Report type selected by the user (value user chose from Report Type field){vpcName}= VPC selected by the user during export (value user chose from VPC selected on the menu bar){exportTime}= Export time in ddMMyyyyHHmmss format
- File format: csv
- Columns: Include the information displayed in the Report Preview table on the Report Export screen.