Create an API Gateway
To create an API Gateway, follow these steps:
Step 1: In the menu bar, select Integration > API Gateway.
Step 2: Click Create an API Gateway cluster to open the Create API Gateway screen.
Step 3: In the Basic Information section, enter:
- Name (required): API Gateway name. Only lowercase letters a-z and digits 0-9 are allowed. Use a hyphen "-" instead of spaces.
- Description (optional): A short description.
- Version (required): Select a version.
- Access type (required): Select Public or Private.
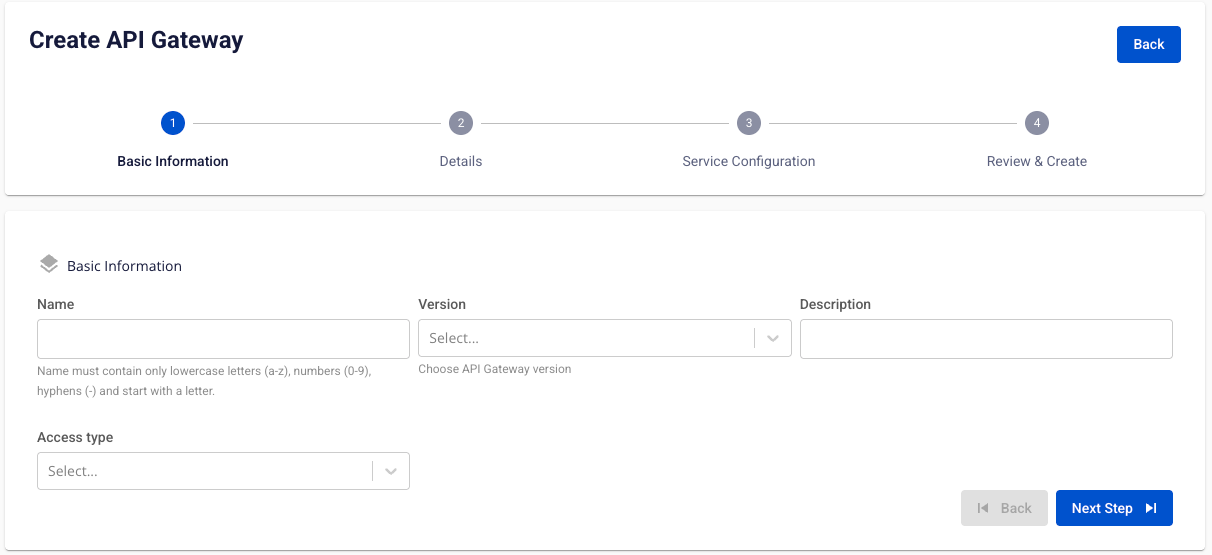
Step 4: Click Next Step to proceed to the Details screen.
Fill in the following:
- Launch Configuration
- Subnet (required): Select a subnet.
- Storage policy (required): Select a storage policy.
- Flavor (required): Select a flavor.
- Worker nodes (required): Enter the number of nodes (1–10).

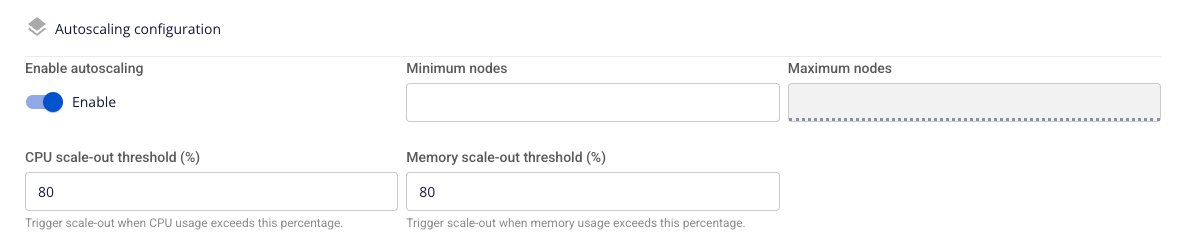
- Autoscaling configuration
- Enabled (required): Enable or disable autoscaling. Default: Enabled. When disabled, fields from Minimum Nodes to Memory scale-out threshold are hidden.
- Minimum Nodes (required): Minimum number of nodes (1–10). Must be less than Maximum Nodes. Recommended: 3 nodes for production.
- Maximum Nodes (required): Maximum number of nodes (1–10). Must be greater than Minimum Nodes. Up to 50 VM instances per node.
- CPU scale-out threshold (%) (required): Average CPU usage threshold. Default: 80%.
- Memory scale-out threshold (%) (required): Average RAM usage threshold. Default: 80%.
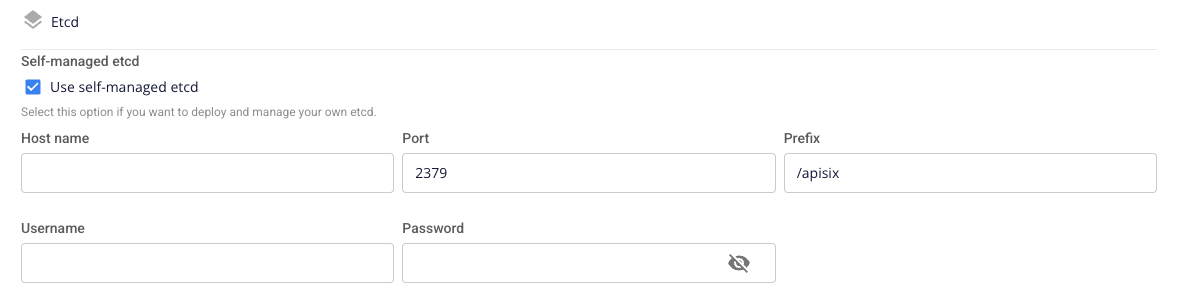
- Etcd — Self-managed ETCD: Choose whether to manage ETCD yourself or use the system-managed ETCD. Default: Unchecked (disabled).
- When unchecked: Select an ETCD Flavor to configure volume size and deployment.

- When checked: Enter ETCD details manually:
- Hostname (required): DNS name or IP address.
- Port (required): A number from 1–65535 (default: 2379).
- Prefix (required): Storage prefix for API Gateway configuration (default: /apisix).
- Username (required): Authentication account for SASL_PLAINTEXT or SASL_SSL protocols.
- Password (required): Authentication password for ETCD.
- Load balancer configuration
- Load Balancer Size (required): Select a LoadBalancer flavor appropriate for your application's traffic.

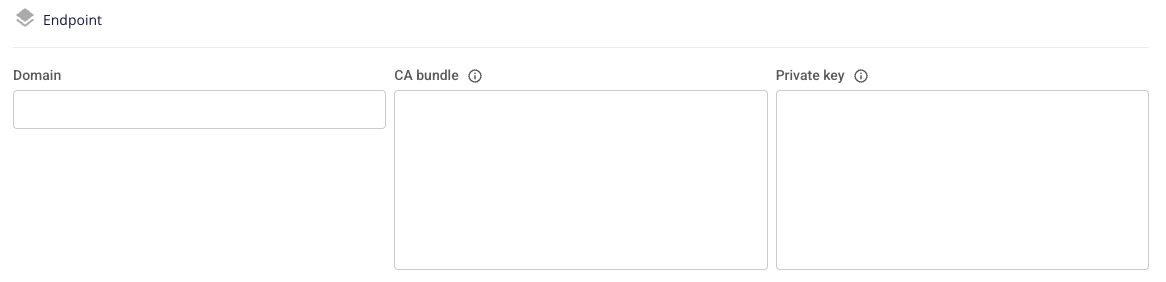
- Endpoint
- Domain (required): The connection address for the API Gateway service after initialization. Allowed characters: a-z, A-Z, 0-9, hyphen (-), period (.). Maximum 100 characters. Example: domain-name.com.
- CA bundle (required): CA certificate chain in PEM format. Must begin with
-----BEGIN CERTIFICATE-----. - Private key (required): Private key in PEM format. Must begin with
-----BEGIN PRIVATE KEY-----.
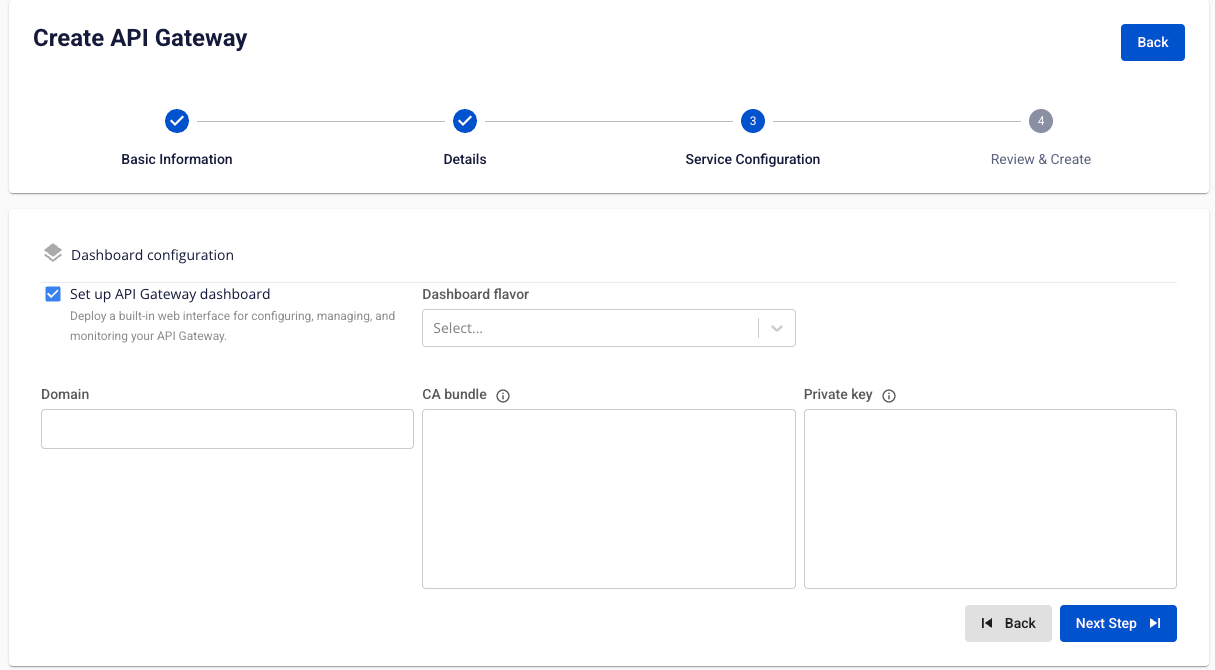
Step 5: Click Next Step to proceed to the Service Configuration screen.
- Dashboard Configuration
- Enable Dashboard: Choose whether to install the Dashboard. Default: Unchecked.
- Dashboard Flavor (required): Cluster size for the Dashboard installation.
- Domain (required): Access address for APISIX Dashboard. Example: dashboard-api.example.com.
- CA bundle (required): CA certificate chain in PEM format.
- Private key (required): Private key in PEM format.
Step 6: Click Next Step to proceed to the Review and Create screen.
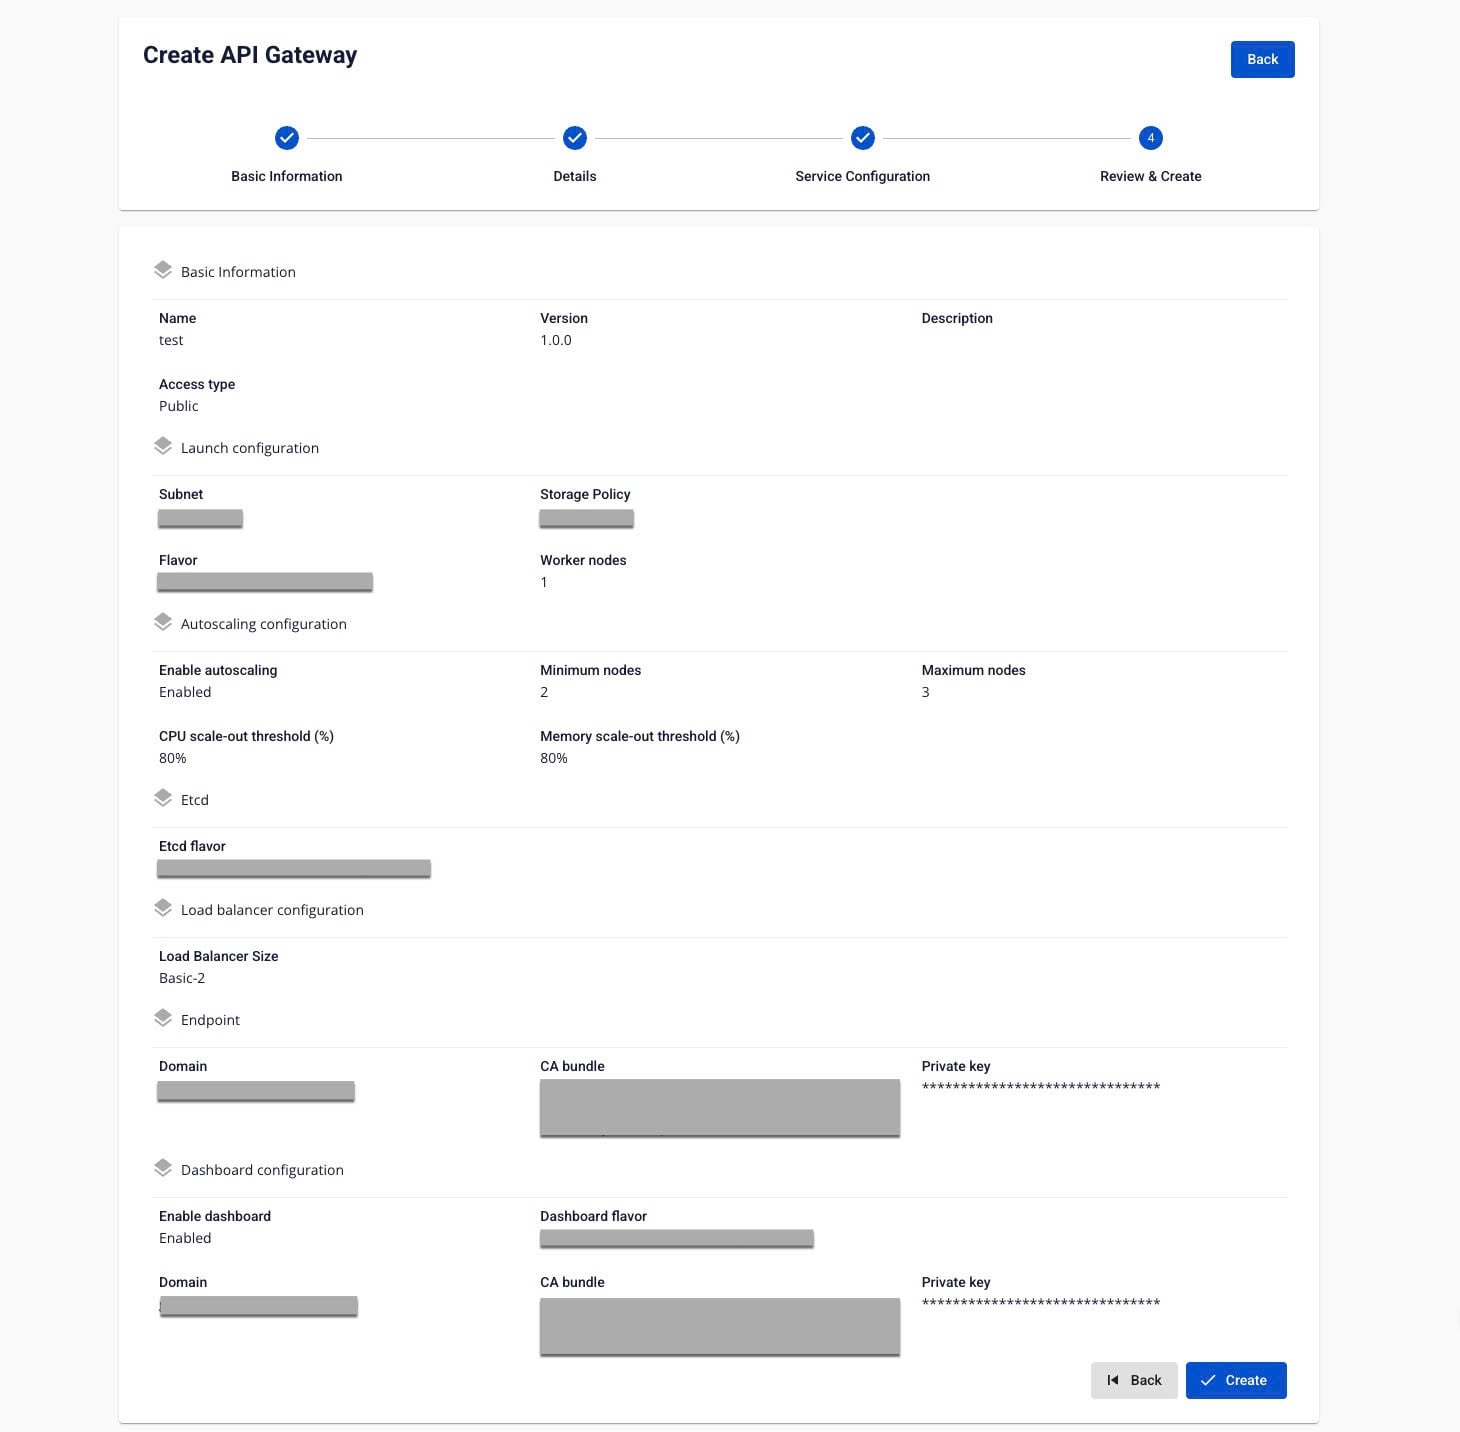
Step 7: Review all information, then click Create to finish creating the API Gateway.
The API Gateway is ready when its Status shows Healthy (approximately 25 minutes).