Create A Security Group
Overview
A Security Group is a network-based, stateful firewall service for GPU Virtual Machines. It is provided at no additional cost. Security Groups control both inbound and outbound traffic — any traffic not explicitly allowed by a rule is automatically blocked. Note
- The total number of rules across all Security Groups is limited to 100.
- To request an increase in this limit, please contact FPT Smart Cloud support.
The Default Security Group
A default security group is automatically created when you create a VPC , and it allows all outbound network traffic. The rules for this security group cannot be modified. The following outbound rules are added by default:
| Type | Protocol | Port | Action | IP Version | Destination |
|---|---|---|---|---|---|
| Custom | UDP | 547 | ALLOW | IPv6 | ff02::1:2/128 |
| HTTP | TCP | 80 | ALLOW | IPv4 | 169.254.169.254 |
| Custom | UDP | 67 | ALLOW | IPv4 | All |
| HTTP | TCP | 80 | ALLOW | IPv6 | fe80::a9fe:a9fe/128 |
Create a Security Group
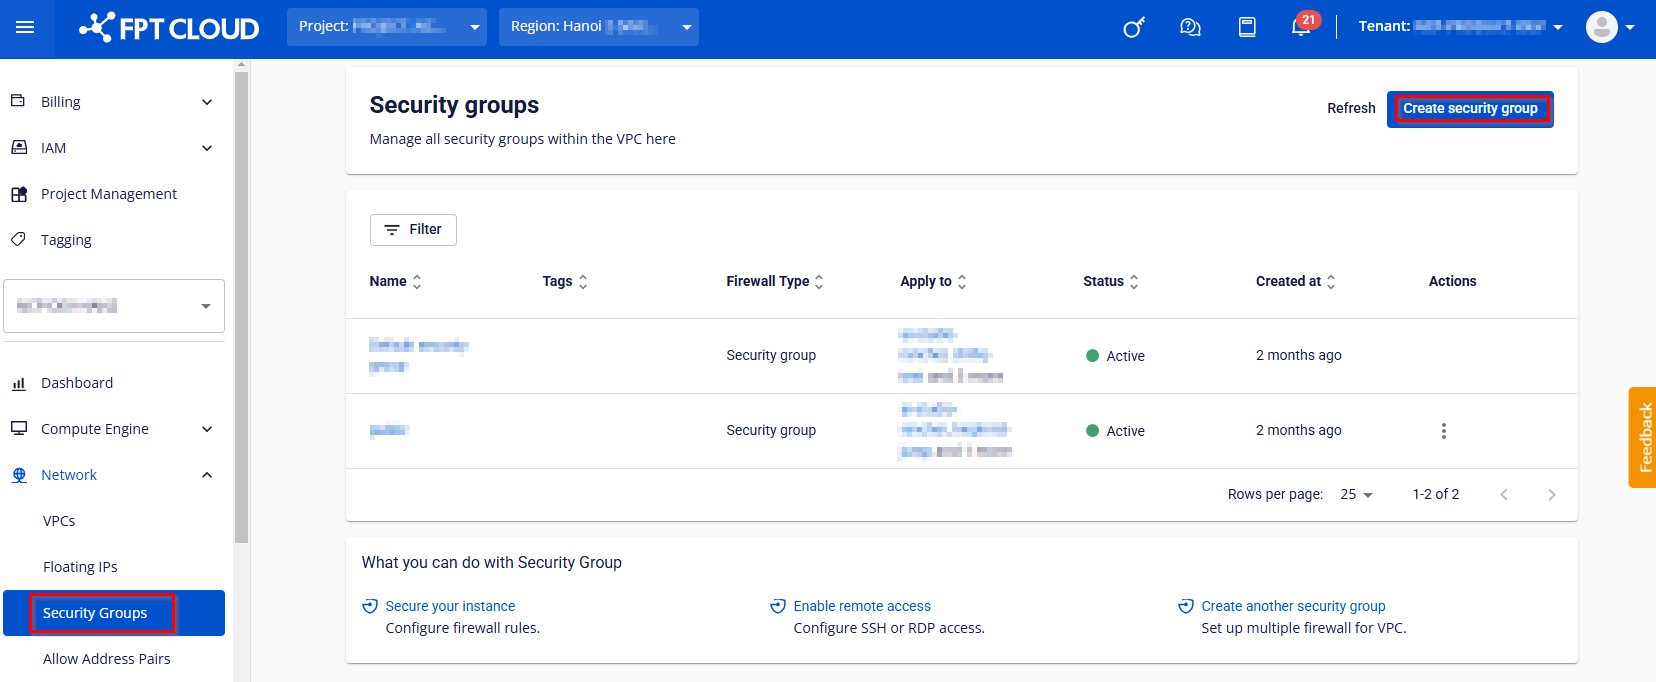
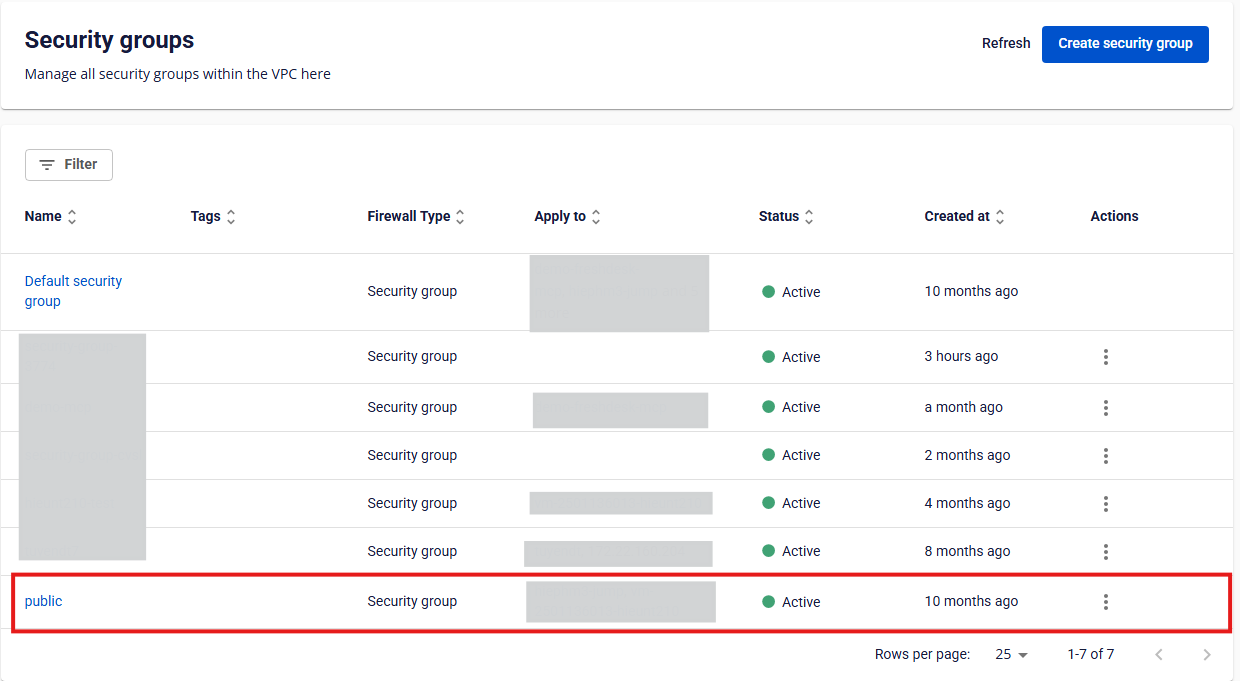
Step 1: In the left-side menu, go to Networking → Security Group , then click Create Security Group.
Step 2: Enter the required information in the Create Security Group form:
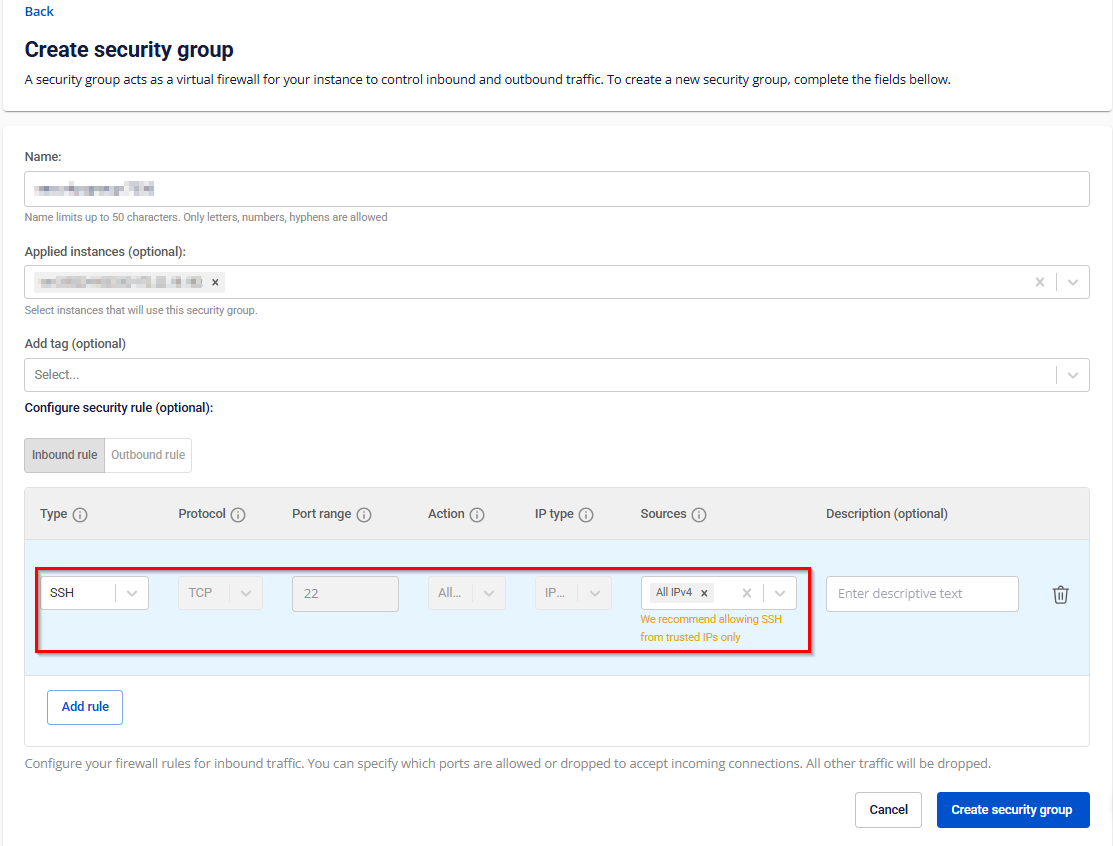
- Name: Enter a name for the Security Group. The system automatically generates a default name for quick setup.
- Applied Instances: Select the GPU VM name to associate it with the Security Group.
- Add Tags: Optional, for better resource organization.
- Configure Security Rules: Update Inbound and Outbound rules.
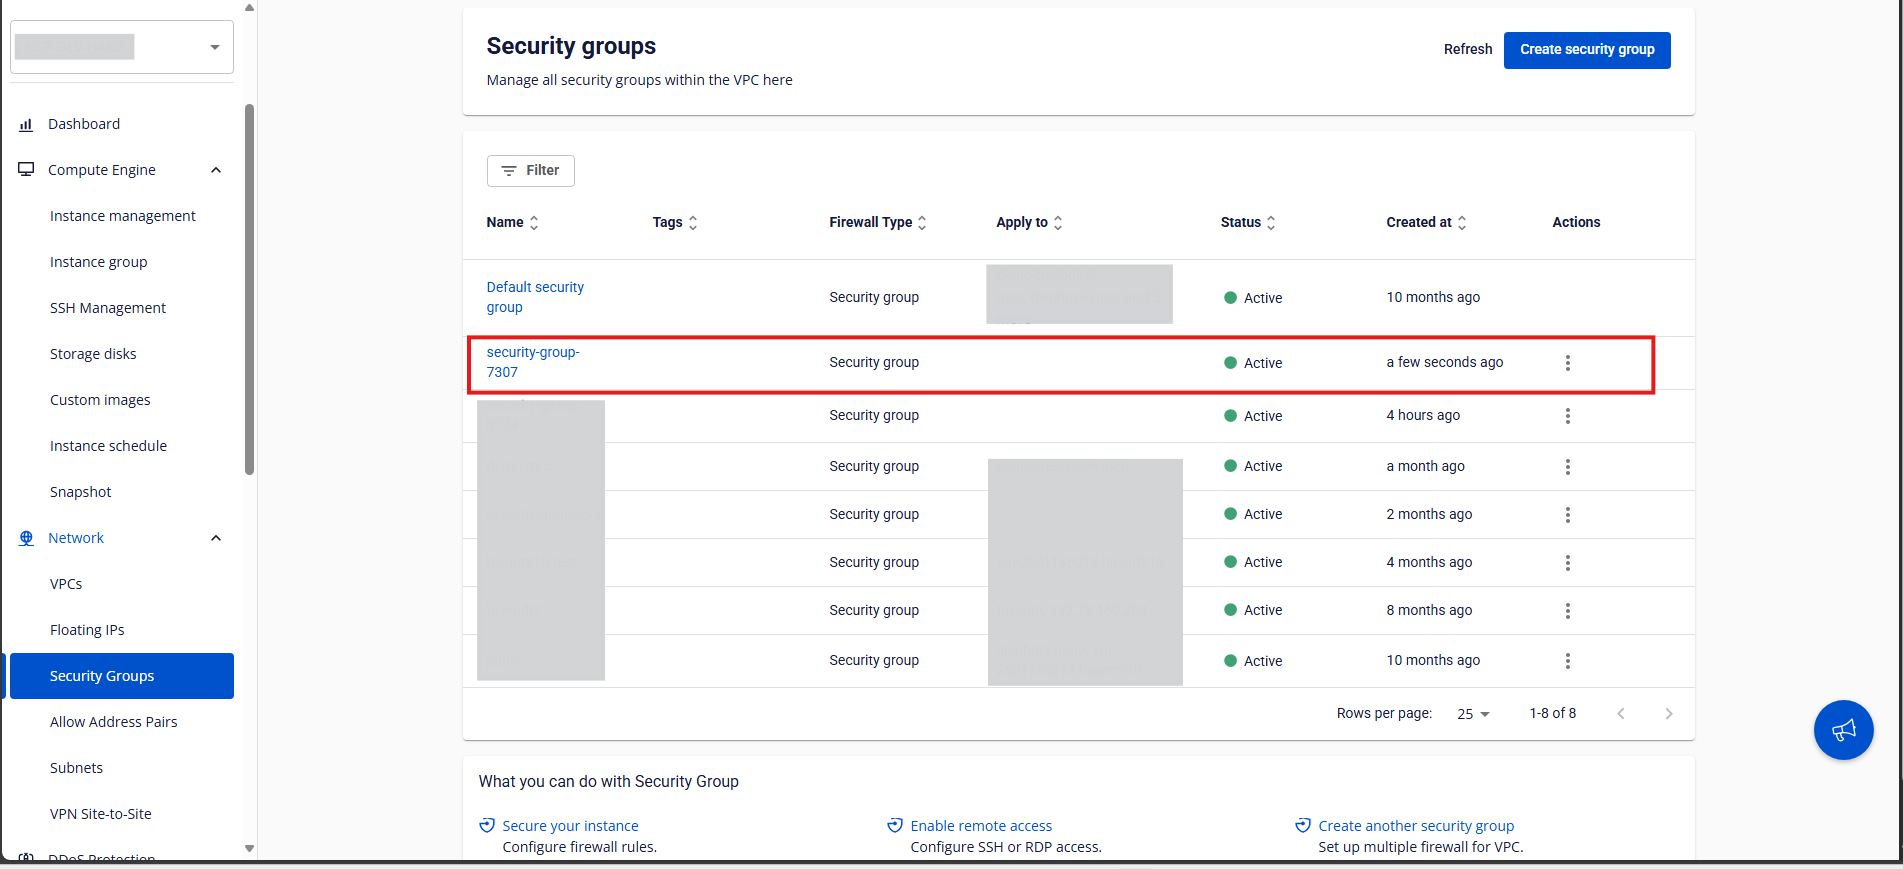
Step 3: Confirm by clicking Create Security Group. The newly created Security Group will appear in the list.
Manage Rules
A single Security Group can contain multiple Inbound and Outbound rules.
- Inbound Rules:
- Control incoming traffic to the instance.
- Define which ports on the instance are open and which IP addresses from the internet can access them (Source).
- Outbound Rules:
- Control outgoing traffic from the instance.
- Define which ports on the instance can send traffic out and to which destination addresses.
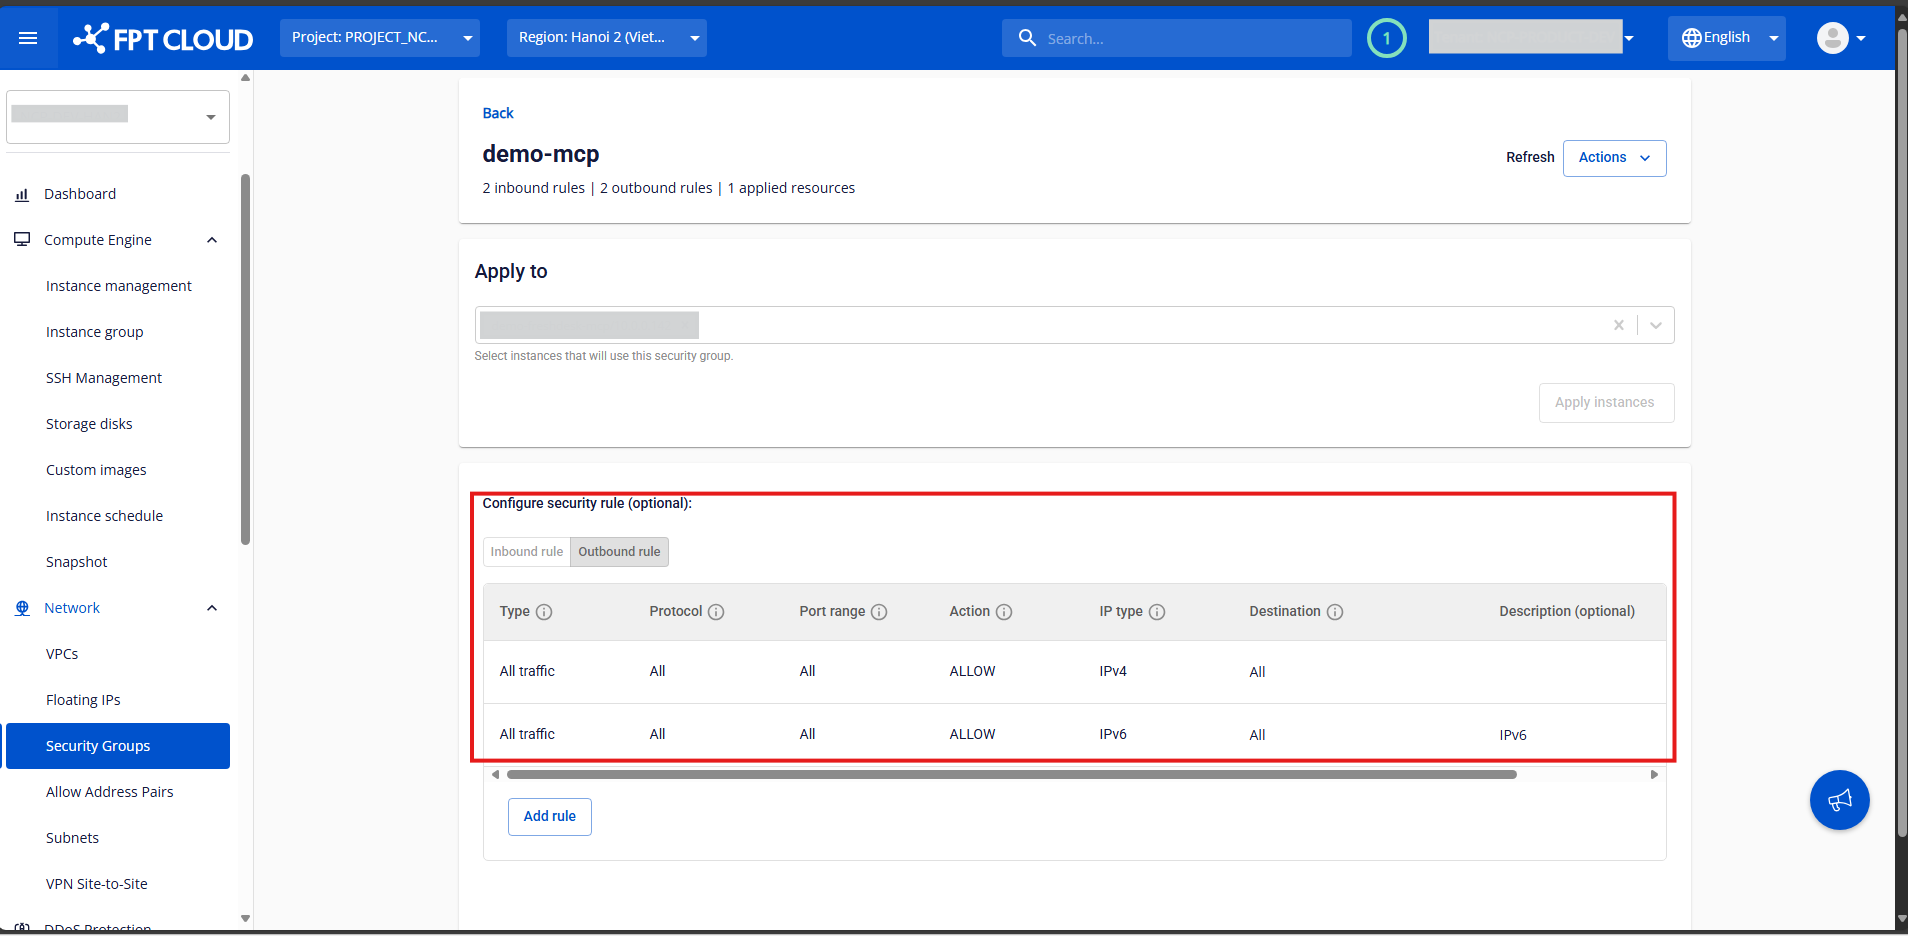
Adding or Editing Rules
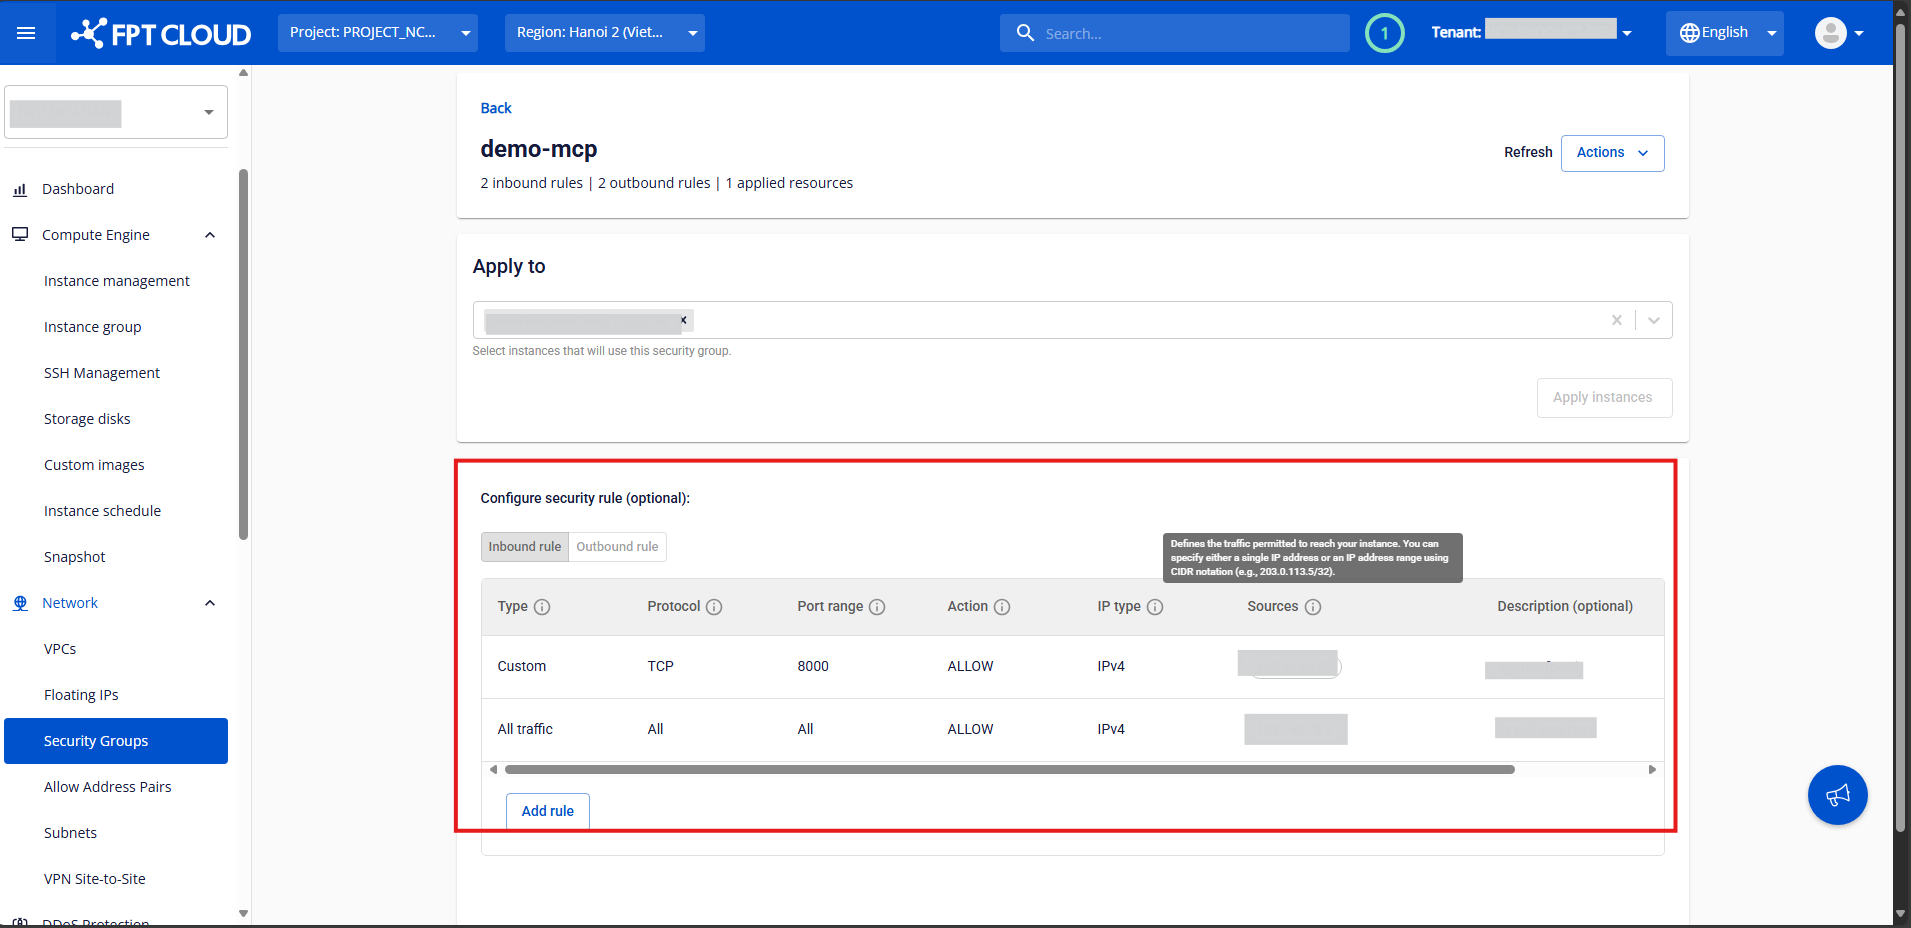
Step 1: In the Security Group Management page, select the Security Group you want to manage to open its details page. Step 2: In the Inbound Rules or Outbound Rules section, click Add New.
Step 3: Fill in the rule information:
- Port: Select the port(s) to open.
- Choose All Ports to open all ports.
- Choose Customize Ports to specify one or a range of ports.
- The system provides quick options for common services like SSH (22) , RDP (3389) , MySQL (3306) , HTTP (80) , and HTTPS (443).
- Sources / Destinations: Enter the IP addresses allowed to connect to the specified ports.
- All IPv4: Allow connections from all IPs.
- My IP: Allow only your current public IP.
- Custom: Enter one or more specific IP addresses.
⚠️ For sensitive ports like 22 (SSH) or 3389 (RDP), the system will display a warning if you allow All IPv4: "We recommend allowing SSH from trusted IPs only."
- Description: Optional notes for the rule.
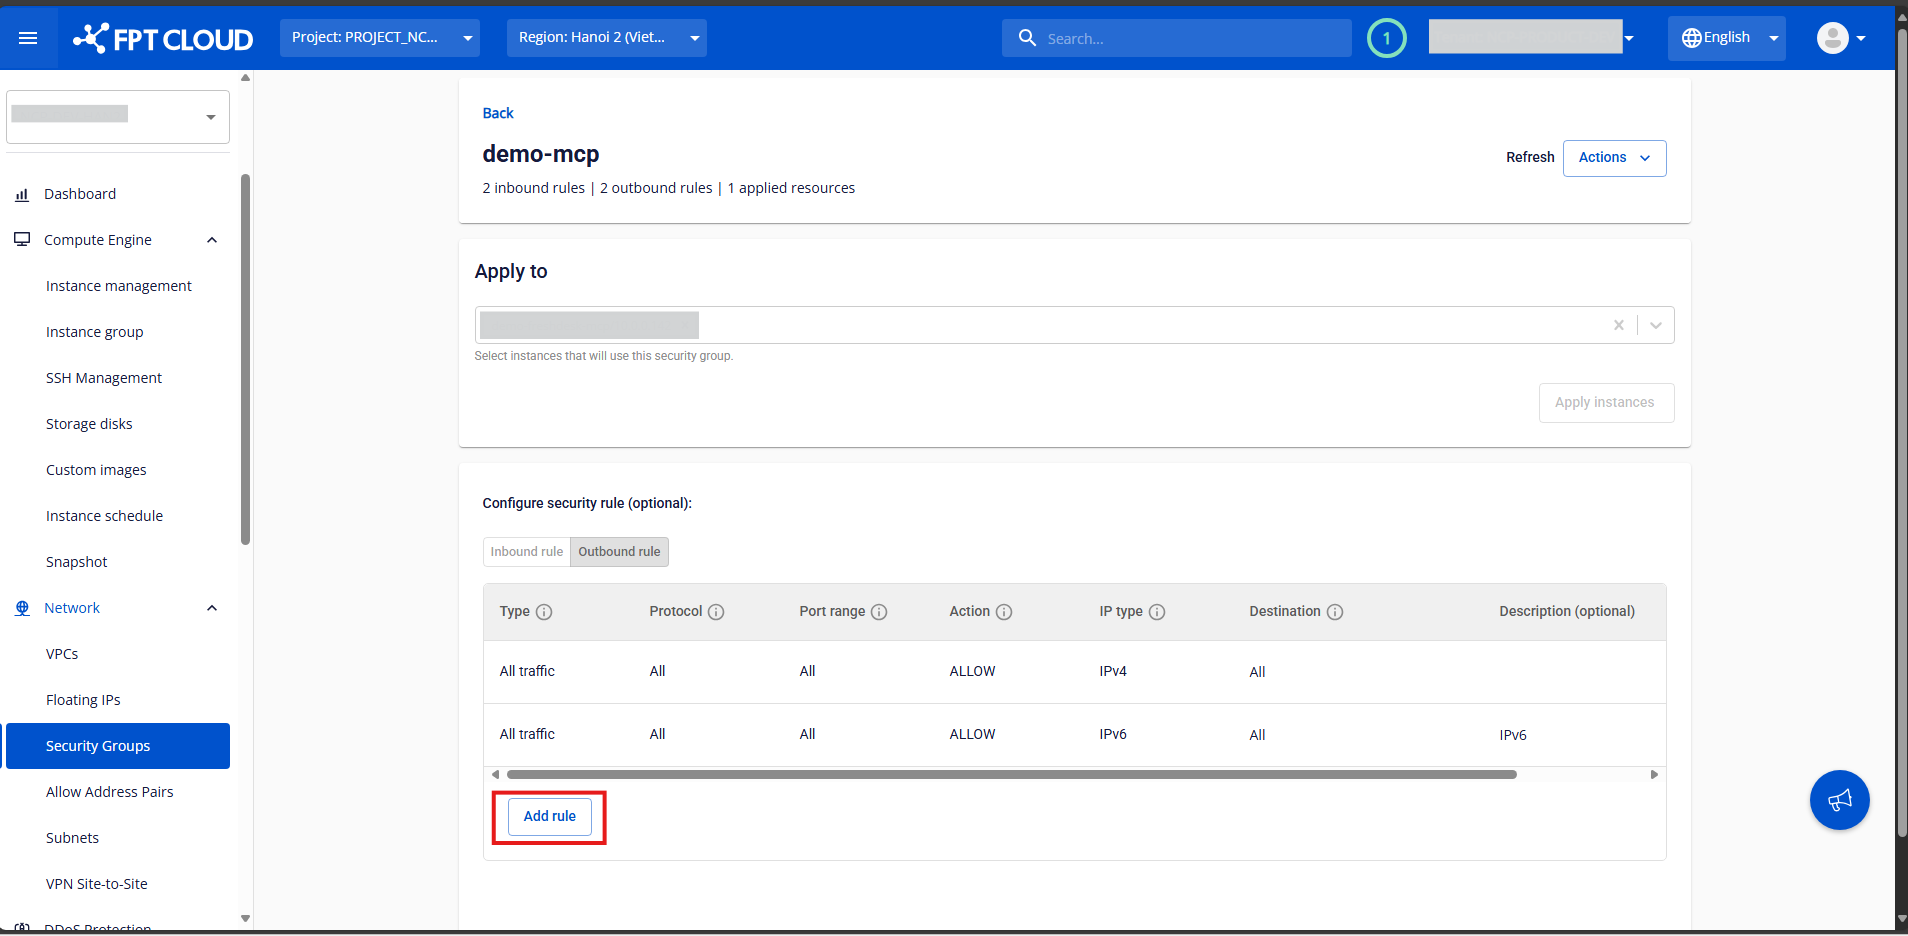
Click Add Rule to continue adding more, or Edit Security Group to save your changes. The system will process the configuration and display a result notification. ⚠️ Recommendation
- Add a new inbound rule for SSH access: Type: SSH; Port Range: 22; Source: All IPv4
- To enhance security when enabling SSH access, please allow only trusted IP addresses and avoid using "All IPv4" (0.0.0.0/0).
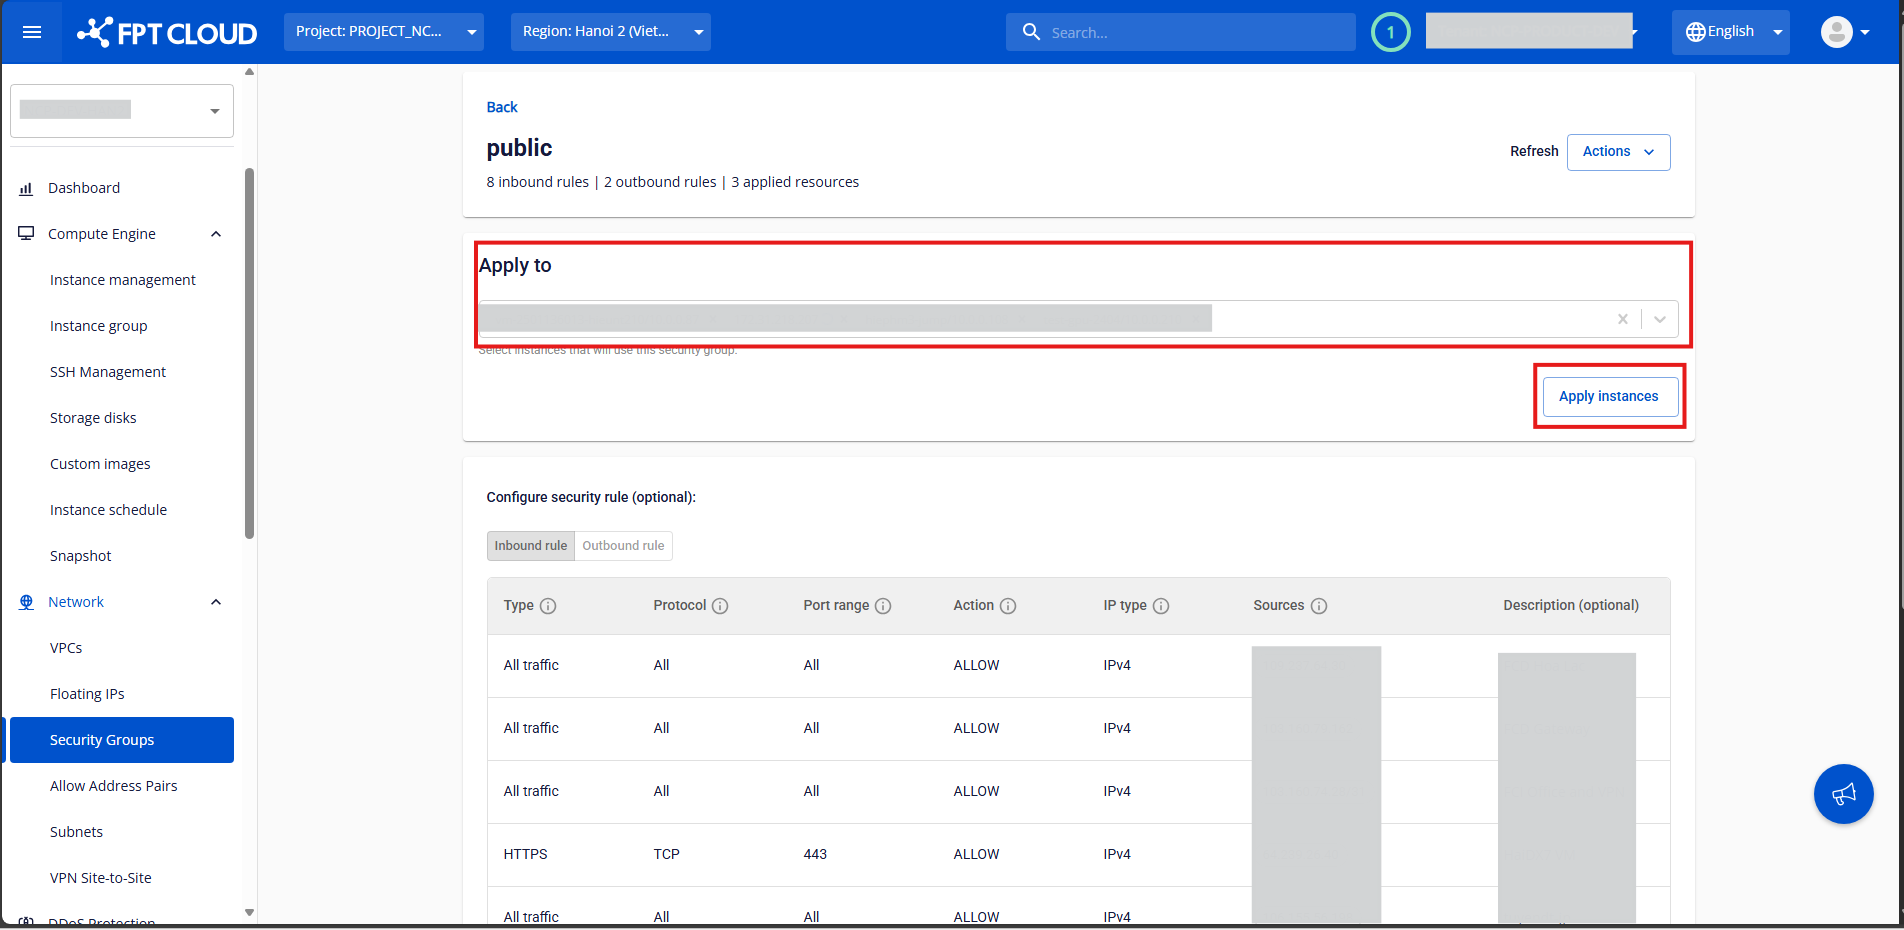
Attach a GPU VM
Step 1: In the Security Group Management page, select the Security Group you want to attach to a virtual machine.

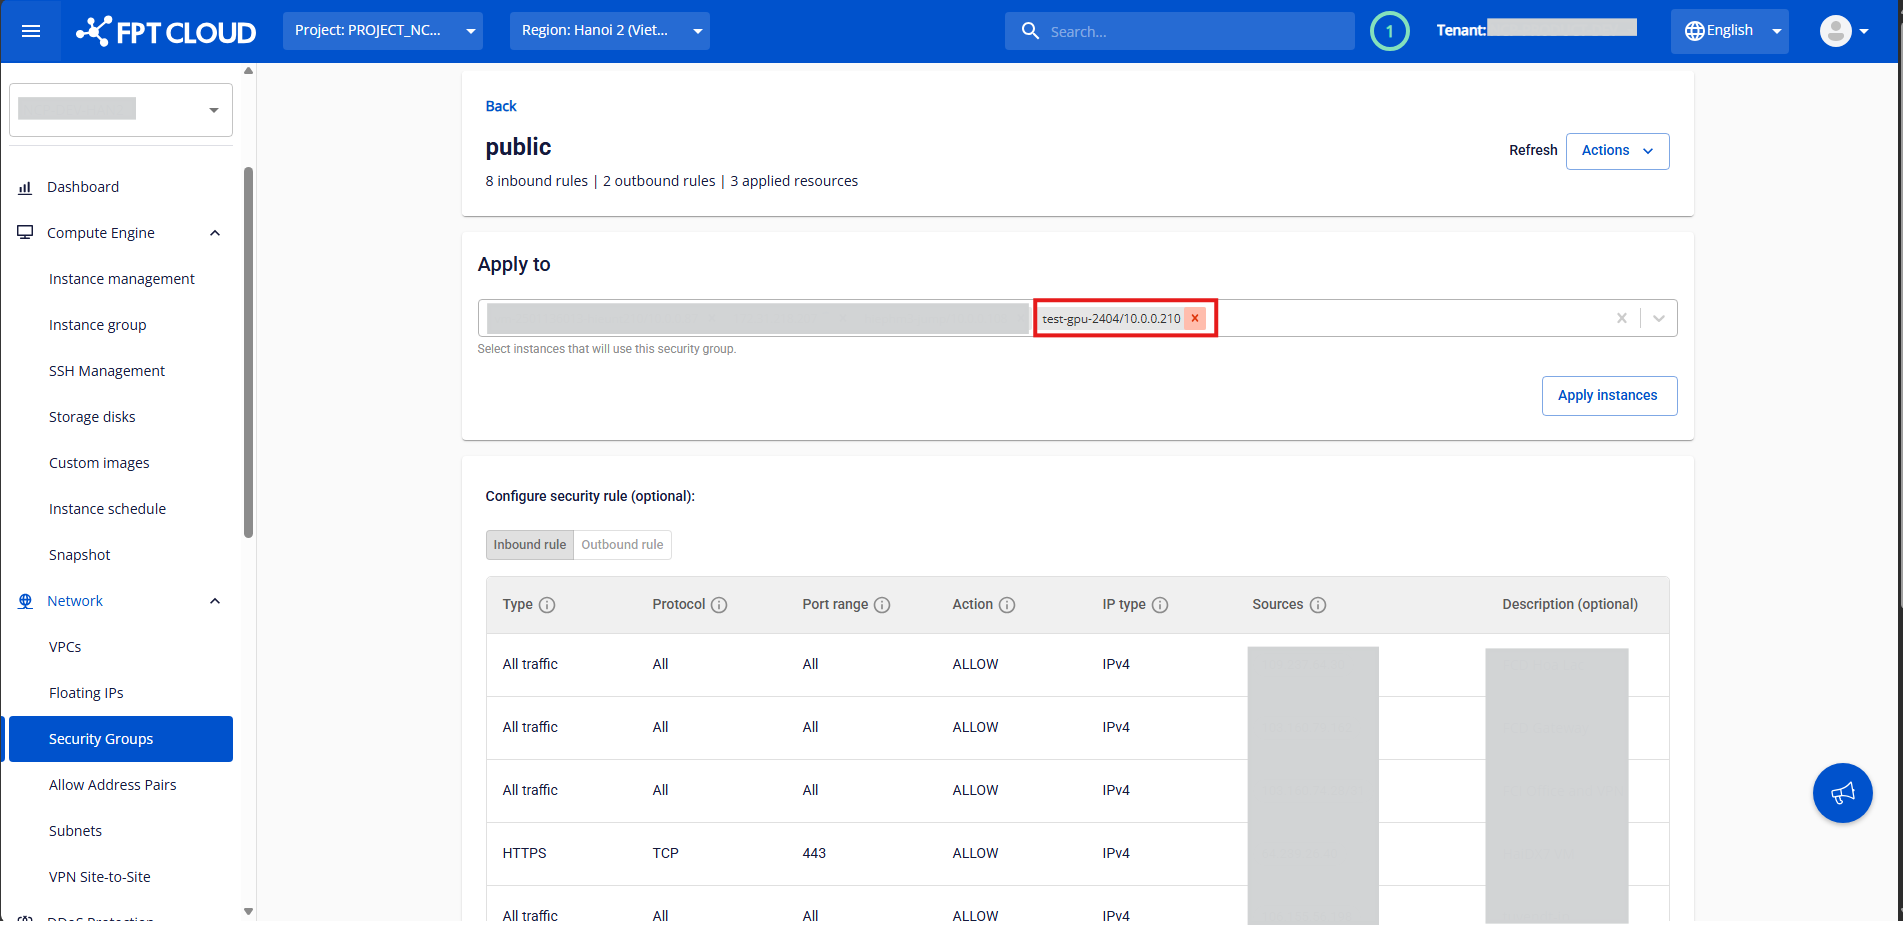
Step 2: In the Apply To section, select the virtual machines to attach. You can also specify a CIDR range to apply the Security Group to a network segment. Click Apply Instances to confirm. The system will process and display the result.
Detach a GPU VM
Step 1: In the Security Group Management page, select the Security Group currently attached to the virtual machine.
Step 2: In the Apply To section, locate the instance you want to remove. Click the X icon next to it, then click Apply Instances to confirm. The system will process and display the result.
Delete a Security Group
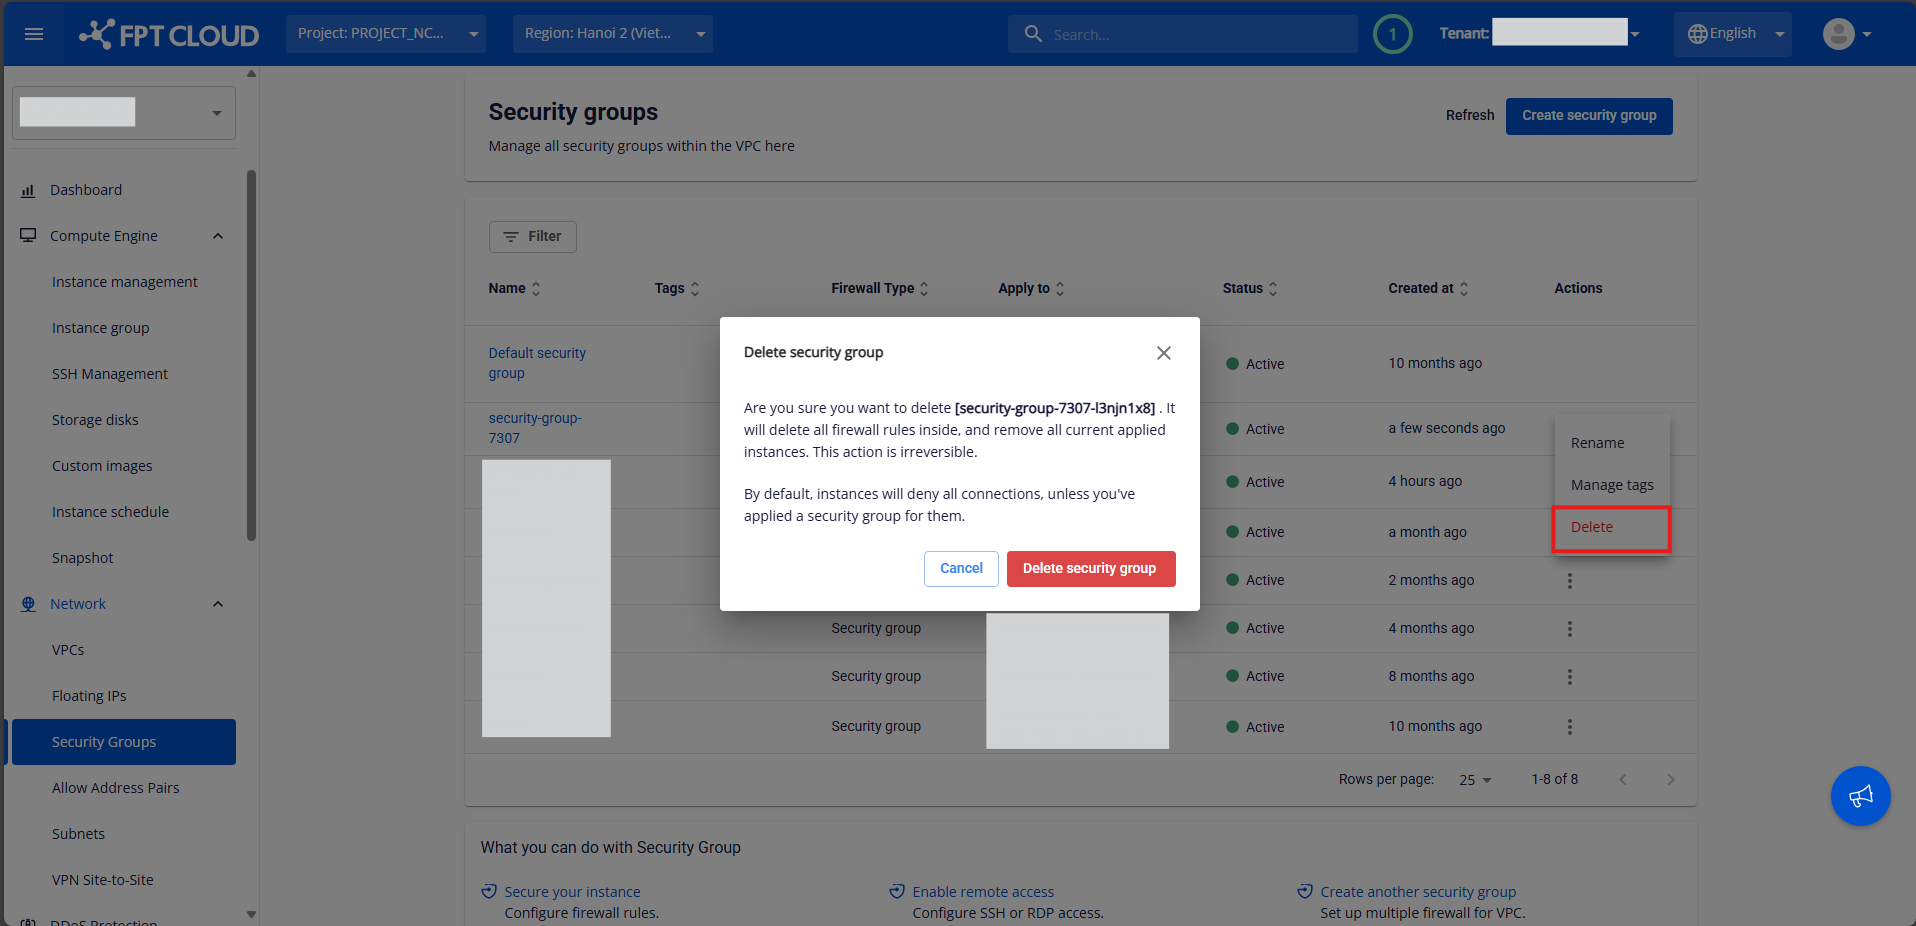
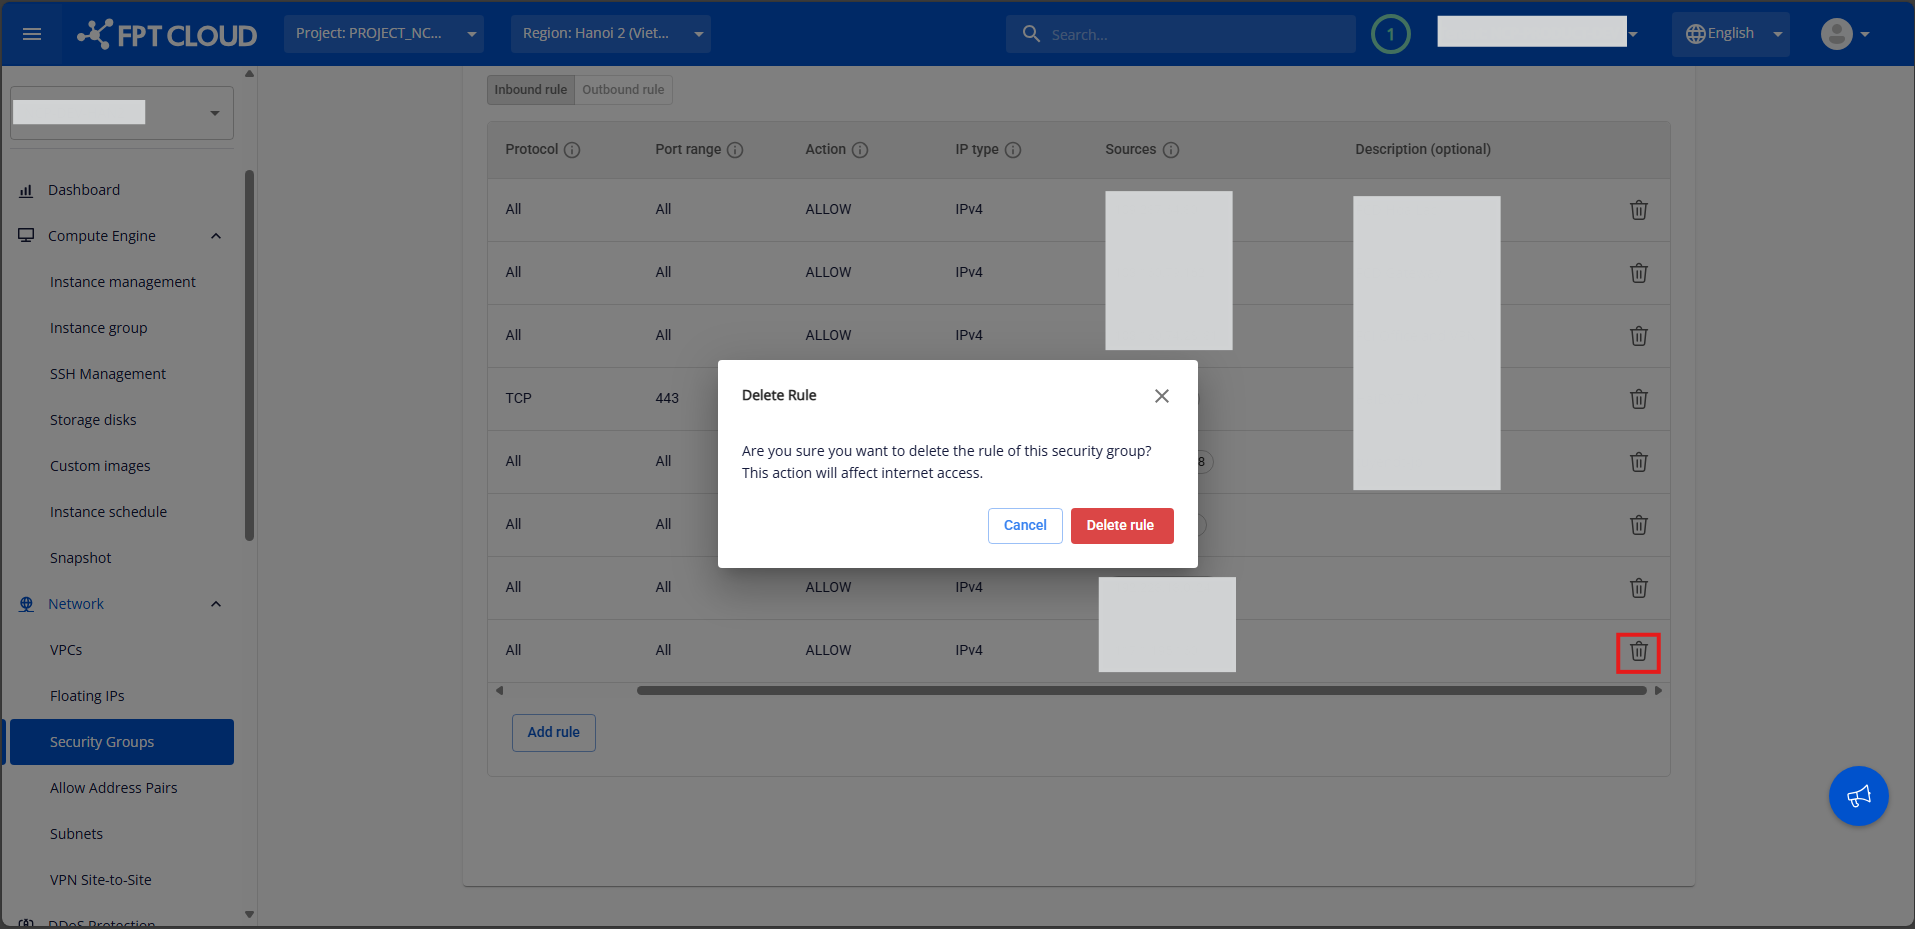
If you no longer need a Security Group, you can delete it from the VPC. ⚠️ Note: All rules must be deleted first before the Security Group can be removed. Step 1: In the Security Group Management page, select the Security Group you want to delete to open its details page.
Step 2: Delete all rules by clicking the trash icon next to each rule and confirming deletion.
Step 3: After all rules have been deleted, return to the Security Group list. Under the Actions column, select Delete for the Security Group you want to remove. Step 4: A confirmation pop-up will appear. Click Delete Security Group to confirm. The system will process and display the result.