Pfsense Network Gateway
This article will introduce how to build a highly available (HA) network gateway using pfSense. This FreeBSD-based open-source software helps you achieve a stable and reliable network environment.
What is pfSense?
pfSense is an open source router/firewall software based on FreeBSD that can implement various network functions such as router , firewall , VPN , and proxy. The configuration of the virtual network gateway when building ExpressRoute / Site-to-Site VPN is also described in the official documentation, making it safe and suitable for many corporate environments.
File Preparation
Step 1: Download pfSense ISO file
Go to the official pfSense website: https://www.pfsense.org/download/
Download the latest ISO image.
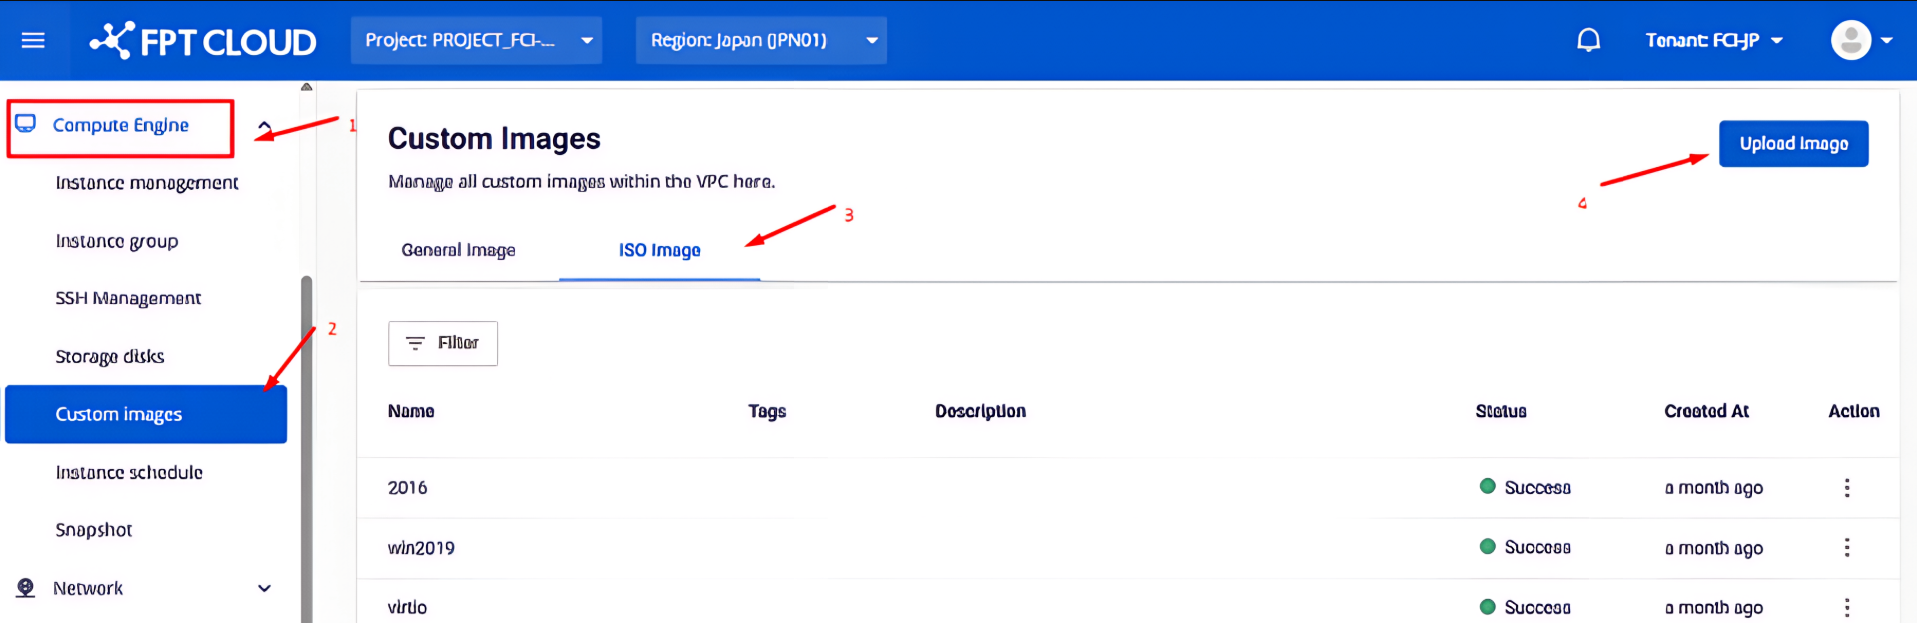
Step 2: Login to FPT Cloud Console
Visit https://console.fptcloud.jp/ and log in using your provided credentials.
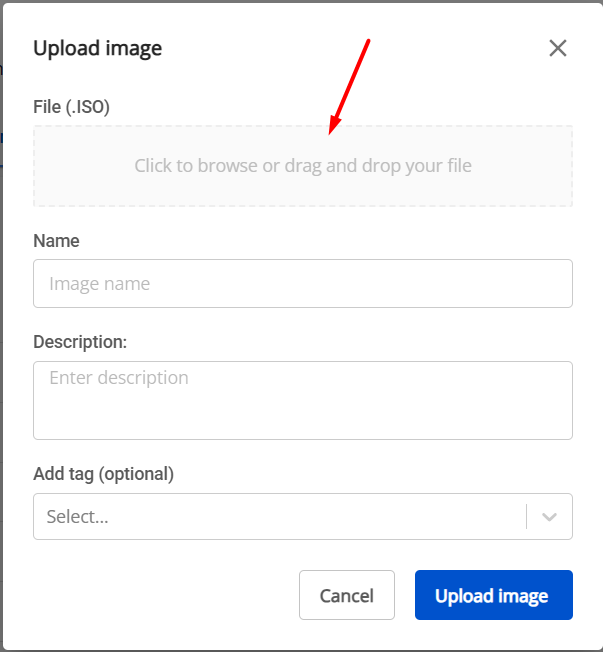
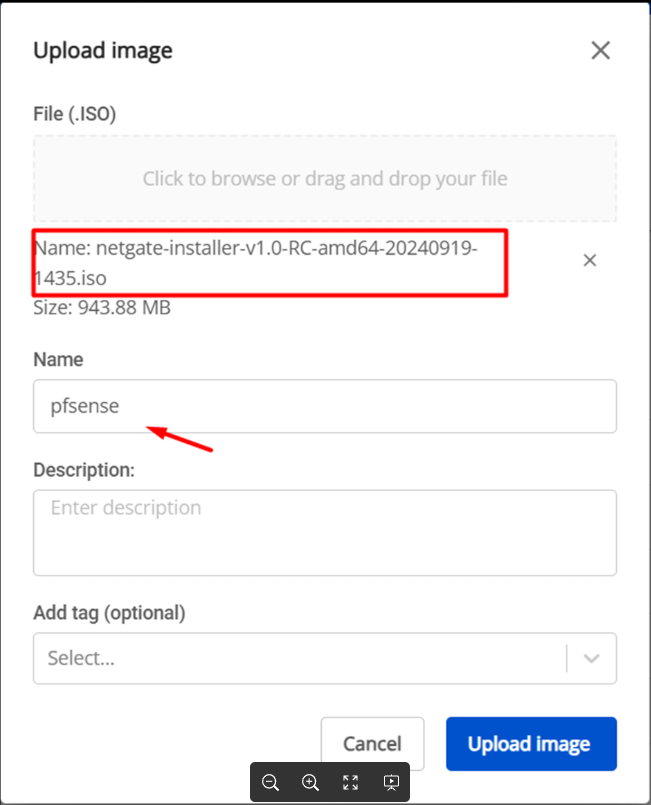
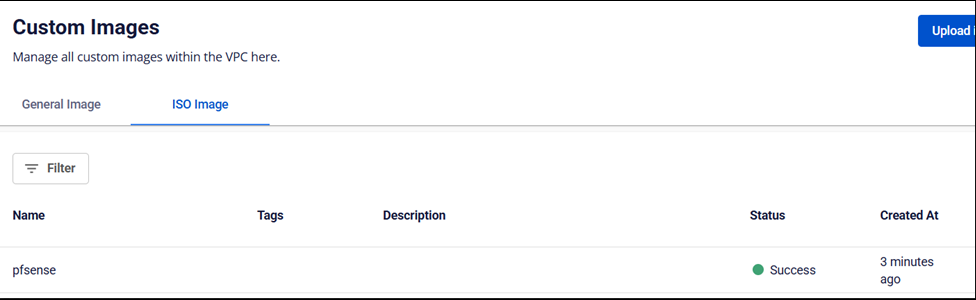
Step 3: Upload the ISO file
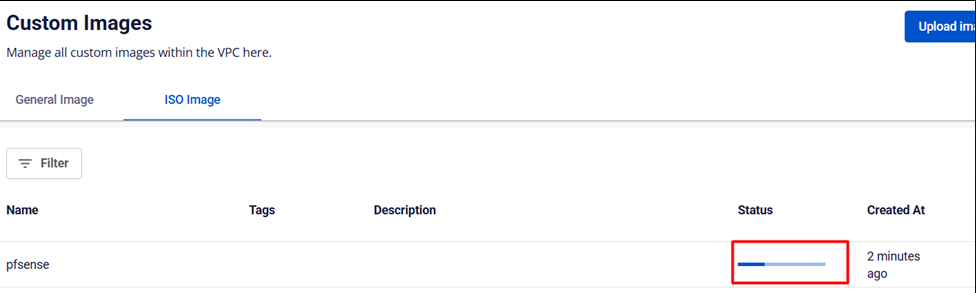
Select the downloaded pfSense ISO file and upload it to the portal. You will receive a confirmation message once the upload is complete.
Network Environment Preparation
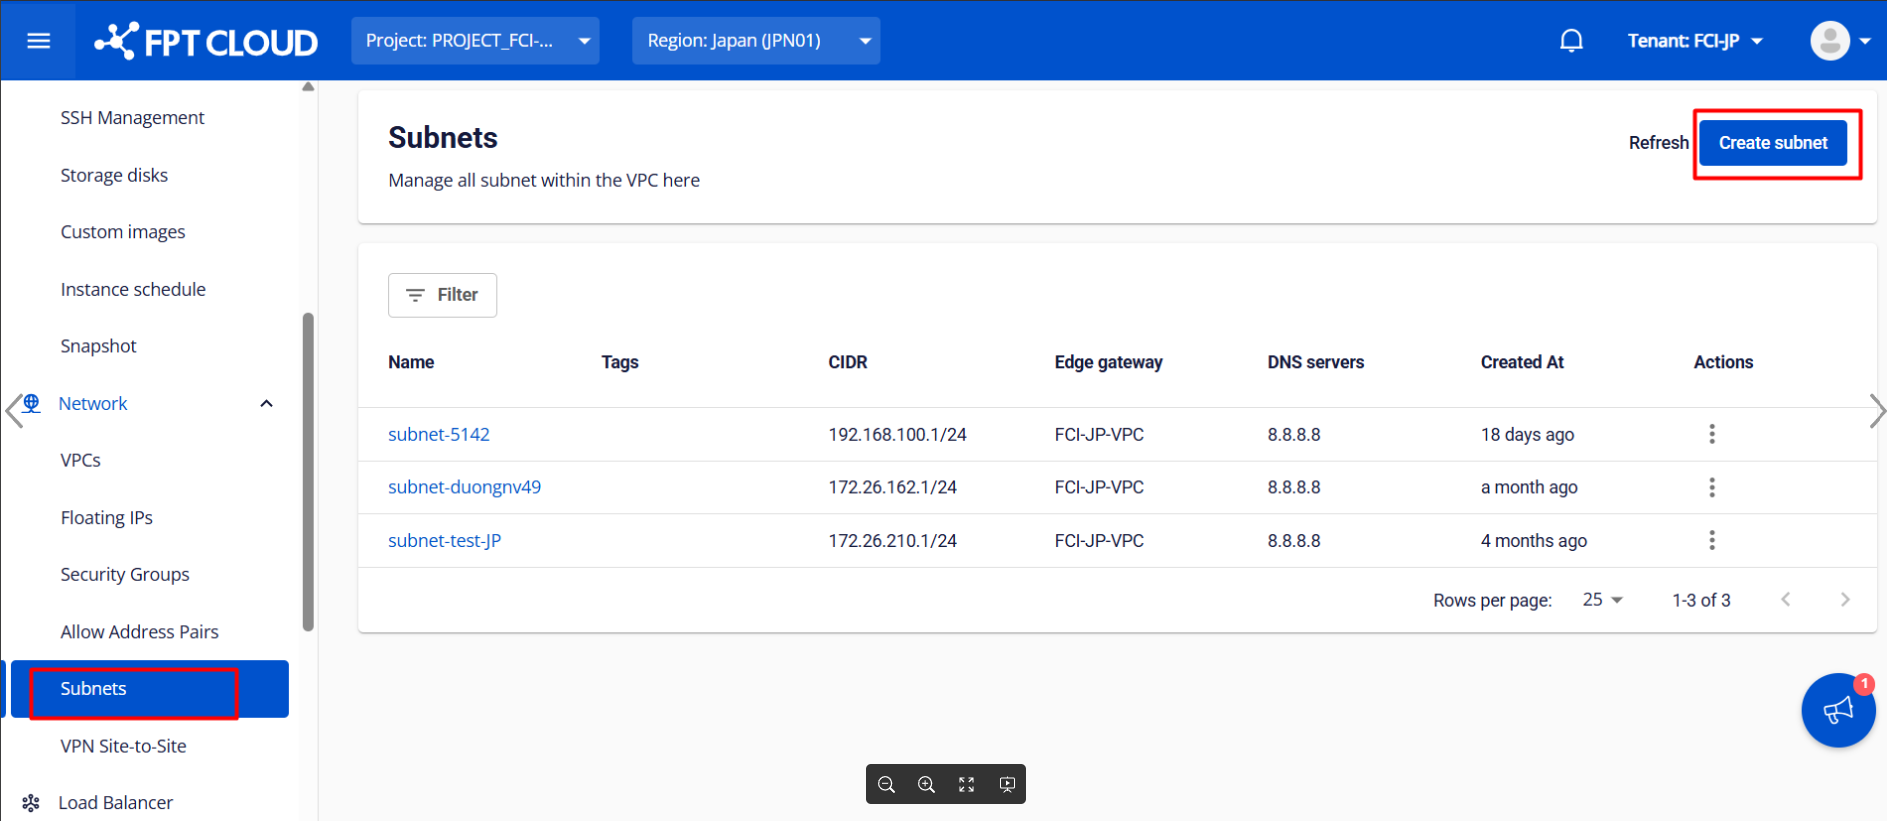
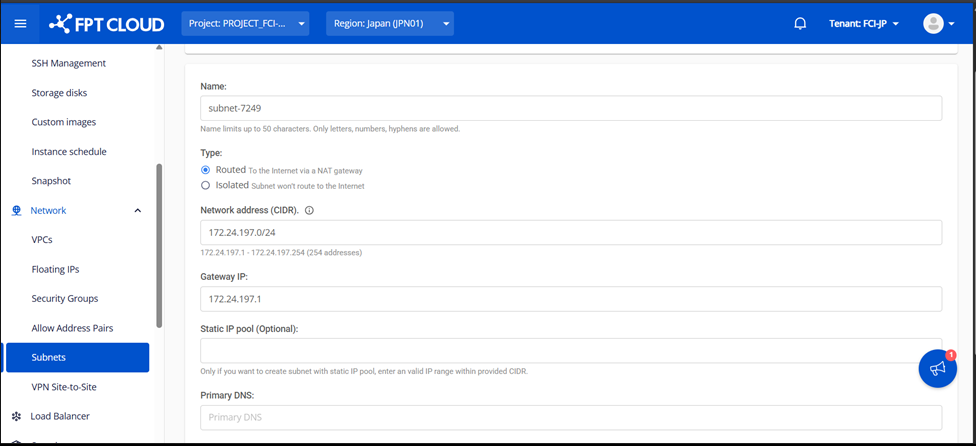
Step 1: Create a New Subnet
In the FPT Cloud Console , create a new subnet according to your network requirements, which will allow you to assign the necessary IP addresses to the network interfaces of pfSense.
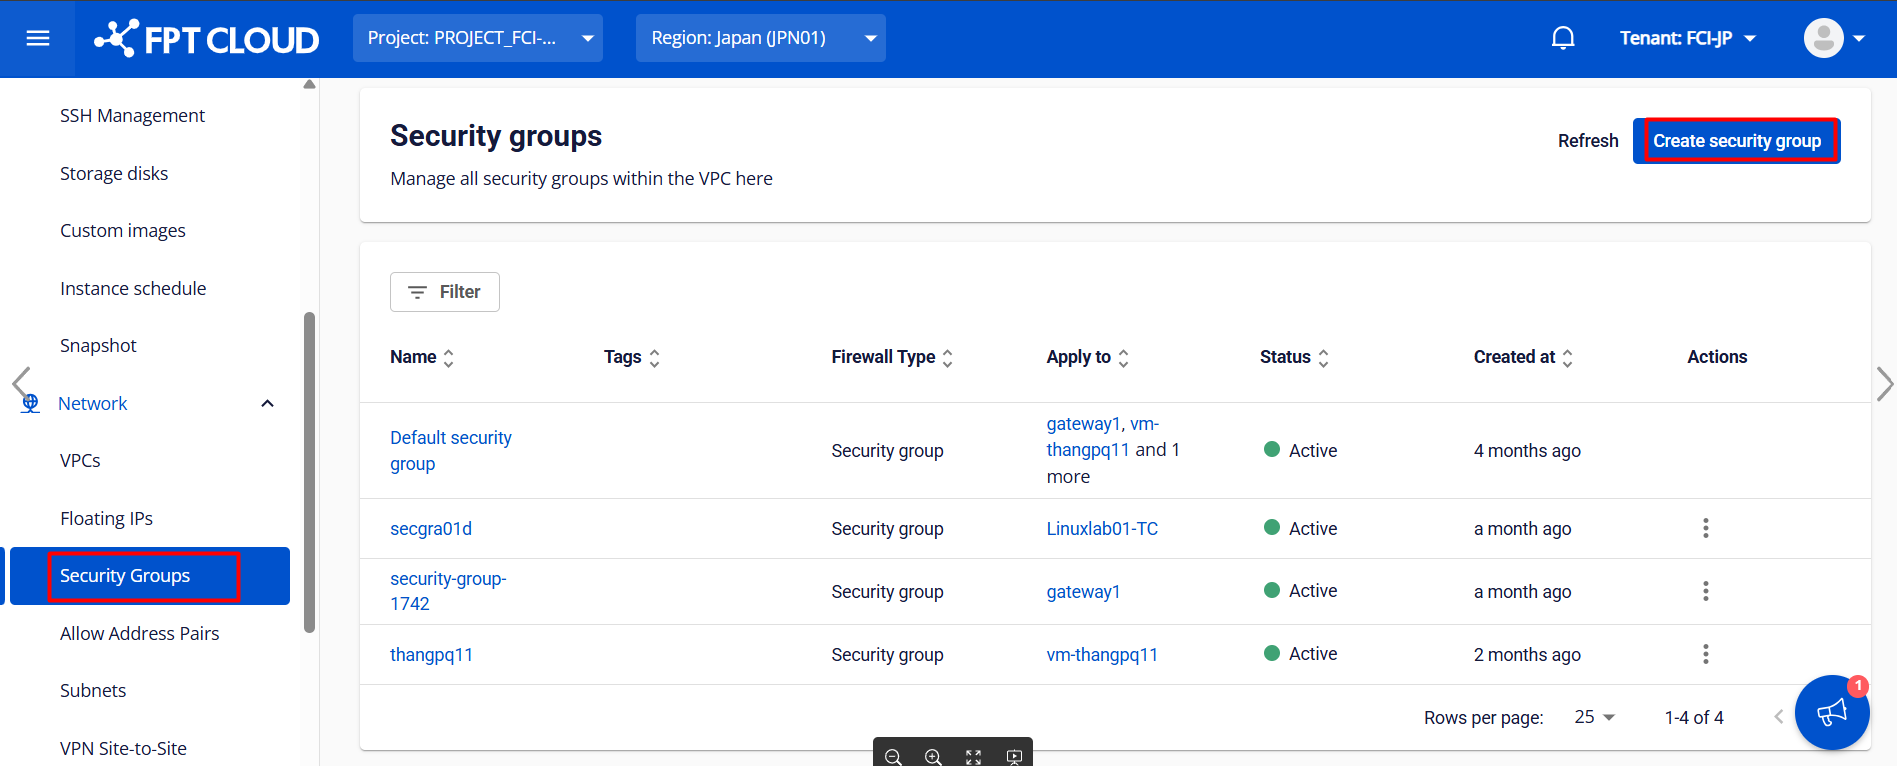
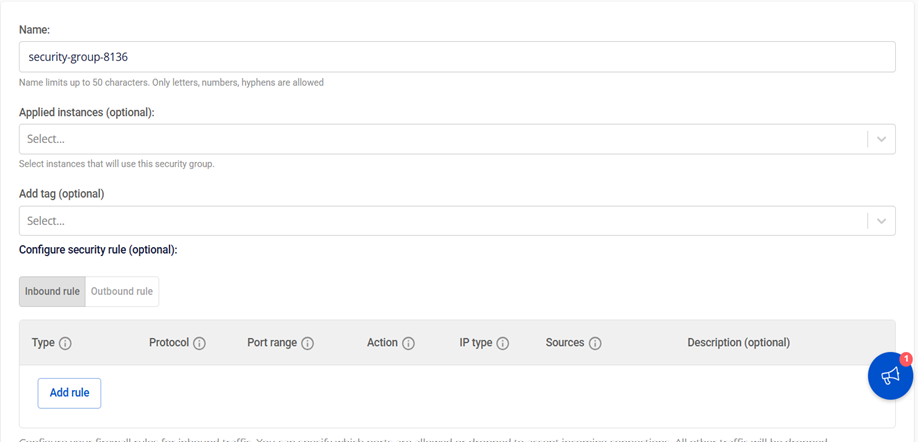
 Step 2: Create a Security Group
Define security rules for your environment and create appropriate security groups to control communication and network traffic between pfSense virtual machines.
Step 2: Create a Security Group
Define security rules for your environment and create appropriate security groups to control communication and network traffic between pfSense virtual machines.
Creating a pfSense Virtual Machine
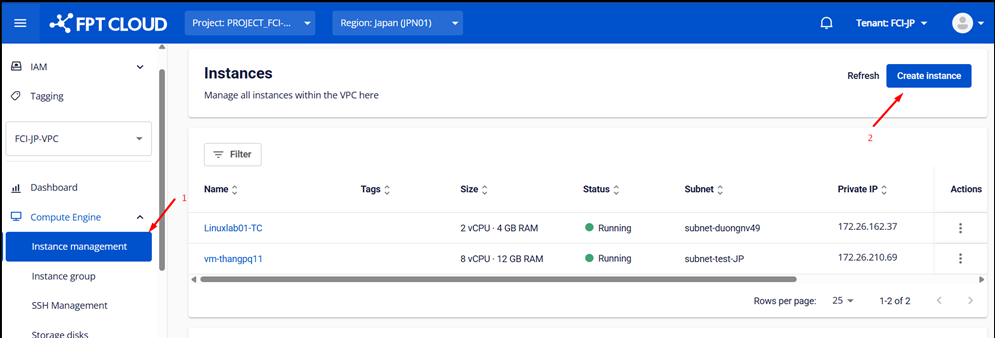
Step 1: Compute Engine Go to the Compute menu in the FPT Cloud console and click "Create Instance".
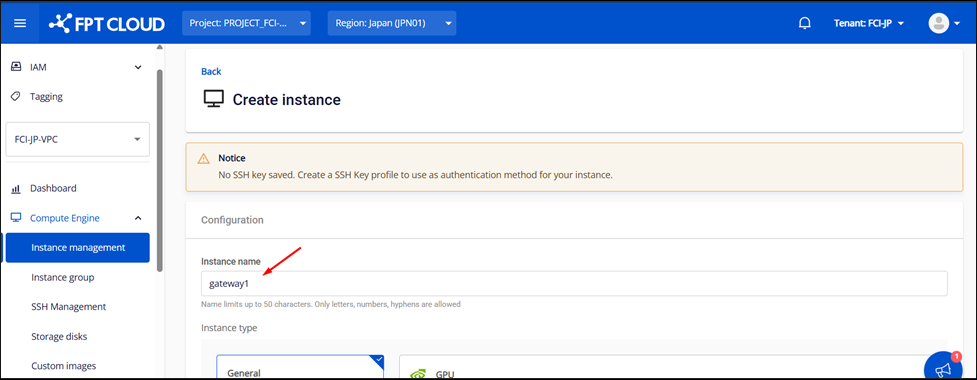
Step 2: Basic Information Settings
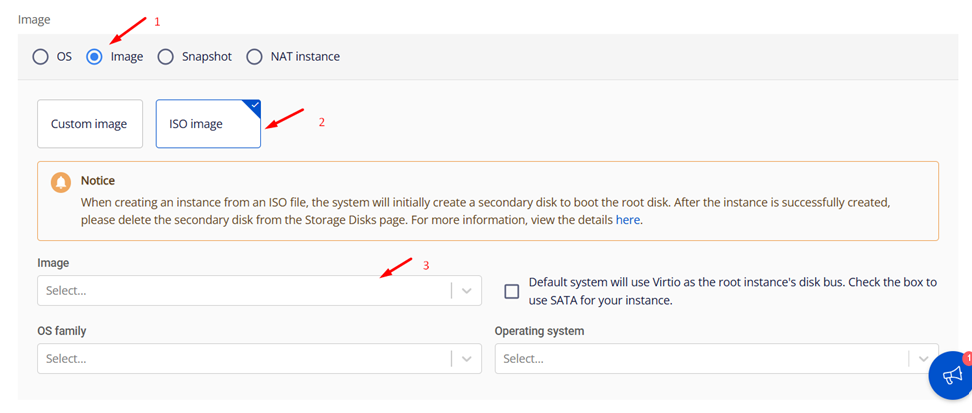
Set up an instance name (e.g., pfsense-master or pfsense-slave) and select the pfSense ISO you uploaded earlier under the ISO image option.
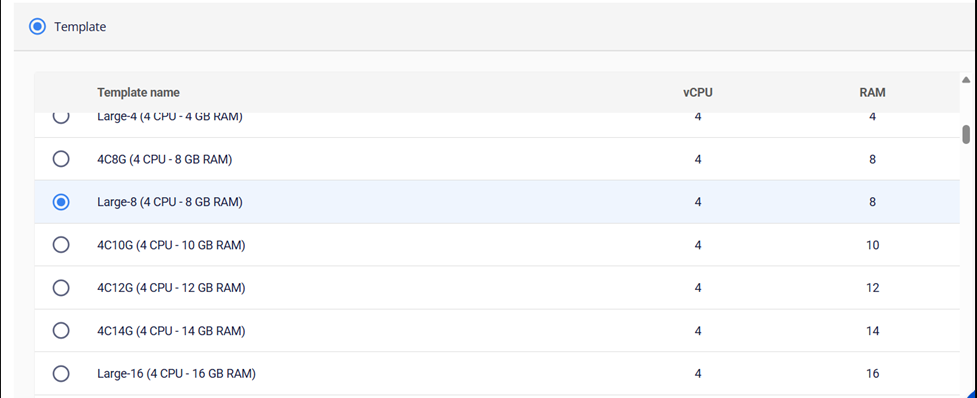
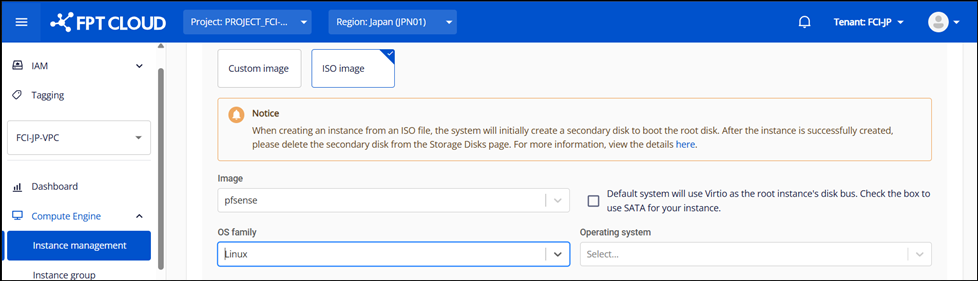 Step 3: Resource and Network Configuration
Select the appropriate resource size (CPU/RAM) for your environment and connect the necessary networks.
Step 3: Resource and Network Configuration
Select the appropriate resource size (CPU/RAM) for your environment and connect the necessary networks.
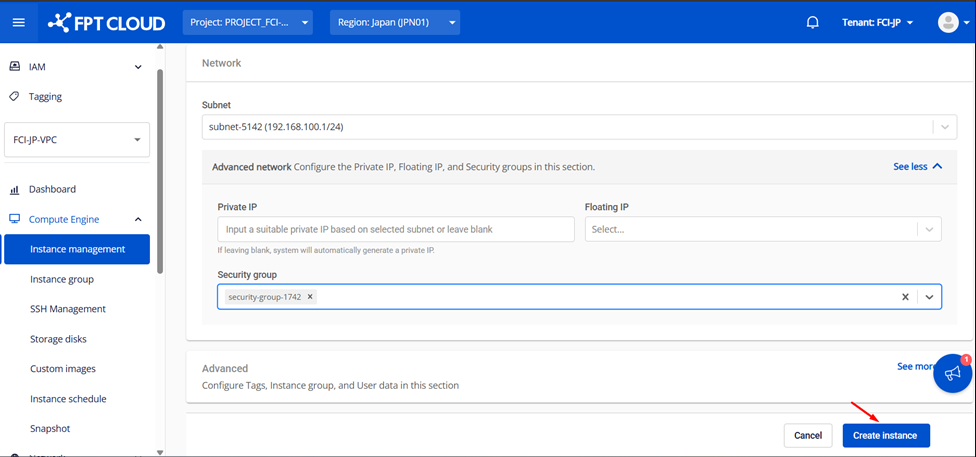
 Step 4: Attach a Security Group
Attach the previously created security group and create the virtual machine.
Step 4: Attach a Security Group
Attach the previously created security group and create the virtual machine.

HA (High Availability) Requirements
Minimum Requirements for High Availability (HA) Implementation:
- At least three IPs per subnet on the pfSense network interface
- One for the master
- One for the slave
- One virtual IP for external communication
- Layer 2 devices must support multicast
- The upstream / ISP / router must have access to the virtual IP used by CARP
Configuring the pfSense Interface
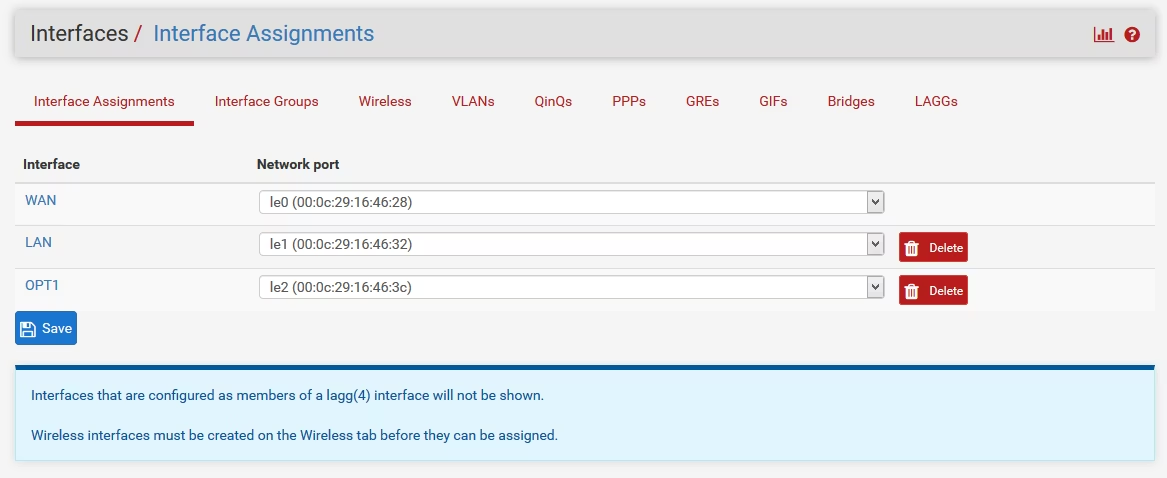
New Network: Adding a Card
- Select "Assignment" from the Interface menu and click "Add" to add a new interface.
- Double-click the OPT1 interface and enter the required information.
- After setting, click "Save" , then "Apply Changes".
Firewall: Creating Rules
- Select "Rules" from the Firewall menu and switch to the "Sync" tab.
- Click "Add" to create a new rule and enter the required information.
- Once the configuration is complete, click "Save and Apply Changes".
- Repeat the same configuration on both pfSense servers.
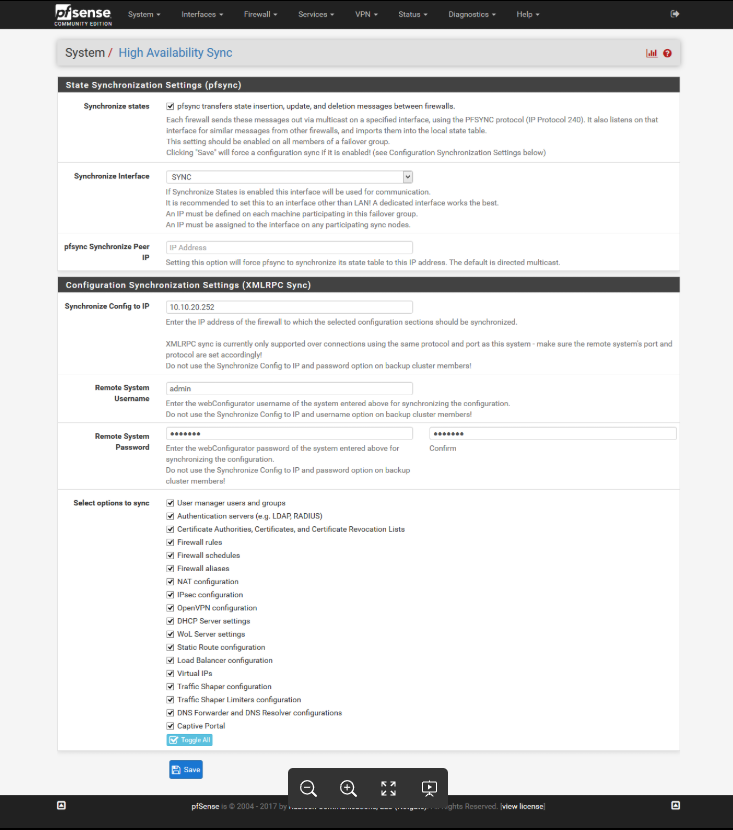
Configuring CARP (High Availability Protocol)
Configuring CARP on the Master
- Select "High Availability Synchronization" from the System menu and enter the required information.
- The username and password for the remote system specify the credentials of a high-privileged user on the pfSense slave virtual machine
Configuring CARP on the Slave
- Similarly, select "High Availability Synchronization" from the System menu and enter the required information.
- The settings will be different from those of the master, so please follow the instructions to set them appropriately.
