Security Group Management
Security Group Management
A Security Group acts as a virtual network firewall, controlling inbound and outbound traffic to and from virtual machines. In FPT Cloud, there are two types of firewalls:
-
Security Group: A firewall that controls internet traffic to and from a virtual machine.
-
Distributed Firewall: (Available only on the Specific service) A firewall that controls traffic between virtual machines within an internal network.
Using these firewall types helps protect virtual machines by blocking attacks such as DDoS and other threats from the internet or viruses.
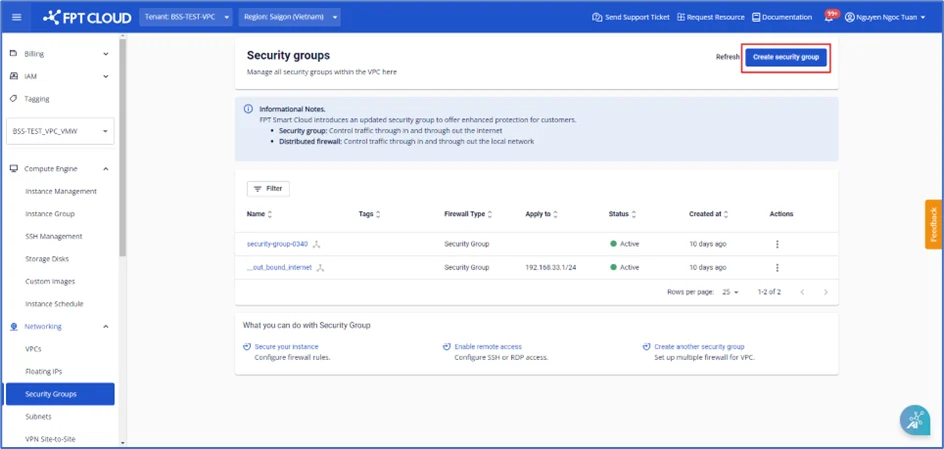
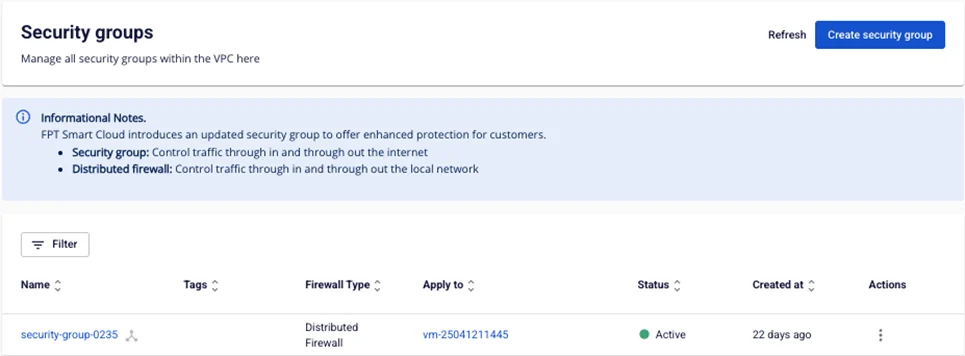
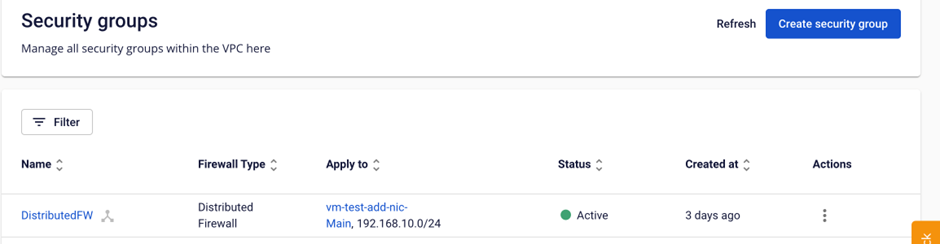
To manage Security Groups, go to the Security Groups page under the Networking service group. Here you can create, list, edit, and delete Security Groups within a VPC.
Create a New Security Group
To create a new Security Group, follow these steps:
Step 1: In the menu, select Networking > Security group. Click Create security group.
Step 2: Enter the required information:
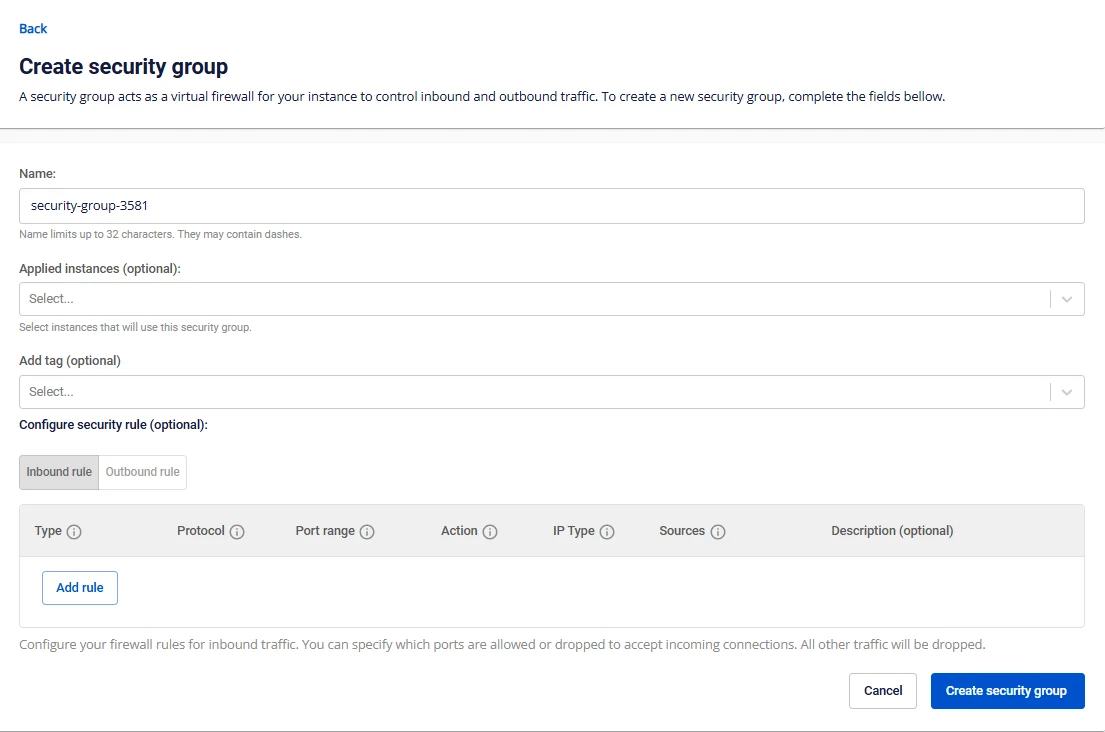
For General service users:
-
Name: The security group name. By default, the system will auto-generate a name for quick use.
-
Subnet: Select a Subnet from the list.
-
Applied CIDR / instances: Select the virtual machines or CIDR range to apply. You can skip this field and add it later.
-
Configure security rule:
-
Inbound rule: Controls traffic entering the virtual machine. You can configure rules as needed.
-
Outbound rule: Controls traffic leaving the virtual machine. You can configure rules as needed.
-
__
Security group creation screen for General service users
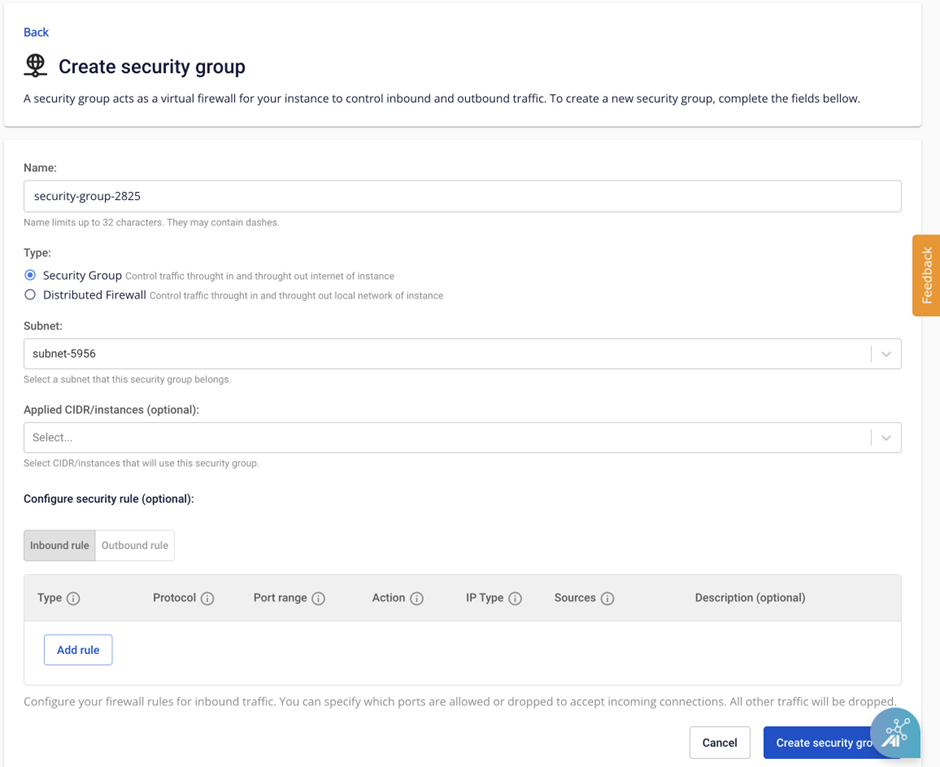
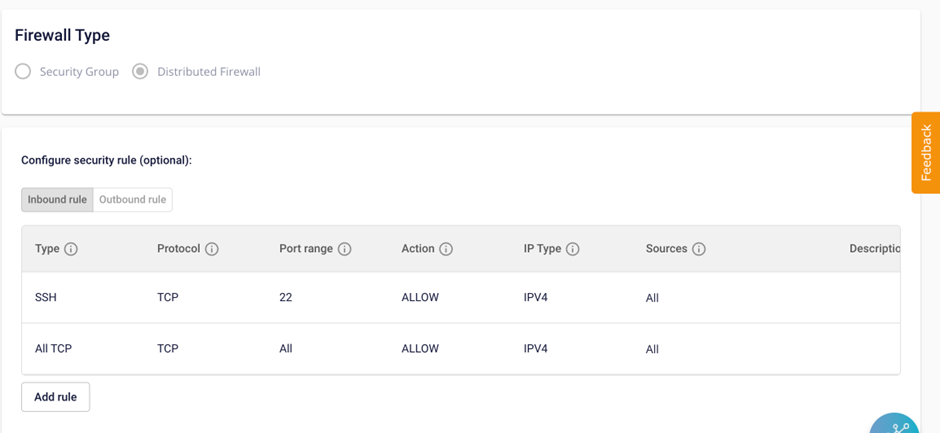
For Specific service users:
-
Name: The security group name. By default, the system will auto-generate a name for quick use.
-
Type:
-
Security group: Controls internet traffic to and from the virtual machine.
-
Distributed Firewall: Controls internal network traffic to and from the virtual machine.
-
-
Subnet: Select a Subnet from the list.
-
Applied CIDR / instances: Select the virtual machines or CIDR range to apply. You can skip this field and add it later.
-
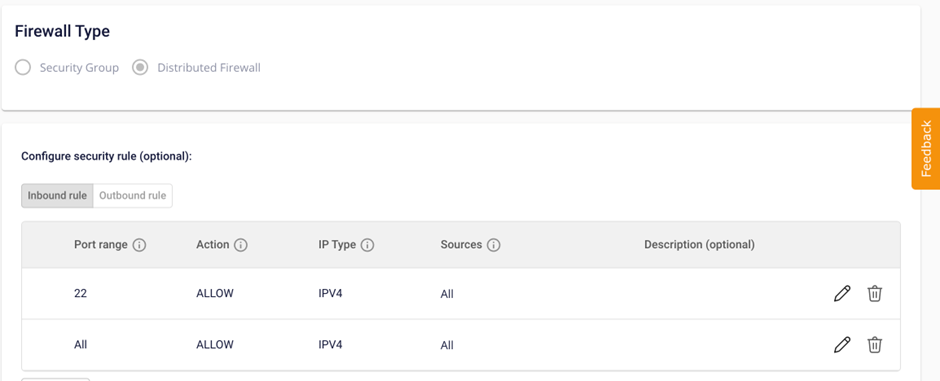
Configure security rule:
-
Inbound rule: Controls traffic entering the virtual machine. You can configure rules as needed.
-
Outbound rule: Controls traffic leaving the virtual machine. You can configure rules as needed.
-
__
Security group creation screen for Specific service users
Step 3: Click Create security group. The system will process the request and display the result.
If successful, the newly created Security Group will appear in the Security Group table.

Manage Inbound and Outbound Rules in a Security Group
Inbound rules define which Ports will be open on the virtual machine and which internet addresses (Sources) are allowed to access those ports.
Outbound rules define which Ports will be open on the virtual machine and which internet addresses (Destinations) are accessible from those ports.
A single Security Group can contain multiple Inbound rules and Outbound rules. To add rules and open ports for a Security Group, follow these steps:
Step 1: On the Security group management panel, select the Security group whose rules you want to manage to go to the Security group detail page.
Note: The Firewall type cannot be changed after creation.
Step 2: Click Add New in the Inbound rules section (similarly for outbound rules).

Step 3: Fill in the required rule details:
-
Port: Select the port to open. You can choose All ports to open all ports, or Customize ports to open one or a range of custom Ports. The system also suggests ports for popular services such as SSH, RDP, MySQL, HTTP, HTTPS, etc.
-
Sources (Destinations): Enter the internet IP addresses that can connect to this port in the Sources (Destinations) field. Select All IPv4 to allow all, MyIP to allow only your current public IP, or enter an IP directly to add custom IPs. Note: For sensitive ports such as 22 or 3389, if you allow All IPv4, the system will display a high-risk warning: "We recommend allowing SSH from trusted IPs only".
-
Description: A note about the rule.
Click Add rule to continue adding a new rule, or click Edit security group to save. The system will save and display the result.
Attach a Virtual Machine to a Security Group
Step 1: On the Security group management panel, select the Security group you want to attach to a virtual machine to go to the Security group detail page.

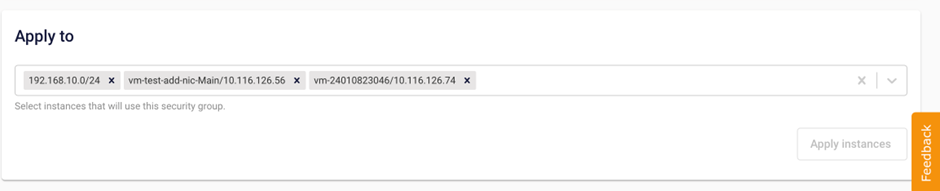
Step 2: In the Apply to section, select the virtual machines to attach to the Security group. You can also enter a CIDR range to apply to a network range. Click Apply Instances. The system will save and display the result.

Detach a Virtual Machine from a Security Group
Step 1: On the Security group management panel, select the Security group you want to detach from a virtual machine to go to the Security group detail page.
The Apply to section shows the list of virtual machines currently attached to this Security group.
Step 2: Click the X icon next to the virtual machine you want to detach, then click Apply Instances. The system will process the request and display the result.
Delete a Security Group from a VPC
If a Security group is no longer needed, you can delete it from the VPC.
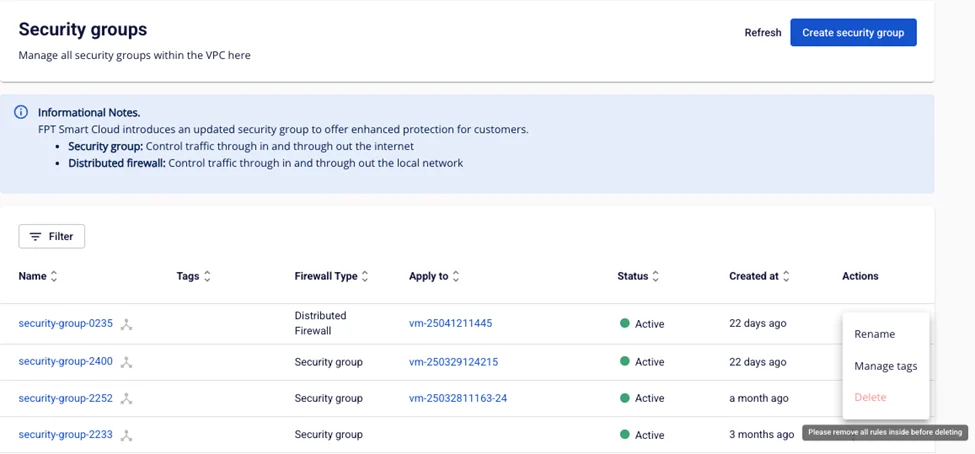
Note: All rules must be deleted before performing this operation.
Step 1: On the Security group management panel, select the Security group you want to delete to go to the Security group detail page.
Step 2: Go to a rule, click the trash icon, and confirm deletion.

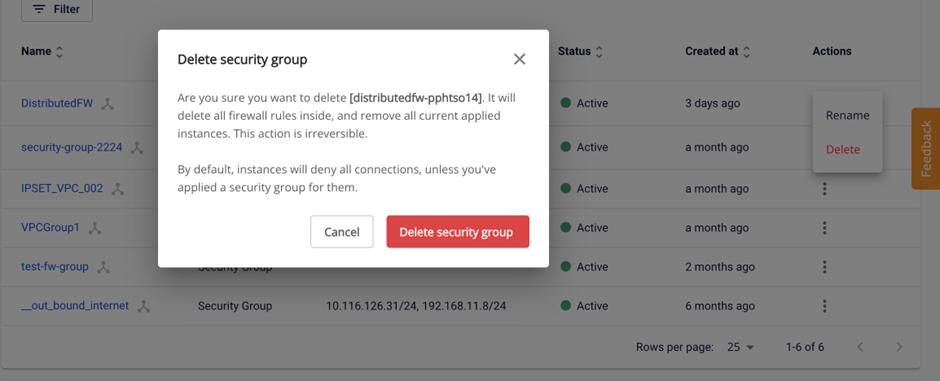
Step 3: After deleting all rules in the Security group, return to the Security Group management panel. Under the Action column for the Security group you want to delete, select Delete.
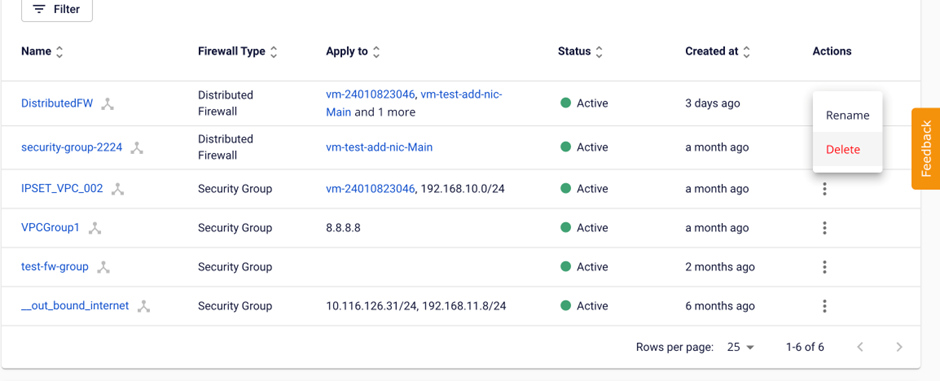
Step 4: The system will display a confirmation popup. To confirm deletion, click Delete security group.