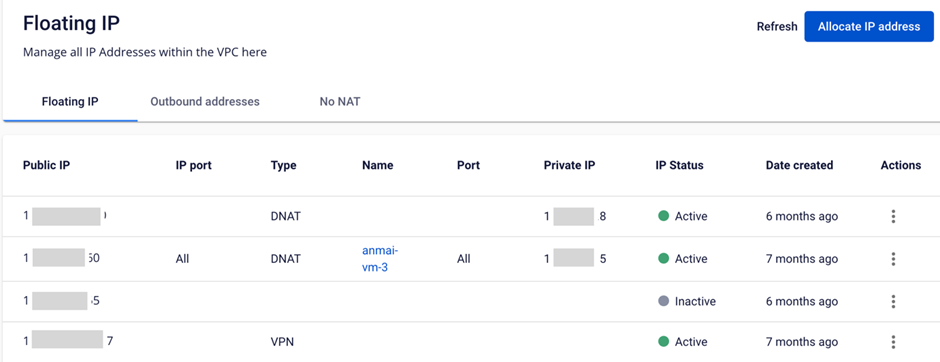
Floating IP Management
Floating IP Management
Floating IP is used to retain a Public IP address and route internet traffic to a virtual machine. To make a virtual machine accessible from the internet, you need to attach a Floating IP to it.
If you no longer need it or want to change the endpoint, you can redirect the Floating IP to another virtual machine in the same VPC with just a few simple steps.
This helps you save costs on Public IP resources and allows you to make maximum use of IP addresses.
Allocate a New Public IP Address from the Pool
If your account still has remaining quota, you can allocate additional IPs for use.
To add a new Public IP to a VPC, follow these steps:
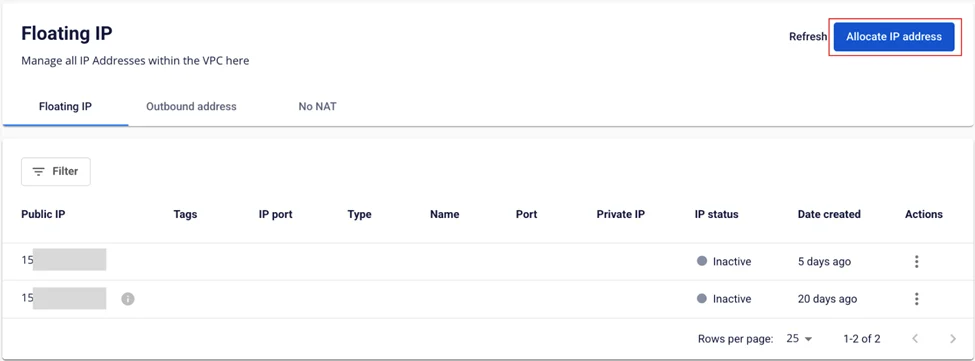
Step 1: In the menu, select Networking > Floating IP. Click Allocate IP address.
Step 2: Enter the required information. You can create multiple NAT rules with different IP ports in the range 1–65535:
-
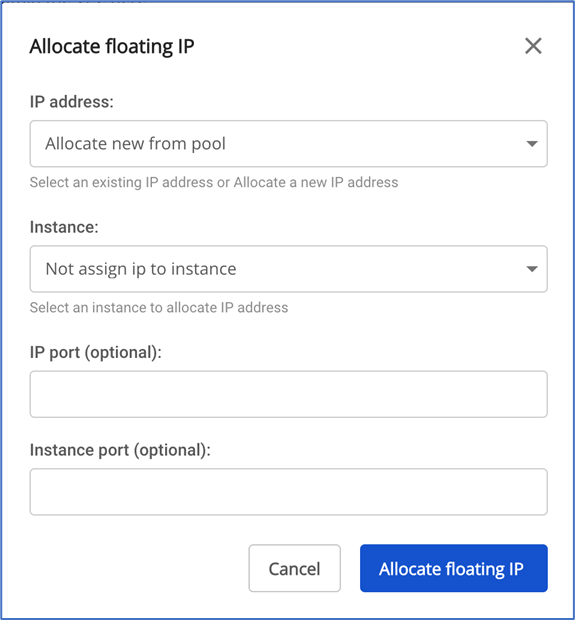
IP address: Select Allocate new from pool.
-
Instance: Select the virtual machine to associate with this IP. If you do not need to attach it to a virtual machine yet (e.g., for later use or for other purposes such as Site-to-Site VPN), select "Not assign ip to instance".
-
IP port (optional): The IP port to forward traffic into the system. You can configure NAT rules for individual ports. Ports for a single IP must be unique and cannot overlap across rules. If left blank, the system will default to forwarding on all ports.
-
Instance Port (Optional): The port on the instance that receives forwarded data. You can configure NAT rules for individual ports. Ports for a single instance must be unique and cannot overlap across rules. If left blank, the system will default to forwarding on all ports.
-
Add tag (optional): Attach a tag to the IP. This field is optional.
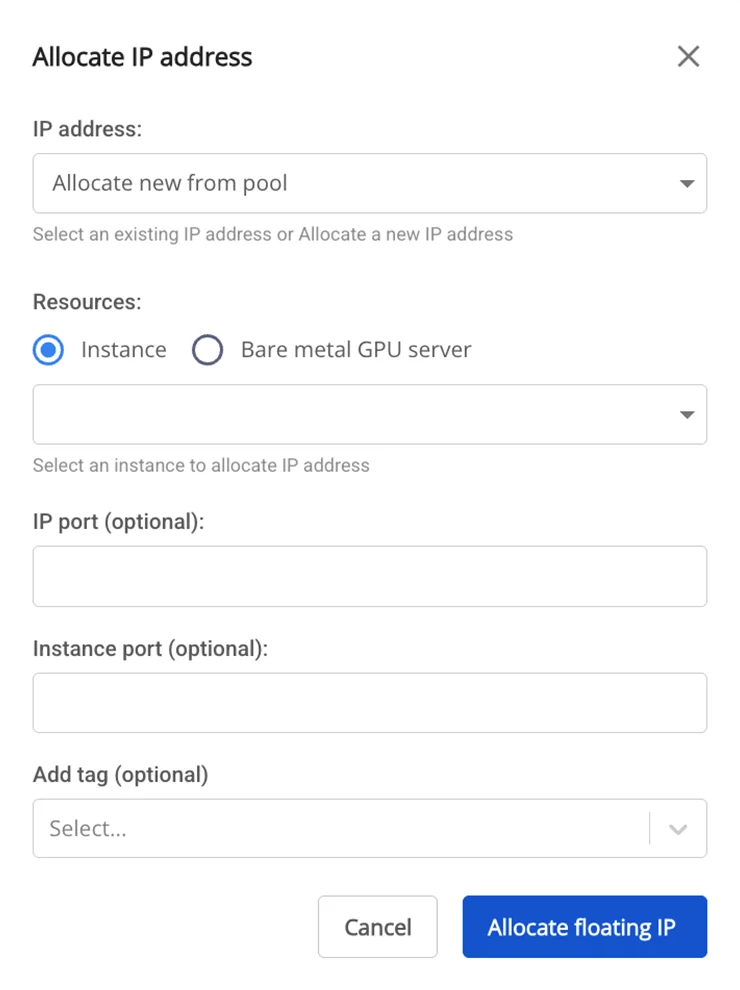
Step 3: Click Allocate floating IP. The system will verify the conditions for allocating the IP and display the result.
If successful, the IP will appear on the Floating IP page.

Note: If the system reports an error due to quota exhaustion, please contact the support team to request additional quota.
Attach a Floating IP to a Server
Step 1: On the Floating IP management panel, under the Action column for the IP you want to attach, select Connect to instance.
Step 2: The Connect to instance popup will appear. Select the virtual machine to associate with this IP in the Instance field.
Step 3: Click Allocate floating IP. The system will process the request and display the result.
If successful, the IP and rule will appear on the Floating IP page.
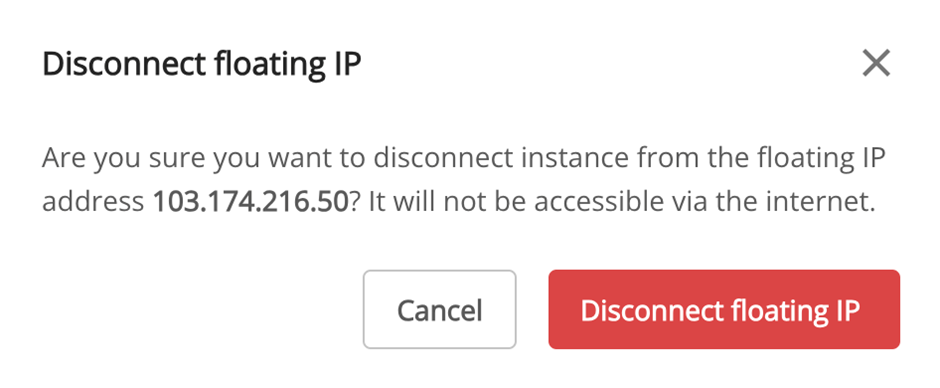
Detach a Floating IP from a Virtual Machine
If you no longer need the IP or want to detach it and attach it to another virtual machine, you can remove the Floating IP as follows:
Step 1: On the Floating IP management panel, under the Actions column for the IP you want to detach, select Disconnect instance.
Step 2: The system will display a confirmation popup. To confirm the detachment, click Disconnect.
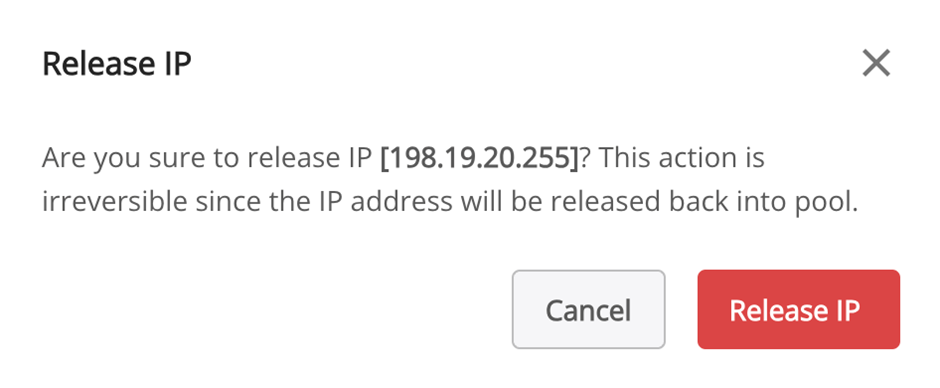
Release a Floating IP from a VPC
To release a Floating IP from a VPC when it is no longer needed, follow these steps:
Step 1: On the Floating IP management panel, under the Action column for the IP you want to release, select Release IP.
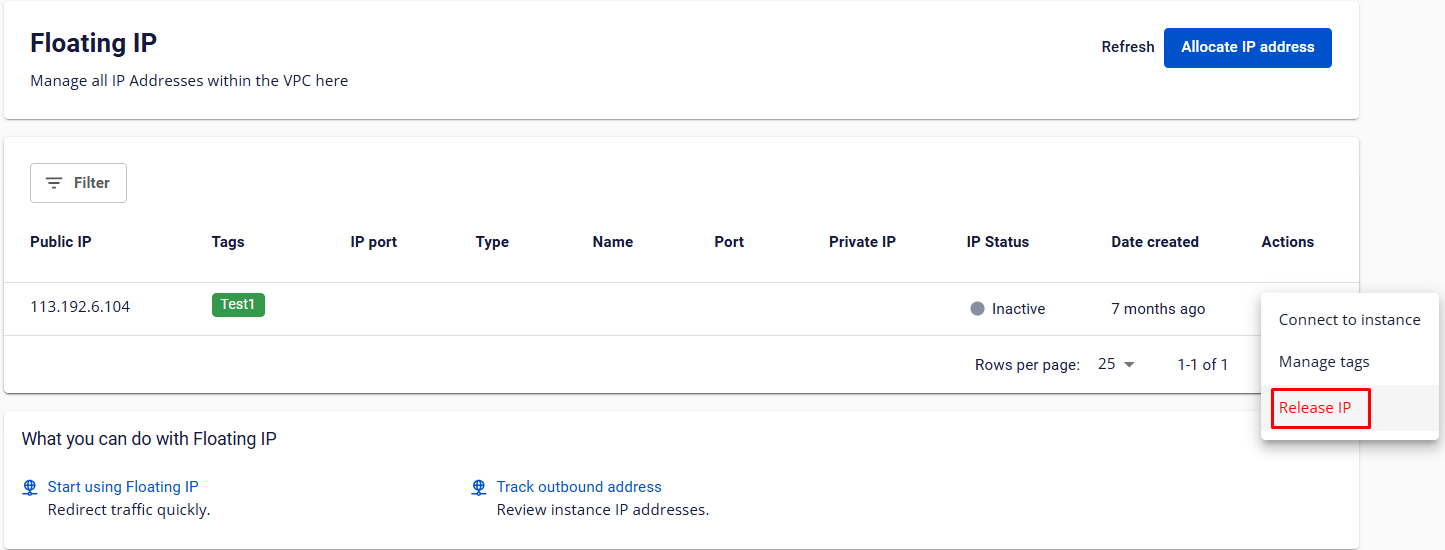
Step 2: The system will display a confirmation popup. To confirm the release, click Release.