Scheduled Automatic Scale
Create Autoscale Schedule
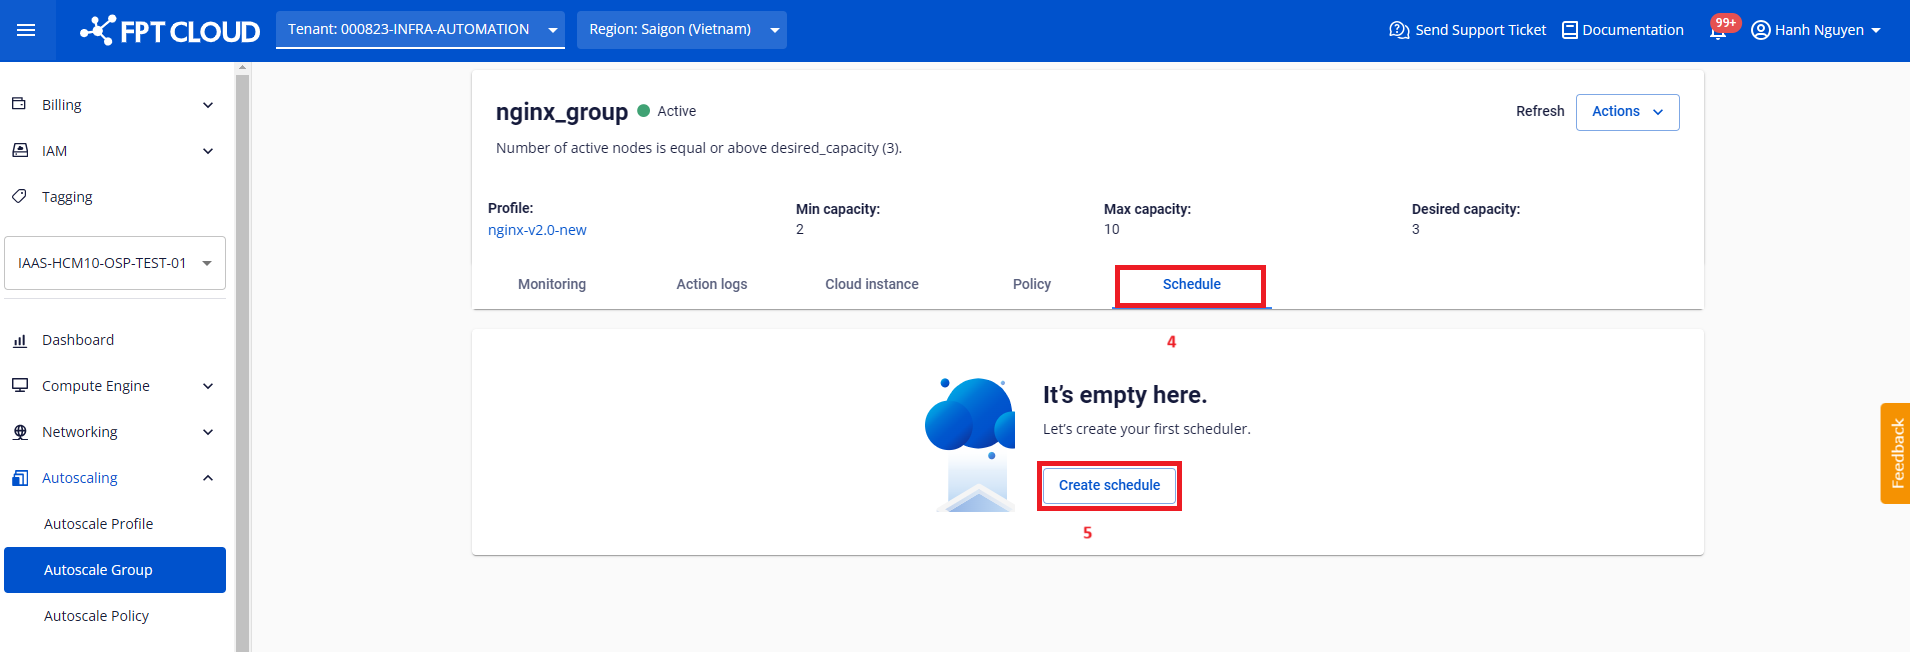
Step 1: Go to Autoscaling > Autoscale Group. Click the name of the group you want to schedule.

Step 2: Navigate to the Schedule tab and click Create schedule.
Step 3: A dialog appears. Configure the following information.
- Schedule name: Enter a schedule name. The name must be 6 to 20 characters and may only contain Latin letters, numbers, and underscores.
- Frequency: The frequency at which the group is resized.
- Desired capacity: The desired number of nodes in the group at the time the schedule executes.
- Min size and Max size: The lower and upper limits of the group.
Case 1: Daily
![]()
- From time: The time of day to resize according to the schedule parameters.
- To time: The time of day the cycle ends and the group resizes back to the original parameters.
- Start date: The date the schedule becomes effective.
- End date: The date the schedule expires.
note
- If Start date is the current date, From time must be later than the current time.
- To time must be at least 30 minutes later than From time.
Case 2: Weekly
![]()
Similar to Daily, with the following additional fields:
- From weekday: The day of the week to resize according to the schedule parameters.
- To weekday: The day of the week the cycle ends and the group resizes back to the original parameters.
Case 3: Monthly
![]()
Similar to Daily, with the following additional fields:
- From date: The day of the month to resize according to the schedule parameters.
- To date: The day of the month the cycle ends and the group resizes back to the original parameters.
note
- Day 31 only occurs in some months.
- February has only 28 or 29 days.
Step 4: Click Create.
The system validates the input and creates the schedule for the Autoscale Group.
![]()
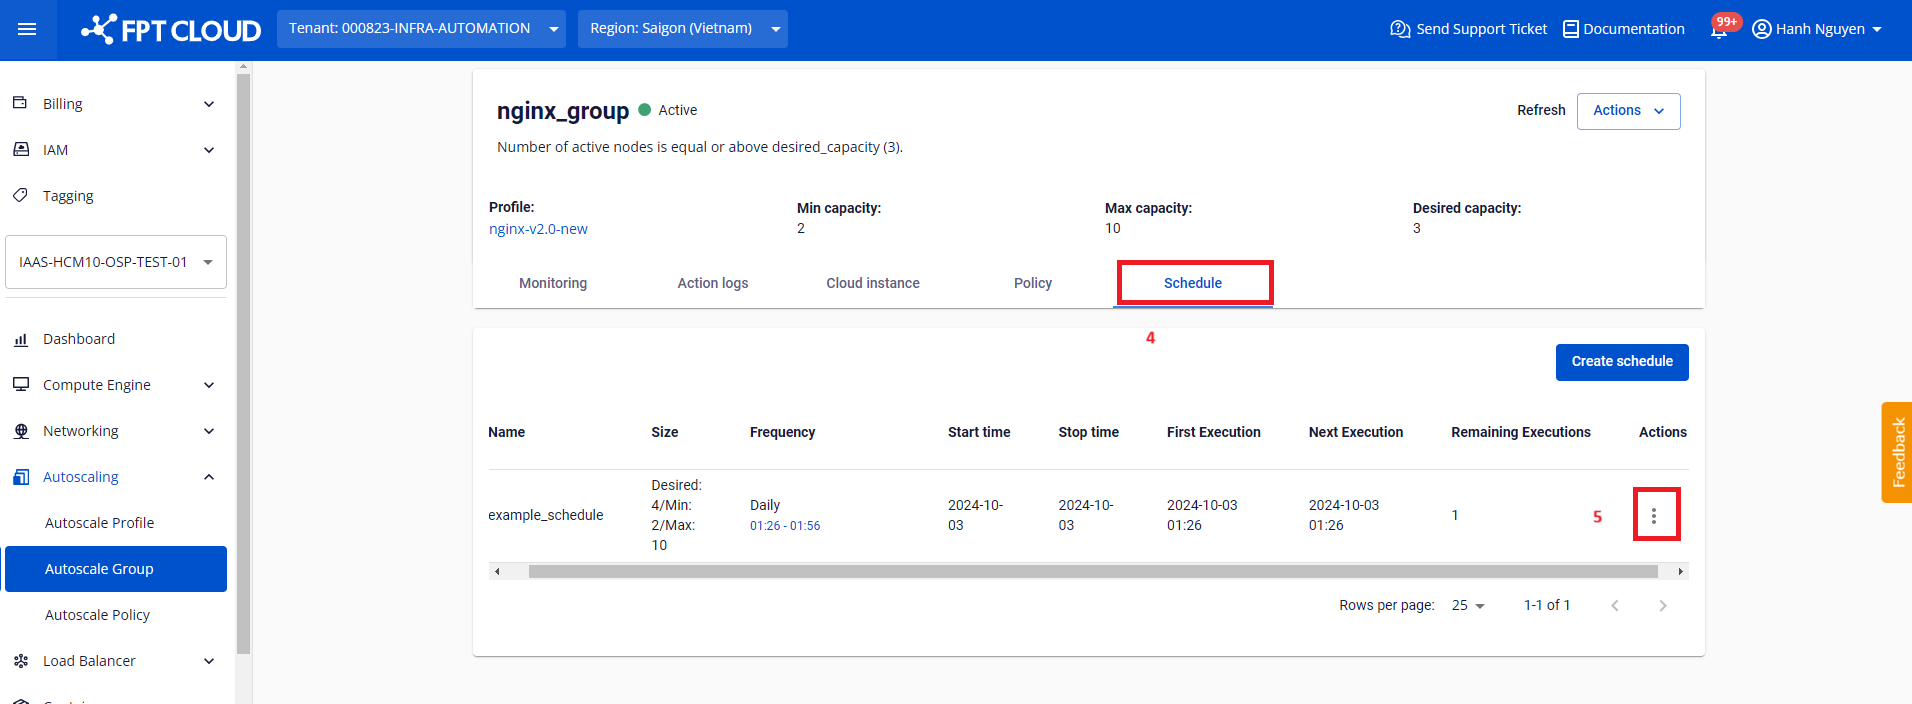
The schedule list displays the following information:
- Name: The schedule name.
- Size: The resize parameters applied to the group when the schedule executes.
- Frequency: The execution frequency of the schedule.
- Start time: The time the schedule becomes effective.
- Stop time: The time the schedule expires.
- First execution: The first time the schedule is executed.
- Next execution: The next time the schedule will execute.
- Remaining executions: The number of executions remaining.
Delete Autoscale Schedule
Step 1: Go to Autoscaling > Autoscale Group. Click the name of the group whose schedule you want to delete.
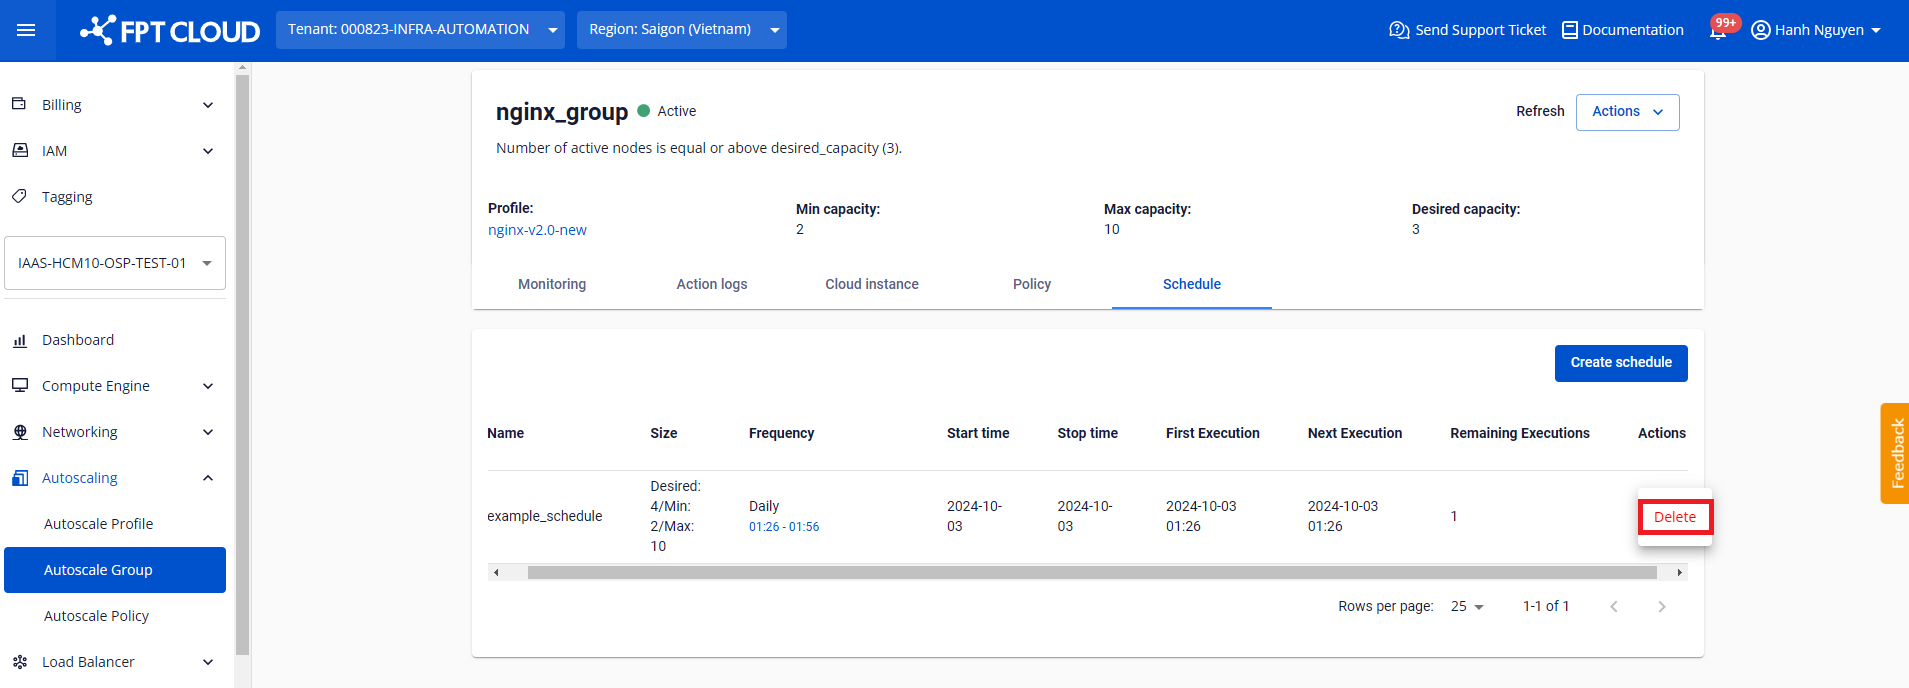
Step 2: Navigate to the Schedule tab. On the row of the schedule to delete, click the Action menu icon.
Step 3: In the menu, select Delete.
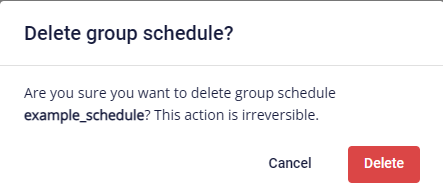
Step 4: A confirmation dialog appears. If the schedule name is correct, click Delete to confirm.
warning
Do not create overlapping schedules with the same start and end execution times within the same group to avoid unexpected conflicts.