Manual Scale
Step 1: Go to Autoscaling > Autoscale Group. On the row of the group you want to adjust, click the Action menu icon.
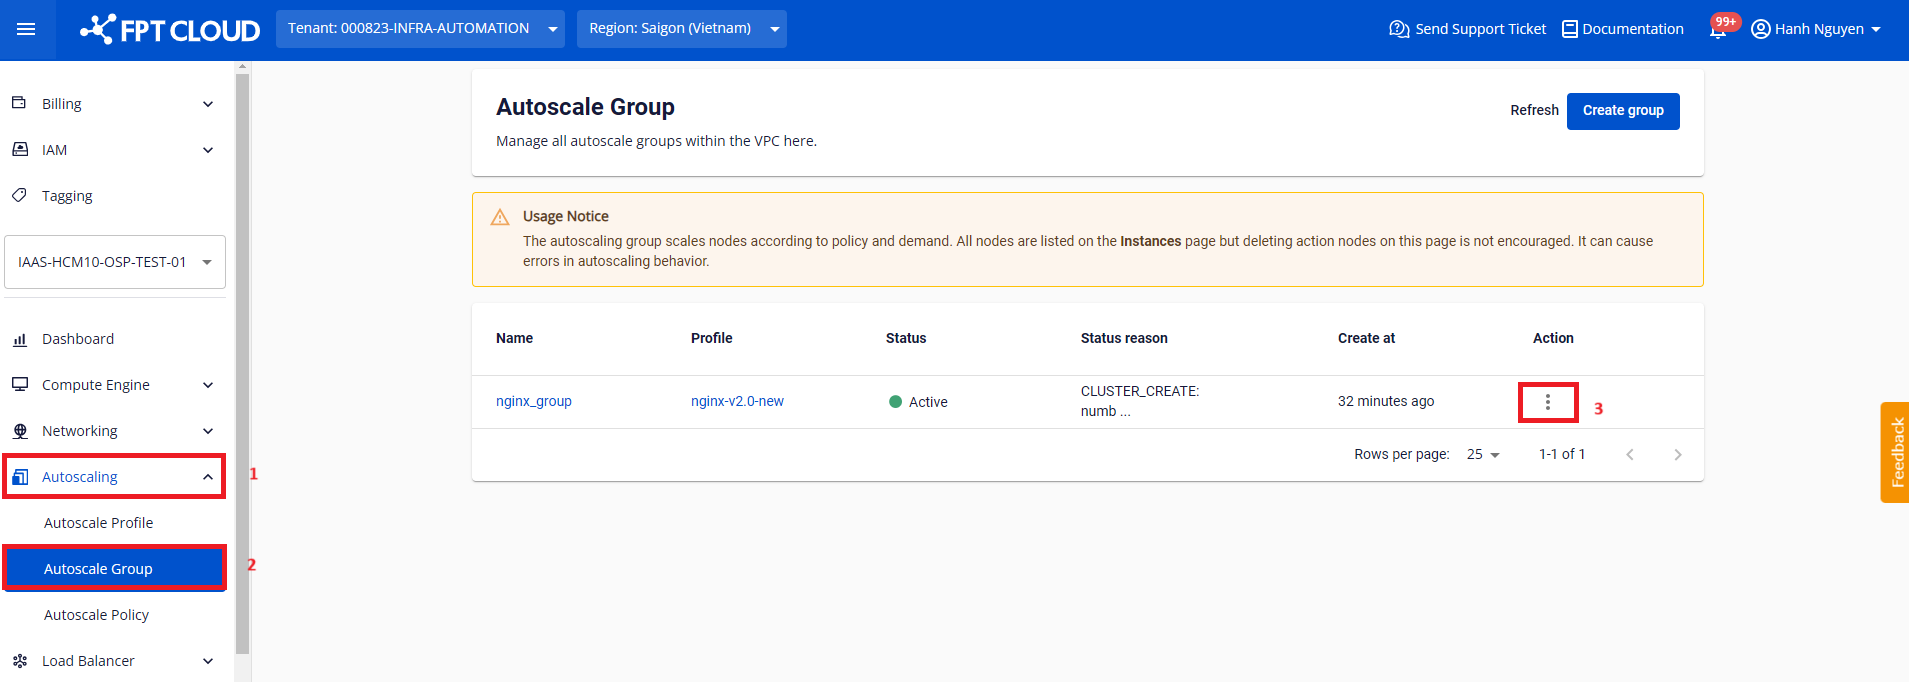
Case 1: Scale in
Step 2: Select Scale in.
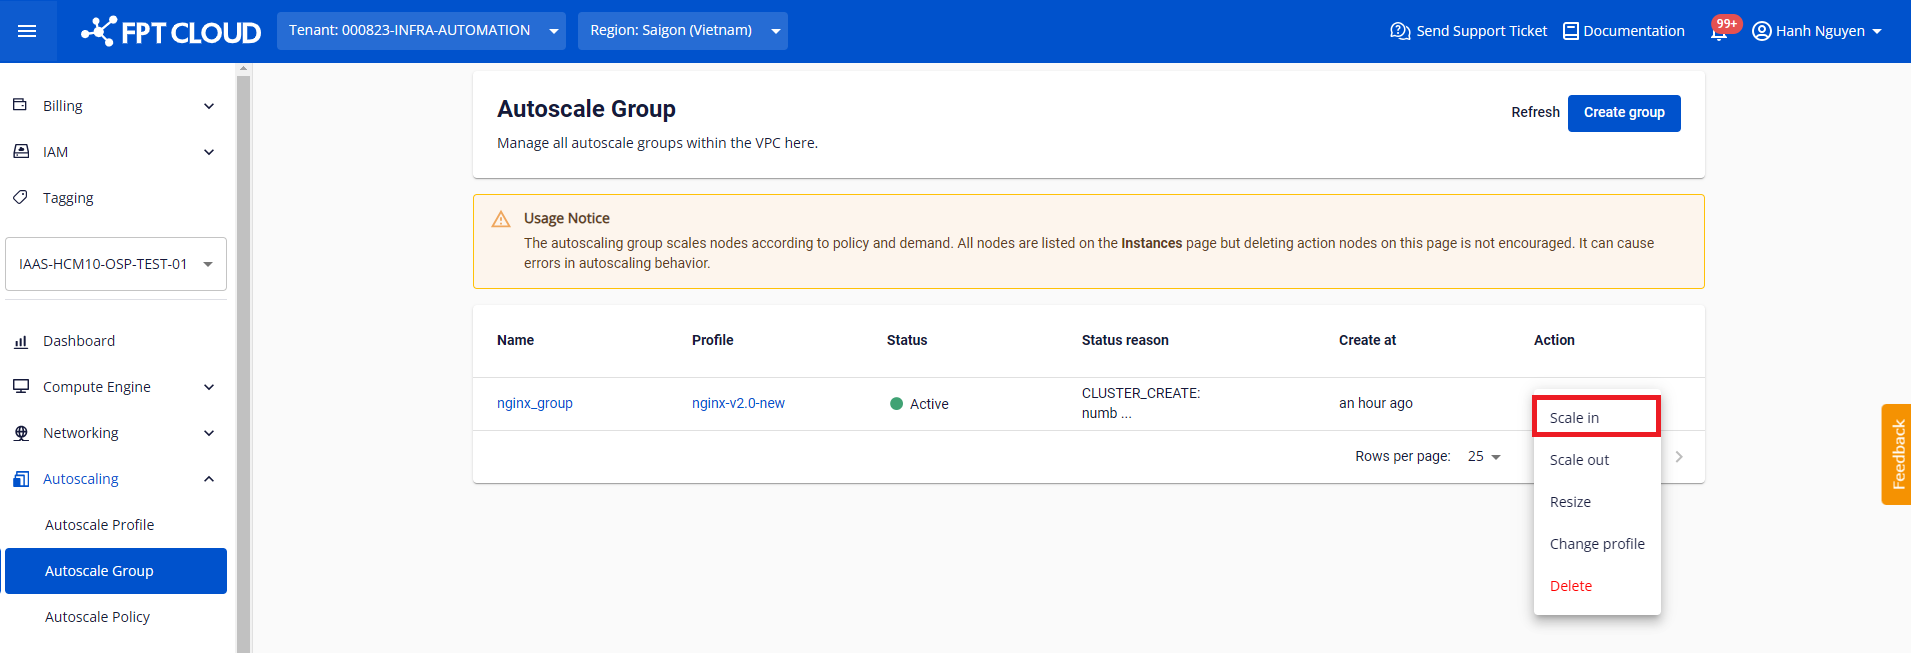
Step 3: A dialog appears. Configure the parameters and click Scale in.
![]()
- Count: The number of nodes to remove.
Case 2: Scale out
Step 2: Select Scale out.

Step 3: A dialog appears. Configure the parameters and click Scale out.
![]()
- Count: The number of nodes to add.
Case 3: Resize
Step 2: Select Resize.
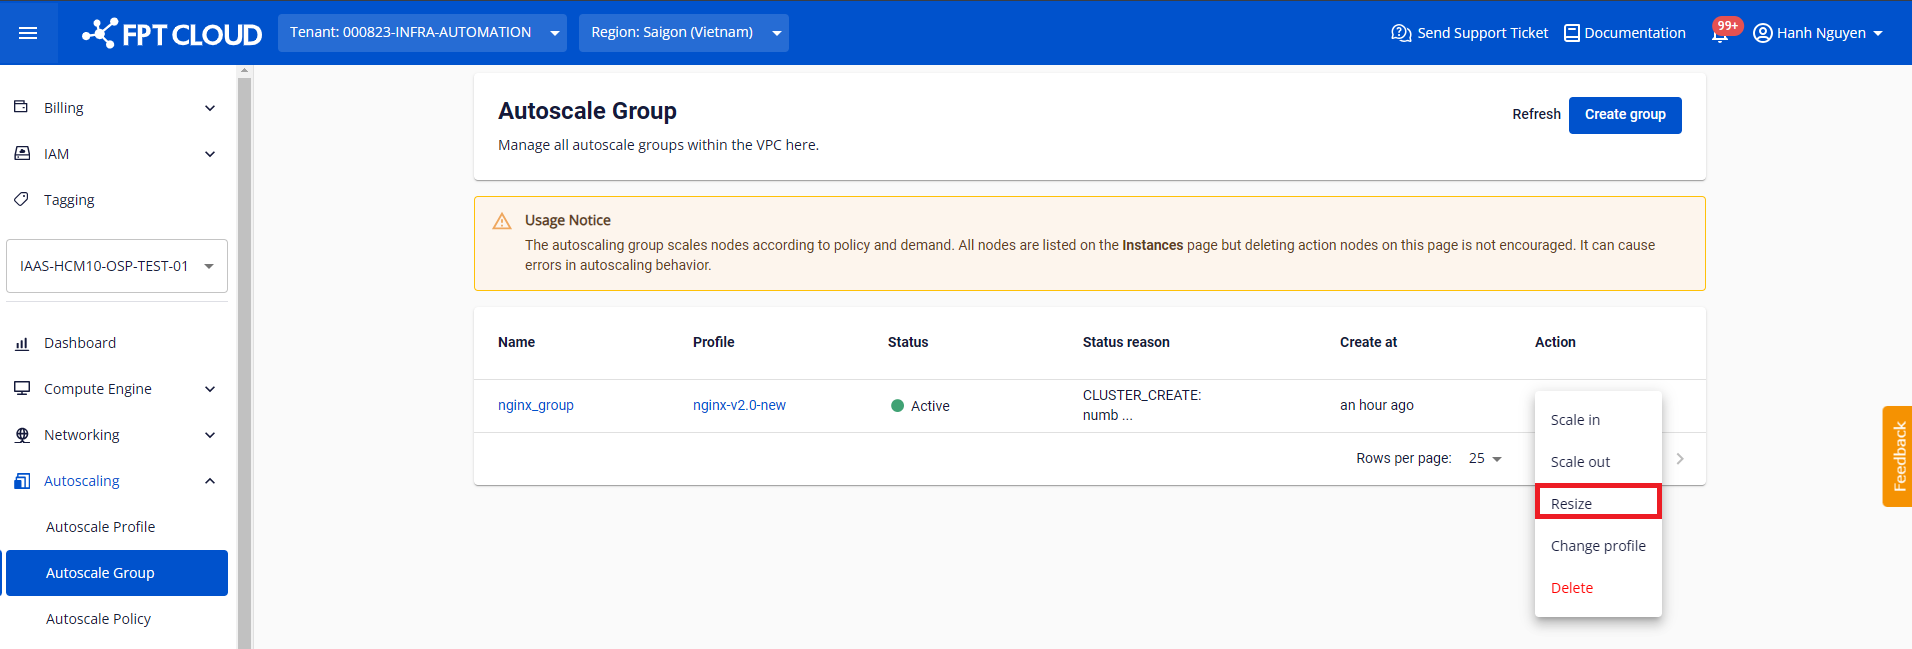
Step 3: A dialog appears. Configure the parameters and click Resize.
![]()
- Change type: The adjustment method for the group.
- Number: The value whose meaning differs depending on the selected Change type:
- Exact capacity: Enter the new capacity (positive integer). After adjustment, the number of nodes in the group equals exactly this value.
- Change in capacity: Enter the number of nodes to add (positive integer) or remove (negative integer). The node count after adjustment equals the current capacity plus or minus the absolute value of Number.
- Change in percentage: Enter the percentage (%) to add (positive decimal) or remove (negative decimal) based on the current capacity. Example: if the current capacity is 4 nodes and Number is 50%, 2 new nodes are added, giving a total of 6.
- Min size and Max size: Resize allows simultaneous adjustment of the group's lower and upper limits.
The system validates the input and performs the resize if valid. After success, the group status changes from Resizing to Active.