Pfsenseデバイスの接続
この記事では、FPT Smart CloudのVPN Site-to-SiteサービスにVPN_S2S接続するPfsenseデバイスの構築方法を説明します。
- ステップ1: Cloud向けPfsenseの構築/
- ステップ2: VPN Site-to-Siteの設定/
- ステップ3: Pfsenseの設定/
以下の条件を確認してください:
- PortalページのVPNAAS
- Pfsense という名前でクラウド上にダウンロード・ブートされたPfsenseイメージ
- パブリックIP(簡略化のためFloating IPを使用せず、VMに直接アタッチ)
- 対応するネットワーク範囲
- デバッグ用のVPNサーバー×2台(2c4g)
ステップ1: Cloud向けPfsenseの構築
- HorizonでPfsenseイメージからVMを構築(2C4G、パブリックIP直結×1、VPN対象ローカルネットワークIP×1)
- SSH経由でVMコンソールにアクセス可能
ステップ2: VPN Site-to-Siteの設定
https://console.fptcloud.com/ にアクセスしてVPN Site-to-Siteを作成します。
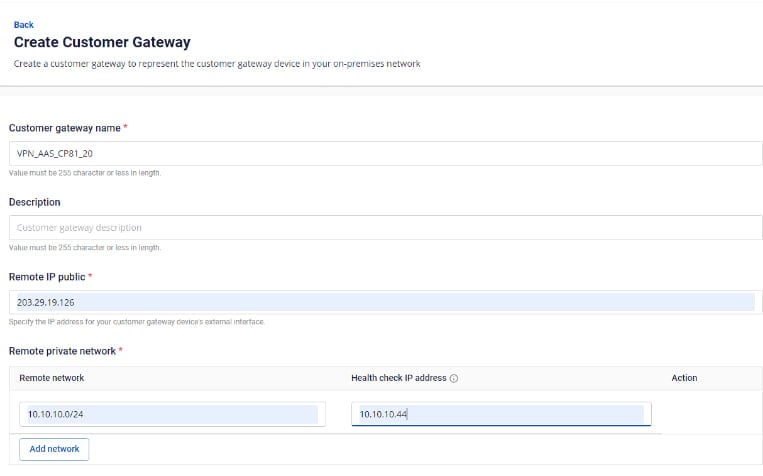
Customer Gatewayの作成:
- Remote private network: PfsenseのLAN Subnetの範囲
- Remote IP public: PfsenseのパブリックIP
VPN Connectionの作成: VPN Connectionのパラメーターには3つの主要セクションがあります:
- General information(VPN接続の基本情報)
- Remote VPN Information(暗号化情報およびお客様情報)
- Dead Peer Detection(問題発生時の自動リトライ回数)
セクション1: General information  注意: Pre-shared-keyパラメーターはPalo Altoとの接続に必要なため保存しておいてください。
セクション2: Remote VPN information 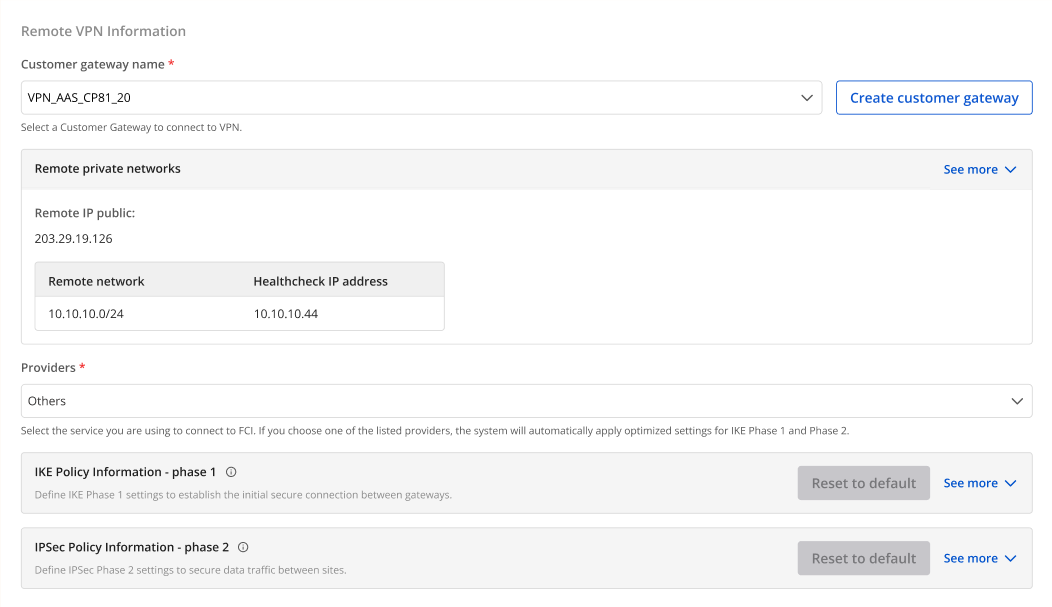 Providers = "others" を選択し、以下の手順に従ってください:
- ステップ1: providers name = "pfsense" を入力
- ステップ2: IKEおよびIPSecの情報を以下のとおり入力:
IKEの設定:
- Authorization algorithm: sha256
- Encryption algorithm: aes 256
- IKE version: ikev2
- DH group: group14
- Lifetime: 3600 seconds
- Phase1 negotiation mode: main
IPsecの設定:
- Authorization algorithm: sha256
- Encryption algorithm: aes 256
- Encapsulation mode: tunnel
- Transform protocol: esp
- Perfect Forward Secrecy (PFS): group14
- Lifetime: 3600 seconds
セクション3: Remote VPN information 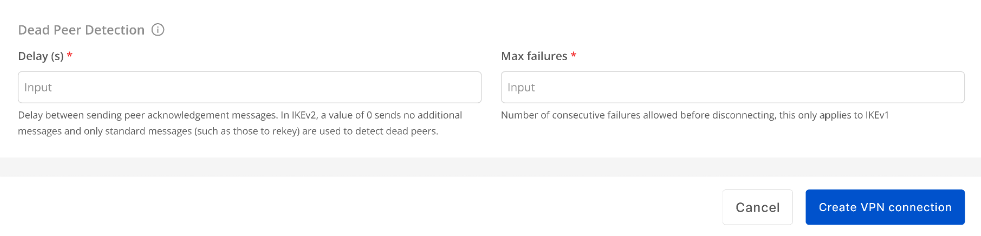 DelayとMax failureのパラメーターを入力し、Create VPN Connection を選択します。
ステップ3: Pfsenseの設定
- 作成したアカウントでCheckpoint VMのVNCコンソールにログインし、「Cpstart」コマンドを実行します。
- IPアドレス https://{IP} でウェブサイトにログインします。次のようなSSL警告が表示される場合があります: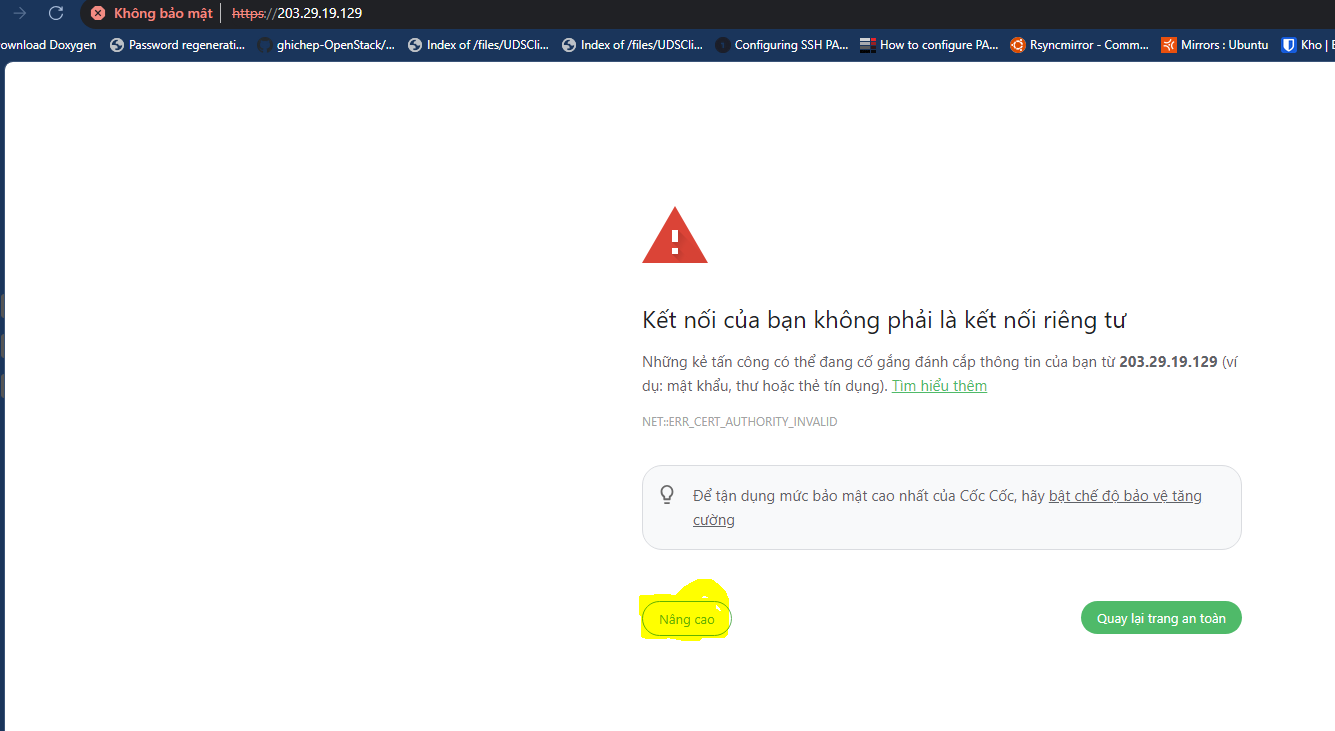
- デフォルトのログイン情報:
User: Admin Pass: Pfsense(初回ウェブログイン時にパスワードを変更できます)
- Interfaces → LAN タブでLANがない場合はLANを追加してください:
 - Pfsenseのトンネル設定を行います:
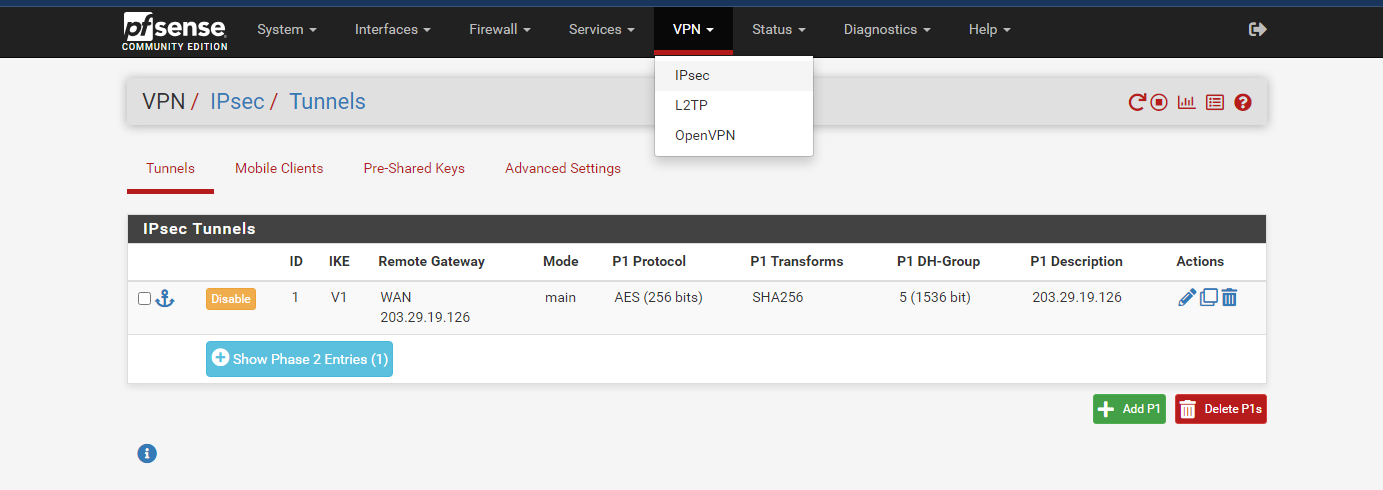 VPNタブで IPsec → Tunnels を選択し、Add P1をクリックします。
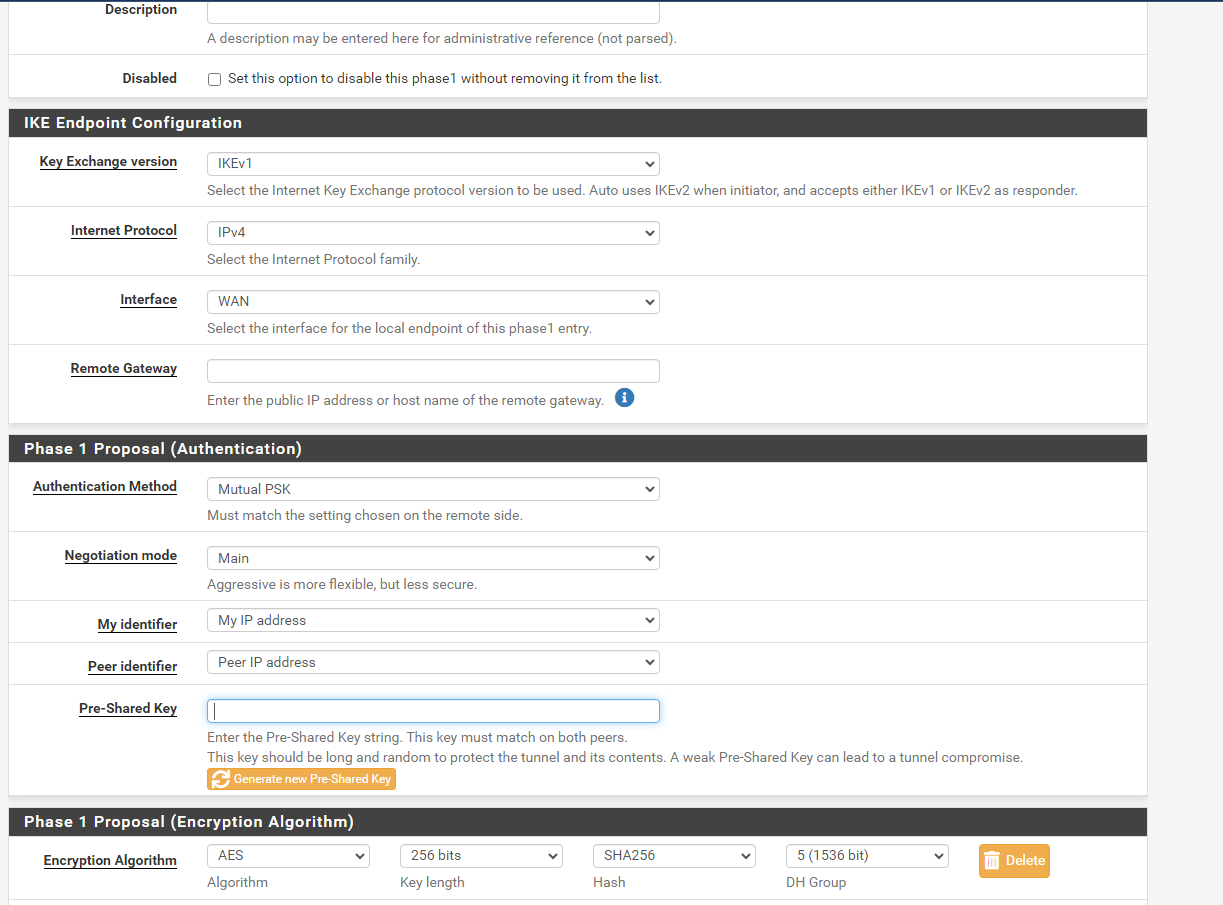
- Phase 1を以下のように設定します:


注意: + Pre-Shared Key: 事前にポータルで作成したVPNAASのキーを入力
- Remote Gateway: 事前にポータルで作成したVPNAASのパブリックIP

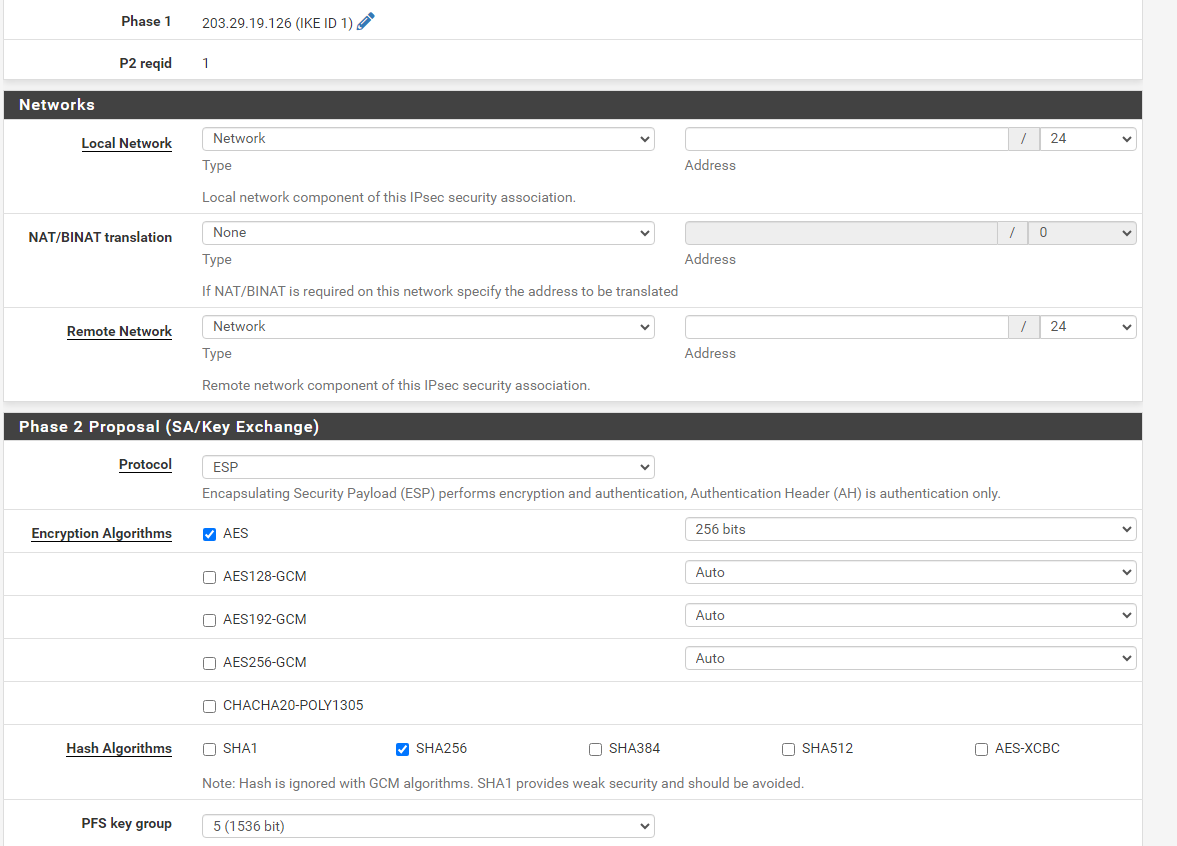
- Phase 2を以下のように設定します:

- Phase 2を以下のように設定します:
以上でターミナルのコマンドラインからネットワークのPingテストを実行できます。