Create a New Kubernetes Cluster
Create a New Kubernetes Cluster
Note: The following prerequisites are required before performing this operation:
- CPU, RAM, Storage, and Instance quota must be sufficient for the desired cluster configuration.
- 1 Public IP Available: Used for the Kubernetes API and Ingress.
- 1 VM Network: The network used for Kubernetes Nodes. A Subnet with a Static IP Pool must be created beforehand — see the guide here.
Step 1: From the menu, select Kubernetes > Click Create.
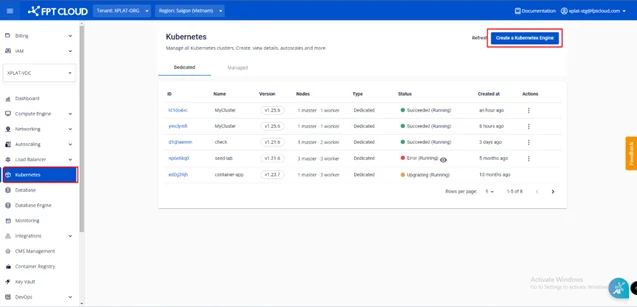
Step 2: Enter a name and select the cluster version, then click Next:

- Name: Enter the cluster name.
- Version: Select the cluster version.
Step 3: Configure Node Pools as needed, then click Next.
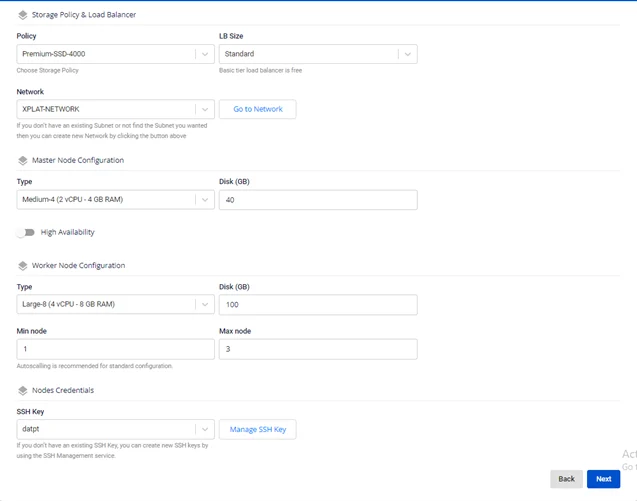
Storage Policy & Load Balancer:
-
Policy: Select the Storage Policy used for the disks of VMs in the Kubernetes Cluster.
-
LB Size: Load Balancer configuration.
-
Standard: Max 2000 CCU, 4000 http req/s, bandwidth 100Mbps.
-
Advanced: Max 4000 CCU, 8000 http req/s, bandwidth 100Mbps.
-
Premium: Max 8000 CCU, 16000 http req/s, bandwidth 100Mbps.
Master Node Configuration:
-
Type: Select the configuration (CPU & Memory) for the Master Node.
-
Disk (GB): Select the root disk size for the Master Node.
-
High Availability:
-
Disable: Quantity (1) — the number of Master Node VM instances for the k8s cluster is 1.
-
Enable: Quantity (3) — the number of Master Node VM instances for the K8s cluster is 3.
Worker Node Configuration:
-
Type: Select the configuration (CPU & Memory) for Worker Nodes.
-
Disk (GB): Select the root disk size for Worker Nodes.
-
Quantity: Number of Worker Nodes for the K8s cluster.
-
Autoscale: Enable/disable the autoscale feature for the cluster. If enabled, enter the Scale Min (minimum number of nodes when scaling down) and Scale Max (maximum number of nodes when scaling up) values.
Nodes Credentials:
- SSH Key: The key used to log in to Node VMs (root user). If you do not have one yet, you can create it by following the guide here.
Step 4: Configure advanced settings for the cluster, then click Next.
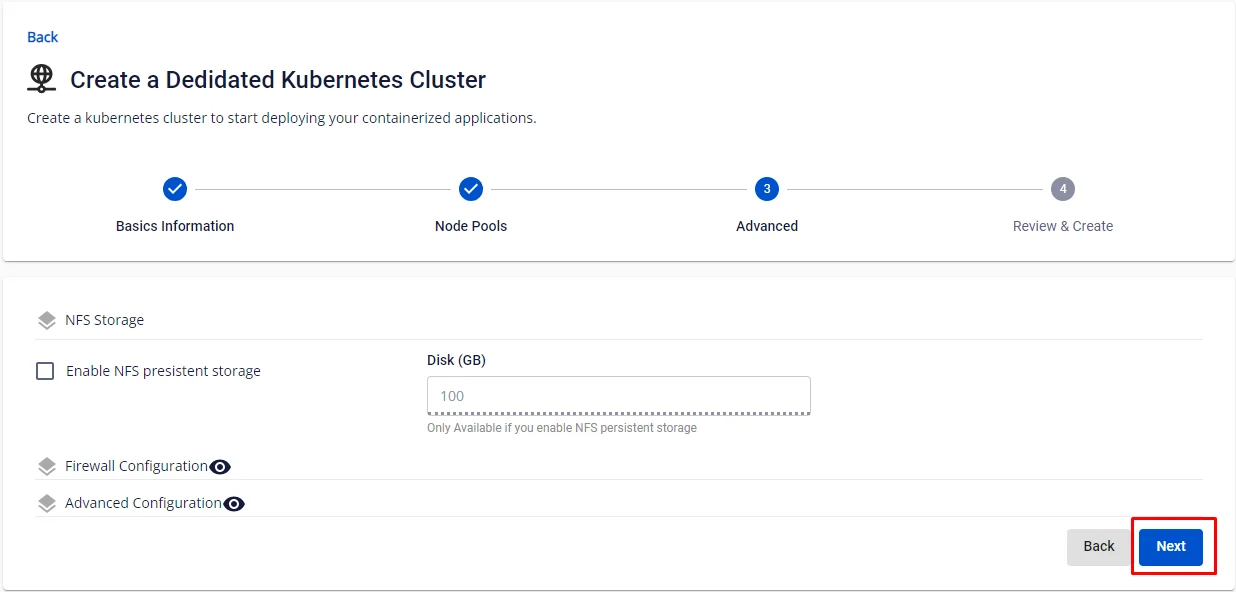
NFS Storage:
-
Check box Enable NFS Persistent Storage: Select to deploy NFS Persistent Storage together with the Kubernetes Cluster.
-
Disk (GB): Capacity of the NFS Storage. Size appropriately — disk capacity changes must be performed manually by the user.
-
Firewall Configuration: Settings for advanced users — click the icon to expand. If you are not familiar with these parameters, leave them as default.
-
Check box Enable Firewall: Select to configure Edge IP, Public IP, and Private IP together with the Kubernetes Cluster.
-
Advance Config: Settings for advanced users — click the icon to expand. If you are not familiar with these parameters, leave them as default.
-
Pod Network: Network used for Pods in the cluster.
-
Service Network: Network used for Services in the cluster.
-
Network Node Prefix: Subnet prefix for Pods on each Node.
-
Max Pod per Node: Maximum number of Pods per Kubernetes Node.
-
Nodes DNS: DNS used for Nodes and the Kubernetes Cluster. Enter the desired DNS to use your own internal DNS system.
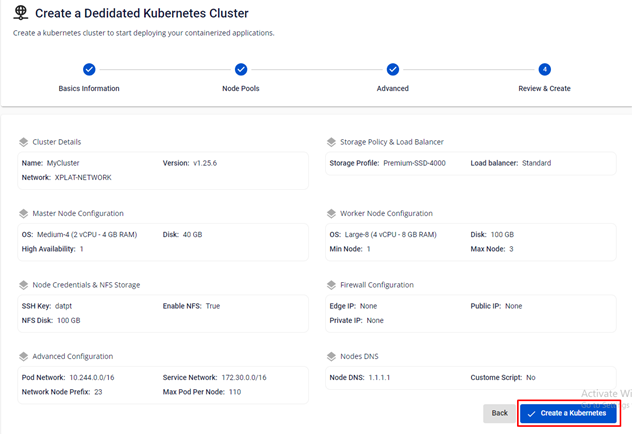
Step 5: Click Next. The system will display a confirmation screen showing all entered information. Review the configuration and proceed to initialize the Kubernetes Cluster based on the selected configuration.

Step 6: Click Create a Kubernetes. The system will confirm, validate resources, and begin provisioning the Kubernetes Cluster based on the selected configuration.