Role management
Role is a core component of the IAM module on FPT Cloud Portal. The Role management feature allows system administrators to define and assign roles with specific sets of access permissions to users when using the FPT Database Engine service. Using roles helps strengthen security through fine-grained access control, apply the principle of least privilege, and support separation of duties according to specific needs and operating models. The steps below provide detailed instructions for creating a new Role and assigning the corresponding permissions to that role.
Step 1: Access the Role management page
Sign in to FPT Cloud Portal. After successfully signing in, from the main menu, select IAM > Roles. The Role Management interface will display the list of existing roles, along with options to create, edit, or delete a role.
Step 2: Create a new role
On the Role Management page, click Create role. The new role creation screen displays as follows:
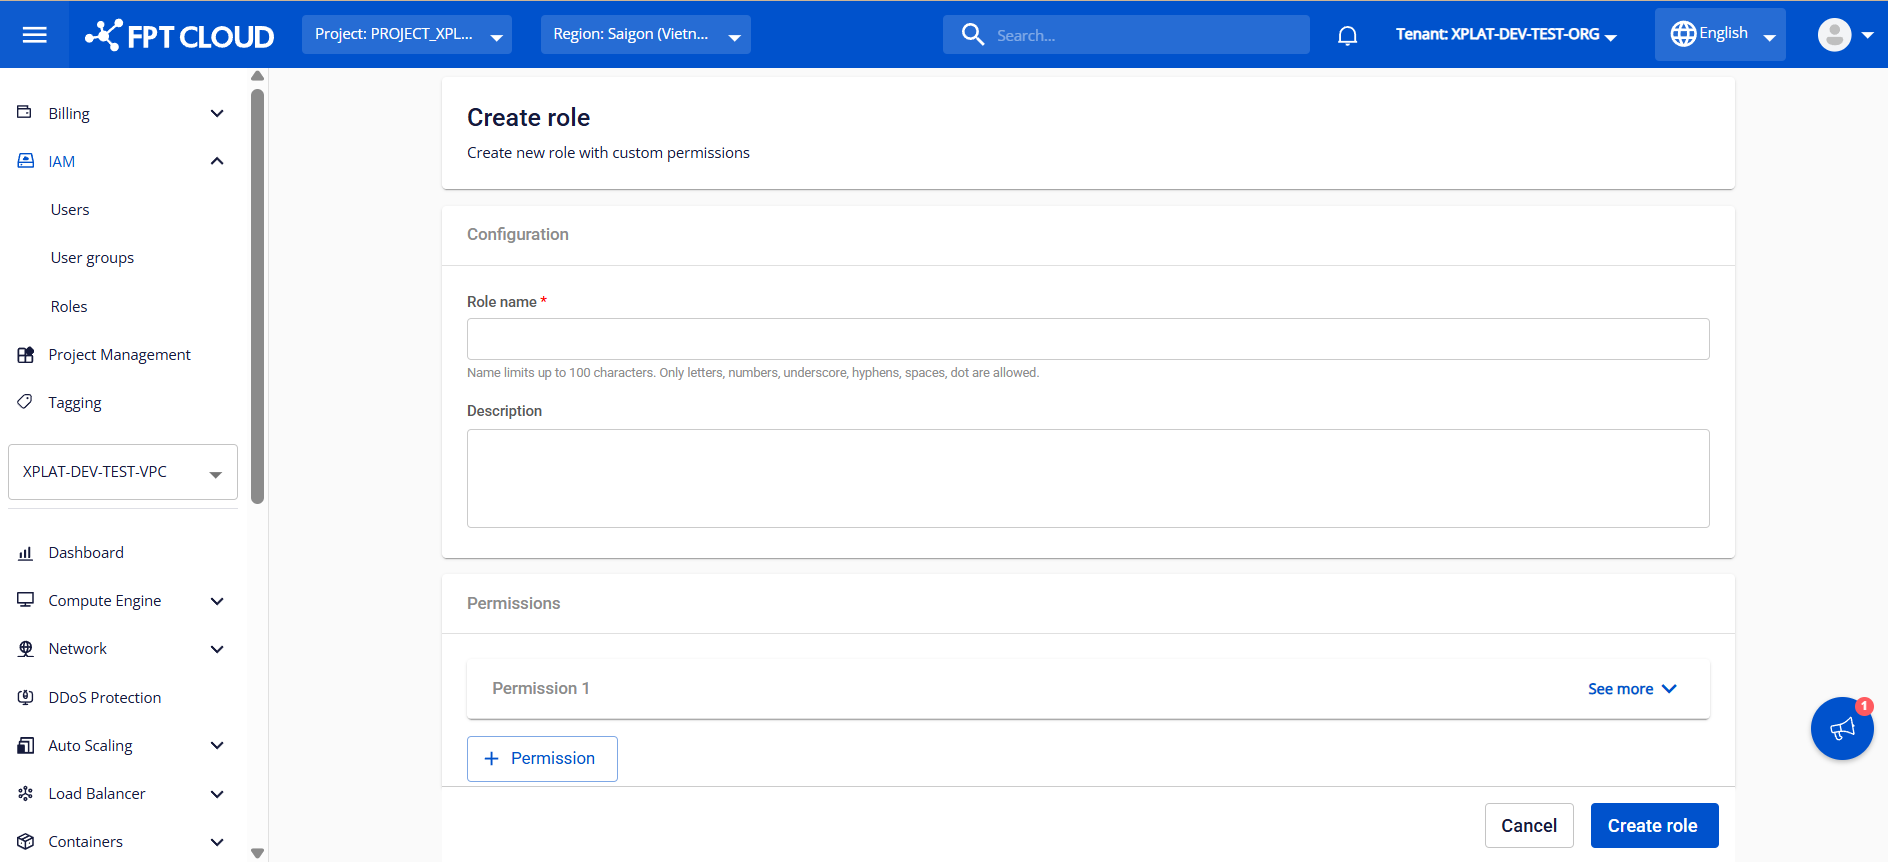
Enter the basic information:
- Role name : The name used to identify the role in the IAM system, up to 100 characters long, including the following characters: letters, digits, underscores (_), hyphens (-), spaces, and dots (.). Required.
- Description : Describes the purpose, permission scope, or user group to which the role applies. This field makes administration and auditing clearer.
- Permissions : The list of permissions assigned to the Role.
- Permission 1 : Displays a permission that has been added to the role. Click See more to view permission details and edit the permission configuration.
- + Permission : Click this button to add a new permission to the role. You can select permissions by function. For details on configuring a Permission, see Step 3.
Step 3: Configure permissions for the role
Click See more to display the information required for a permission:
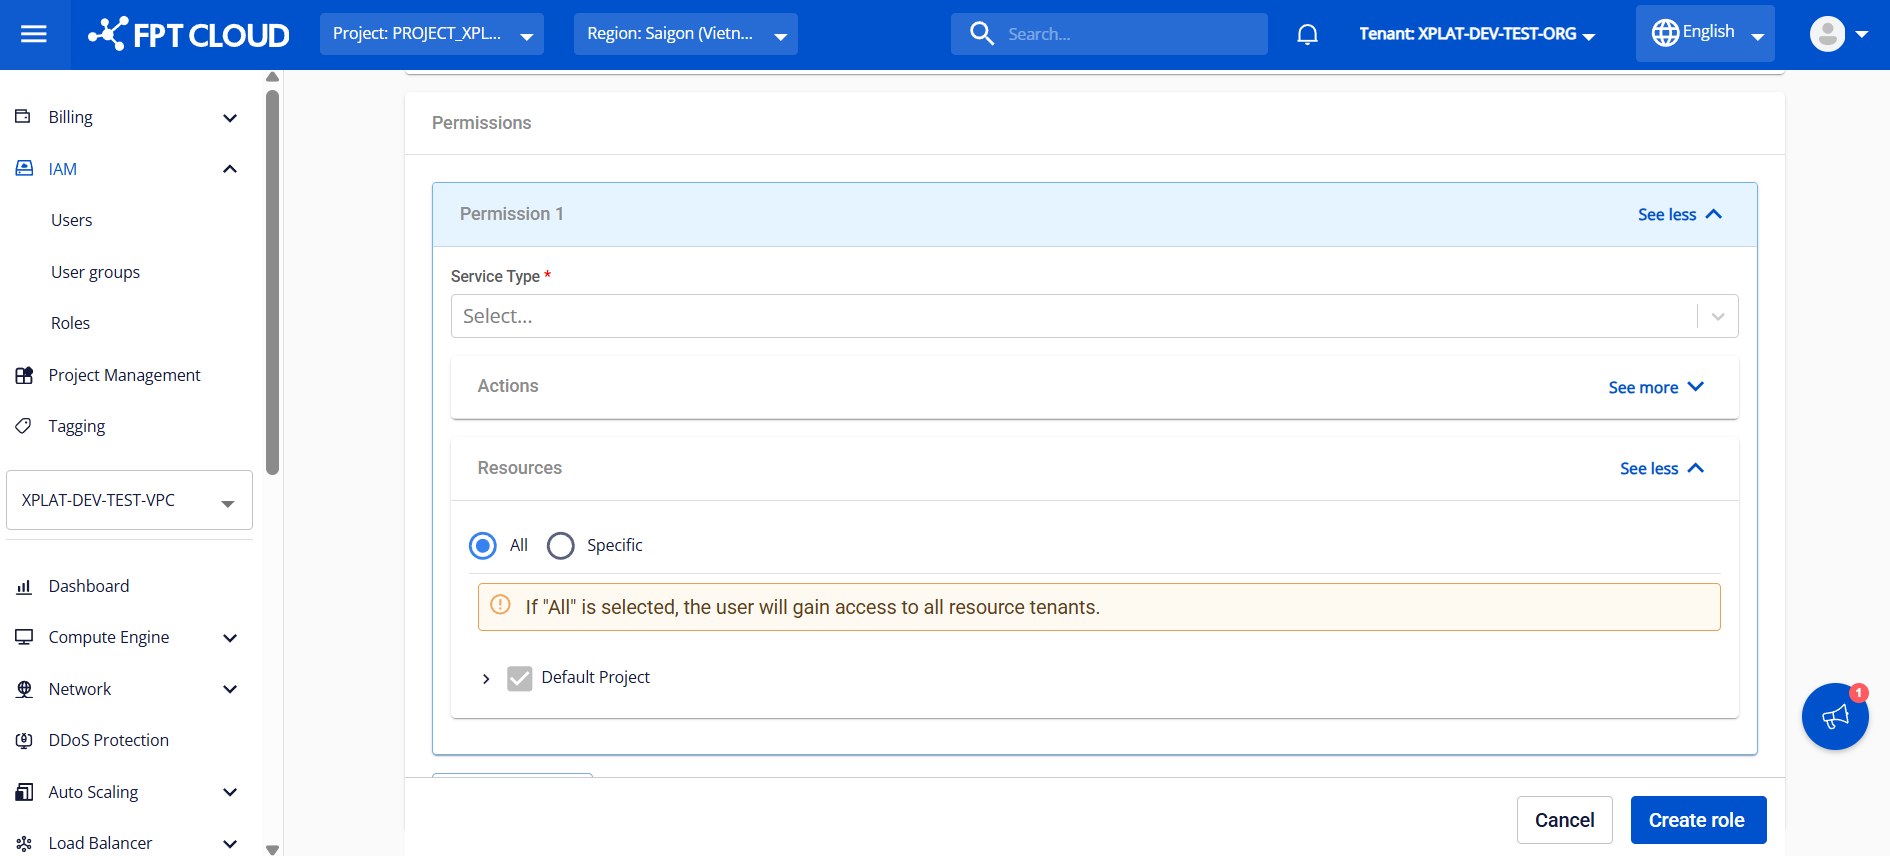
- Service Type : Select the service type corresponding to the permissions or tasks you want to assign. The FPT Database Engine service uses 2 main service types: "ManageDatabase" and "FDE".
- ManageDatabase : Provides permissions for standard database management operations, including viewing information, provisioning, operating databases, and managing add-on services.
- FDE : Provides permissions for sensitive operations related to the database, such as viewing or managing the password information of the database administrator account. After you select a service type, the system automatically displays all the corresponding actions in the Action section and updates the permission name according to the selected service type.
- Action : Defines the actions the role is allowed to perform. Click See more to view and select the actions assigned to the role. Actions that are not selected will not be granted and will be blocked by the system.
- Resource : Defines the resources the role is allowed to access. Click See more to view and select the resources assigned to the role. Resources that are not selected will not be granted and will be blocked by the system. There are 2 options:
- All : Allows access to all resources. When this option is selected, the system by default grants the role access to all resources.
- Specific : Grants access by specific resources selected in the list. Note : With this option, when granting the permission to block viewing of the administrator account password (Service Type "FDE" and action "FDE:hide_admin_password"), you need to select the databases to block in the Select resource field. Only the selected databases will be restricted from viewing the password; databases not selected will allow password viewing.

After entering all the information, click Create role to complete the role creation process. After successful creation, the new role will appear in the management list with Active status and will be ready to be granted to users. For permission assignment instructions, please refer to the User Group management/ section. When necessary, you can perform the following operations on a created role:
- Edit role : This function allows you to modify the role's name, description, and permissions when there are changes to access requirements or security policies. To use this function, on the Role Management page, select the Edit role action corresponding to the role to be edited. Make the changes and click Save to save them.
- Delete role : This function allows you to delete roles that are no longer in use, keeping the access permission management system tidy and accurate. On the Role Management page, select Delete corresponding to the role to be deleted. Confirm the action in the warning dialog to complete. Note : Deleting a role will affect the access rights of users and user groups that are assigned that role. After the role is deleted, the related permissions will be revoked immediately, which may cause disruptions in managing and operating cloud and DBaaS resources. Make sure this role is no longer assigned to any User Group or User before deleting.