Configure build nodes on Jenkins
The FPT Cloud Portal currently only supports creating Cloud-type Jenkins agents. To add a self-managed agent (Node type), follow the steps below.
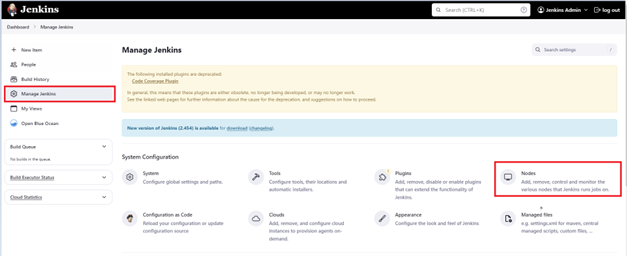
Add a Node agent
Step 1: Prepare a VM to act as a Jenkins agent.
A Jenkins agent can run on the following operating systems: Windows, Linux (Ubuntu, CentOS, etc.).
Install Java on the VM to connect to Jenkins:
For Linux (Ubuntu):
sudo apt update
sudo apt install openjdk-11-jdk
Verify the installed Java version:
java -version

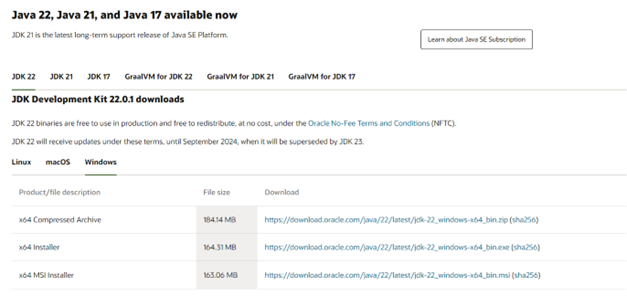
For Windows: Download the appropriate Java version from https://www.oracle.com/java/technologies/downloads/, install it, configure JAVA_PATH in the environment variables, and verify the version.
Step 2: Log in to the Jenkins instance using the username and password from the Portal.
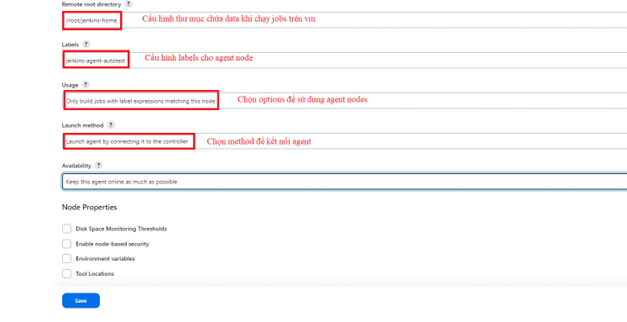
Step 3: Create a new Node as follows.
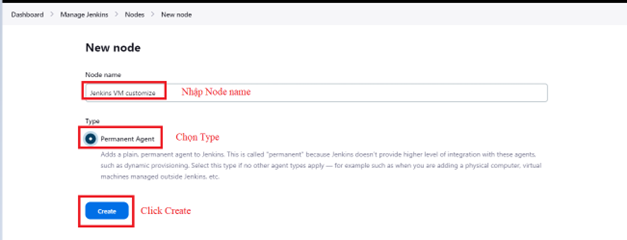
Continue configuring the node details:
Step 4: After creating the node, retrieve the connection information.
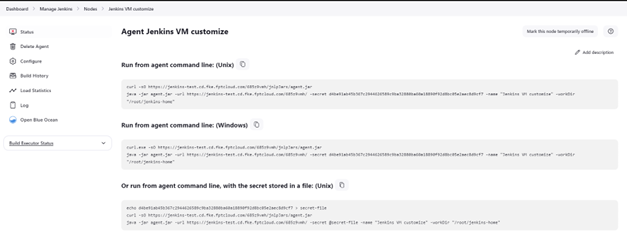
Agent connection details:
Step 5: Modify the connection command.
FPT Cloud uses WebSocket to connect Jenkins agents. Add the -webSocket option to the connection command:
Example:
curl -sO https://jenkins-test.cd.fke.fptcloud.com/685z9vmh/jnlpJars/agent.jar
java -jar agent.jar -url https://jenkins-test.cd.fke.fptcloud.com/685z9vmh/ \
  -secret secretData -name "Jenkins VM customize" -webSocket -workDir "/root/jenkins-home"
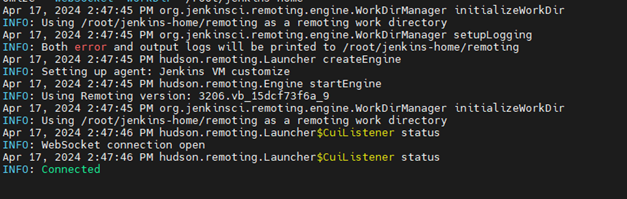
Step 6: Verify the connection.
Agent connection logs:
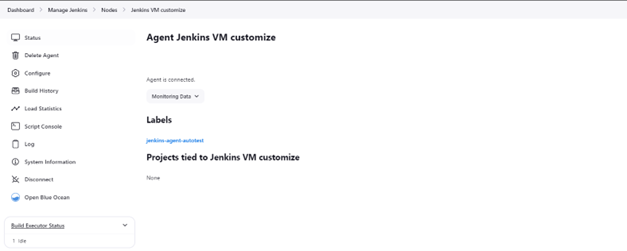
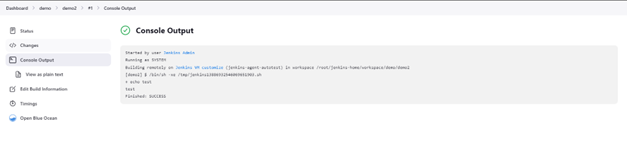
Result in Jenkins after connecting, and a job run using the agent: