Create a report
To create a report, follow these steps:
-
Go to Home > Apps > Reporting > Create a new report.
-
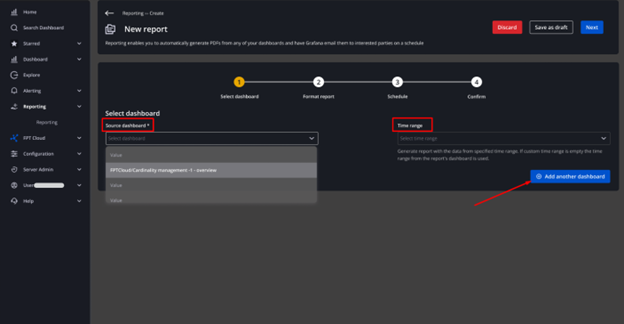
Fill in the Select Dashboard section:
- Select a Source dashboard (required).
- Select a Time Range (optional): the time range from which the report will pull data.
 note
noteTo add more dashboards, click Add another dashboard.
-
Click the Next button.
-
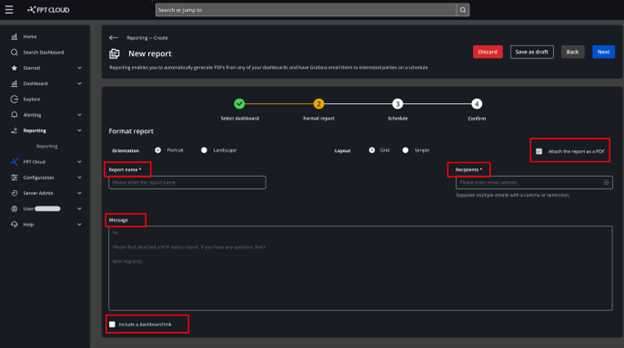
Fill in the Format report section:
- Report name (required): Enter the report name.
- Recipients (required): Enter the email addresses to send the report to.
- Message (optional): Enter the report body text.
noteThe Orientation and Layout fields default to Portrait and Grid respectively.
-
Click the Next button.
-
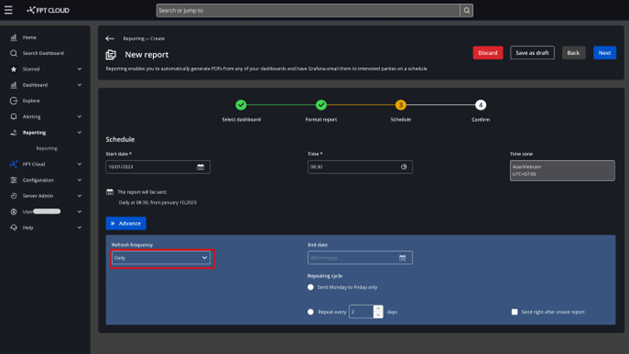
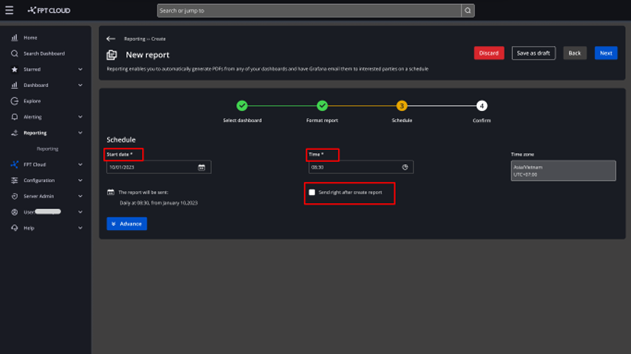
Fill in the Schedule section:
- Start Date (required): The date to start sending the report.
- Time (required): The time to send the report.
- Time zone: Defaults to (GMT+7:00) Vietnam.
- Send right after create report checkbox: Unchecked by default. If checked, the report is sent immediately after creation.
noteIf you do not configure advanced settings, the system will automatically send the report daily according to the schedule you set.
The report scheduling feature lets you set a recurring schedule so reports are created and sent automatically, saving time compared to manual sending. You can customize frequency by hour, day, week, or month.
To use advanced scheduling, click Advanced and fill in:
- Refresh Frequency: How often to send the report — Once, Hourly, Daily, Weekly, or Monthly.
- End date: When to stop sending the report.
- Repeating Cycle: The repeat cycle for sending.
- Repeat every … days: How many days between each send.
- Send right after create report checkbox: If checked, the system sends one report immediately upon creation (outside the configured schedule).
Case 1: Daily

- Set Refresh Frequency to Daily.
- Enter an End date.
- Set the Repeating Cycle:
- Send from Monday to Friday: sends every weekday.
- Repeat every … days: e.g., every 2 days sends the report once every two days.
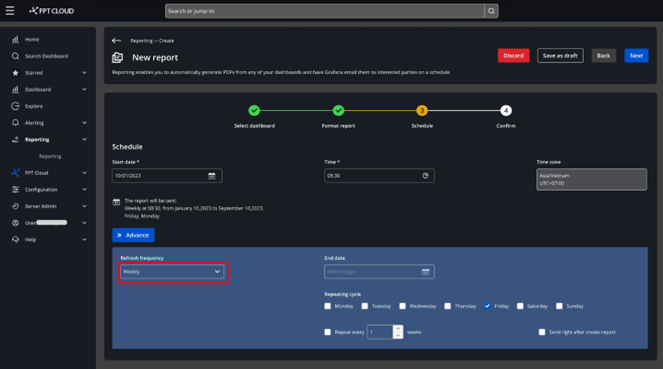
Case 2: Weekly

- Set Refresh Frequency to Weekly.
- Enter an End date.
- Set the Repeating Cycle: select one or more days of the week (e.g., Friday sends every Friday). Enter a Repeat every … weeks value (e.g., 1 sends once a week).
Case 3: Monthly
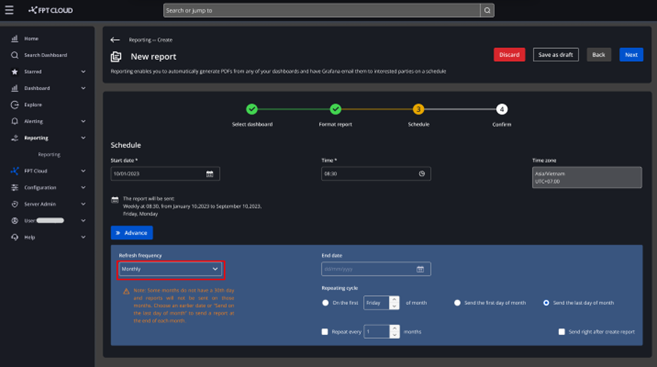
- Set Refresh Frequency to Monthly.
- Enter an End date.
- Set the Repeating Cycle:
- On the first … of month: e.g., first Friday of each month.
- On the first day of month: sends on the 1st of each month.
- On the last day of month: sends on the last day of each month.
- Repeat every … months: e.g., 1 sends once a month.
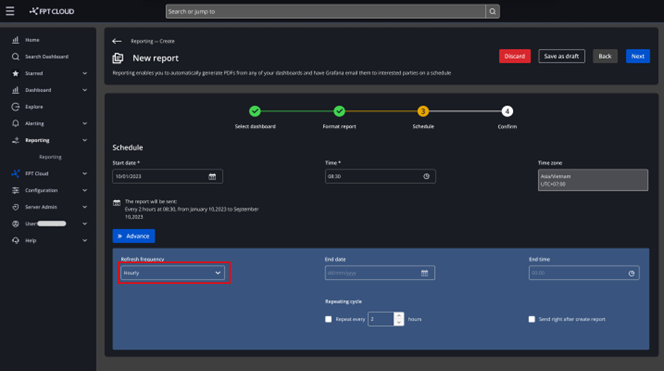
Case 4: Hourly

- Set Refresh Frequency to Hourly.
- Enter an End date.
- Repeat every … hours: e.g., every 2 hours sends once every two hours.
Case 5: Once
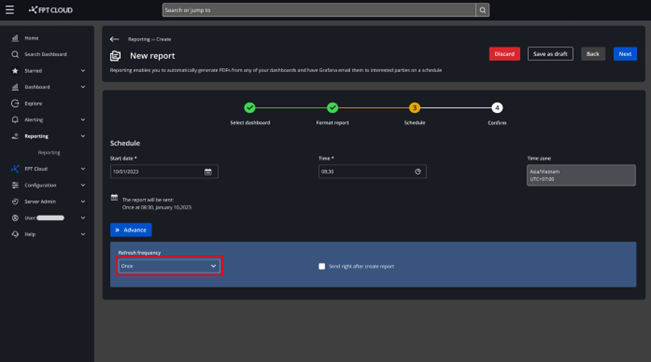
The report is sent exactly once at the configured time. After sending, the schedule status changes to Expired.
-
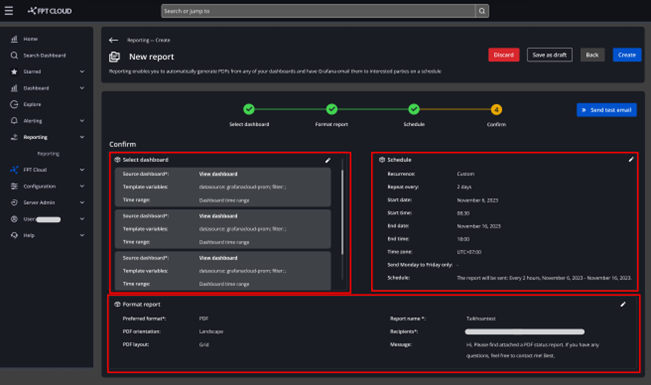
Click the Next button. A Confirm screen appears showing the Select Dashboard, Format Report, and Schedule details for your review.
-
Click Create to create the report.