Create a new Kubernetes Cluster
Note: Several prerequisites are required to perform this action:
- CPU, RAM, Storage, and Instance quotas must be sufficient for the desired Cluster configuration.
- 01 Available Public IP with Public & Private Controlplane Access Mode: used to expose the cluster apiserver endpoint.
- 01 VM Subnet: the subnet used for Kubernetes Nodes. The Subnet must be created with a Static IP Pool.
Create a cluster with VPCs that already support Private Cluster
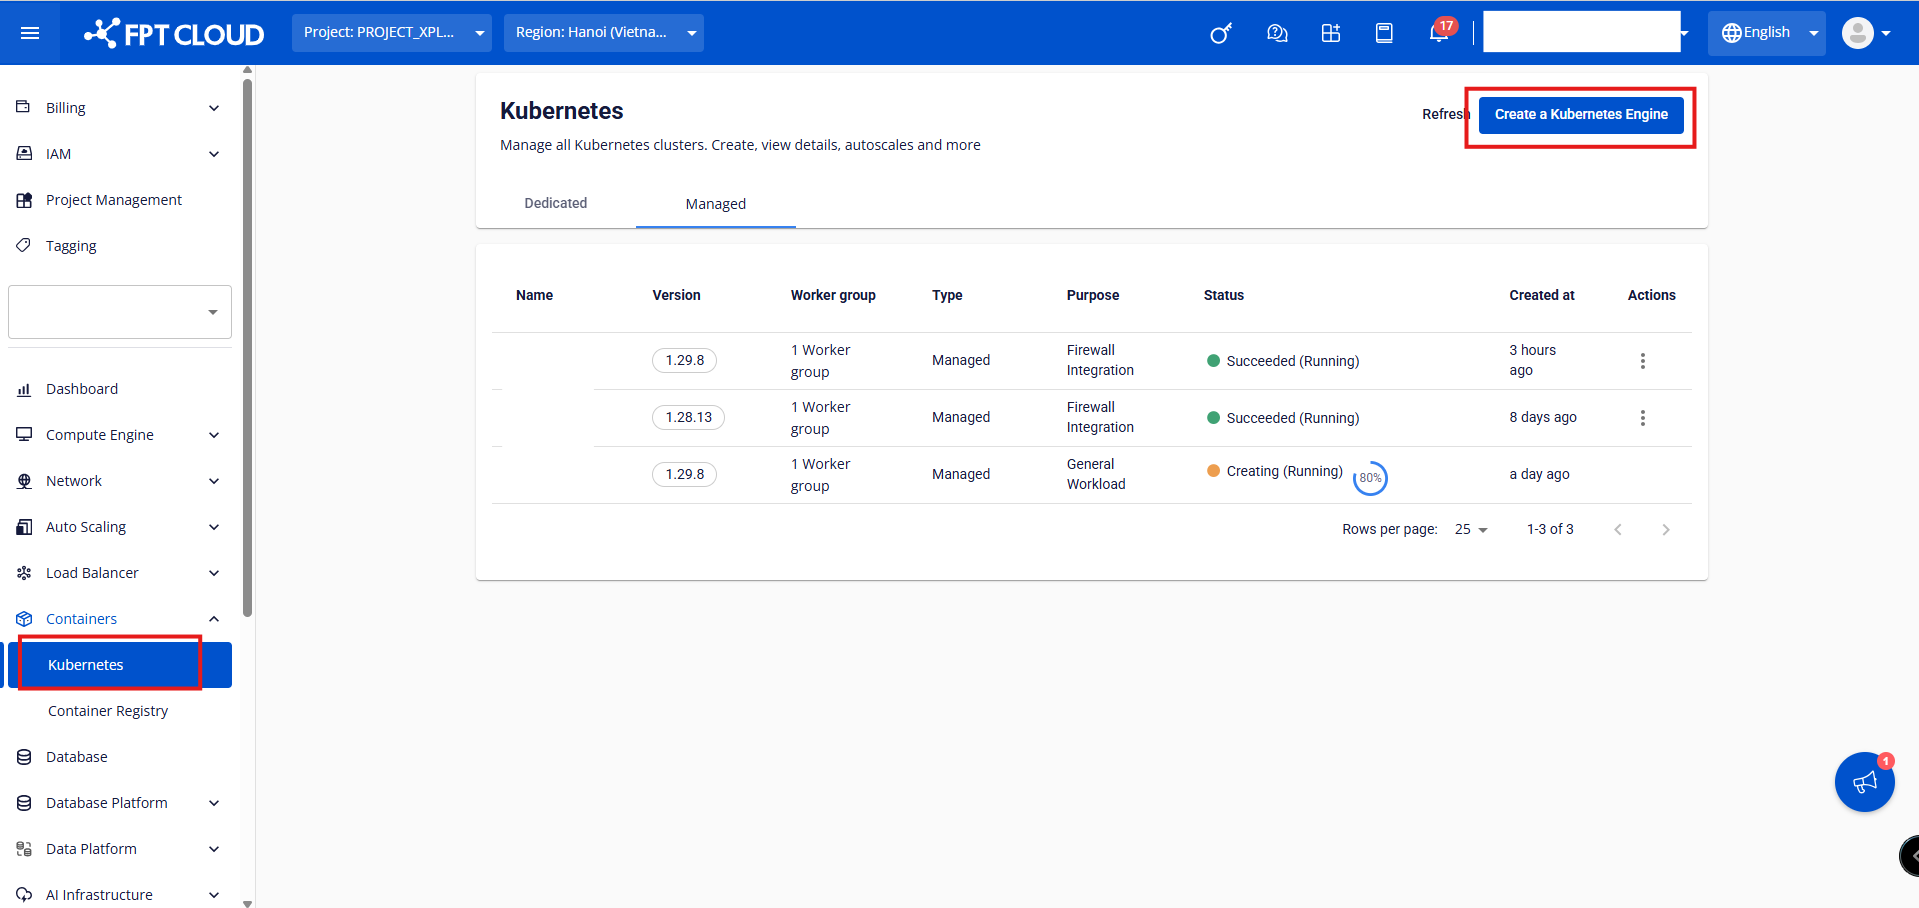
Step 1: On the FPT Portal menu, select Containers > Kubernetes > Create a Kubernetes Engine.
Step 2: Enter the basic information for the cluster, then click the button 1.1. Basics Information:
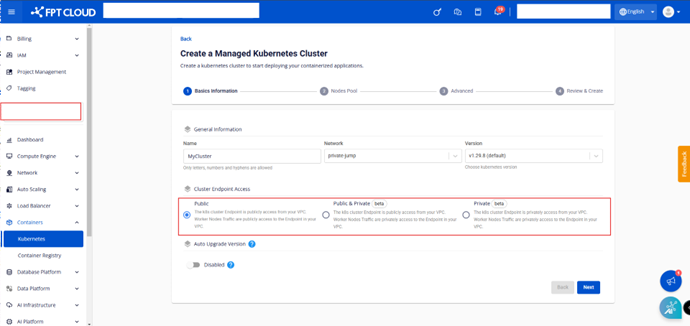
- Name: Enter the Cluster name.
- Network: The Subnet used to deploy the Virtual Machines (VMs) of the Kubernetes Cluster.
- Version: Select the version of the Kubernetes Cluster.
- Cluster Endpoint Access: Access options for the Kubernetes cluster Endpoint.
Public: The k8s cluster apiserver endpoint can be accessed from the public network. Connections from worker nodes to the apiserver go over the public network. Public & Private: The k8s cluster apiserver endpoint can be accessed from the public network. Connections from worker nodes to the apiserver go over the private network. Private: The k8s cluster apiserver endpoint can only be accessed privately within the VPC. Connections from worker nodes to the apiserver go over the private network. How to choose the appropriate Cluster Endpoint ➤ Public: Use this option if the customer needs to access the Kubernetes API Endpoint from outside the VPC. ➤ Public & Private: Use when a publicly accessible Endpoint is required and you want to whitelist IPs that can access this apiserver endpoint. ➤ Private: Use when access to the Endpoint is only required from within the VPC.

Explanation of Allow CIDR
- CIDR (Classless Inter-Domain Routing) is the format used to specify the IP range that is allowed to access the Kubernetes API Endpoint.
- If left empty, it defaults to 0.0.0.0/0, meaning the Endpoint can be accessed from any IP address.
- If a specific value is entered (e.g., 192.168.1.0/24), only IPs in the range 192.168.1.0 - 192.168.1.255 can access it. Note:
➤ Customers must select an appropriate Cluster Endpoint Access based on the security requirements and network architecture of their system. For high security, customers should restrict the CIDR to only allow internal IP ranges instead of 0.0.0.0/0. ➤ If Public & Private or Private is selected, an additional Allow CIDR field will appear to enter the list of IP ranges permitted to access the Kubernetes Cluster Endpoint. ➤ For cluster endpoint access mode Public or Public & Private, users need to add the SNAT IP of all workers (in cases where the VPC uses an external firewall or workers are attached with a floating IP) to the CIDRs that can connect to the cluster controlplane. Example:
- If the worker subnet is SNATed with the IP 103.174.214.26, the user needs to add CIDR 103.174.214.26/32 to the list of CIDRs allowed to connect to the controlplane.
- If a worker in the cluster is attached with floating IP 103.174.215.27, the user needs to add CIDR 103.174.215.27/32 to the list of CIDRs allowed to connect to the controlplane. Step 3: Configure Node Pools according to your needs, then click the button
Key considerations when creating an M-FKE cluster:
➤ M-FKE manages worker nodes through Worker Groups, which are groups consisting of worker nodes with the same configuration. Users can divide worker groups for the appropriate applications. The system requires at least 01 Worker Group (Base); users cannot remove this worker group. ➤ In the Worker Group configuration section, users can assign labels to the desired worker group. These labels will be applied to all worker nodes belonging to the worker group. Users can add or remove multiple labels, as well as edit the key/value of existing labels. These labels make it easier for users to deploy applications on separate worker groups as needed.
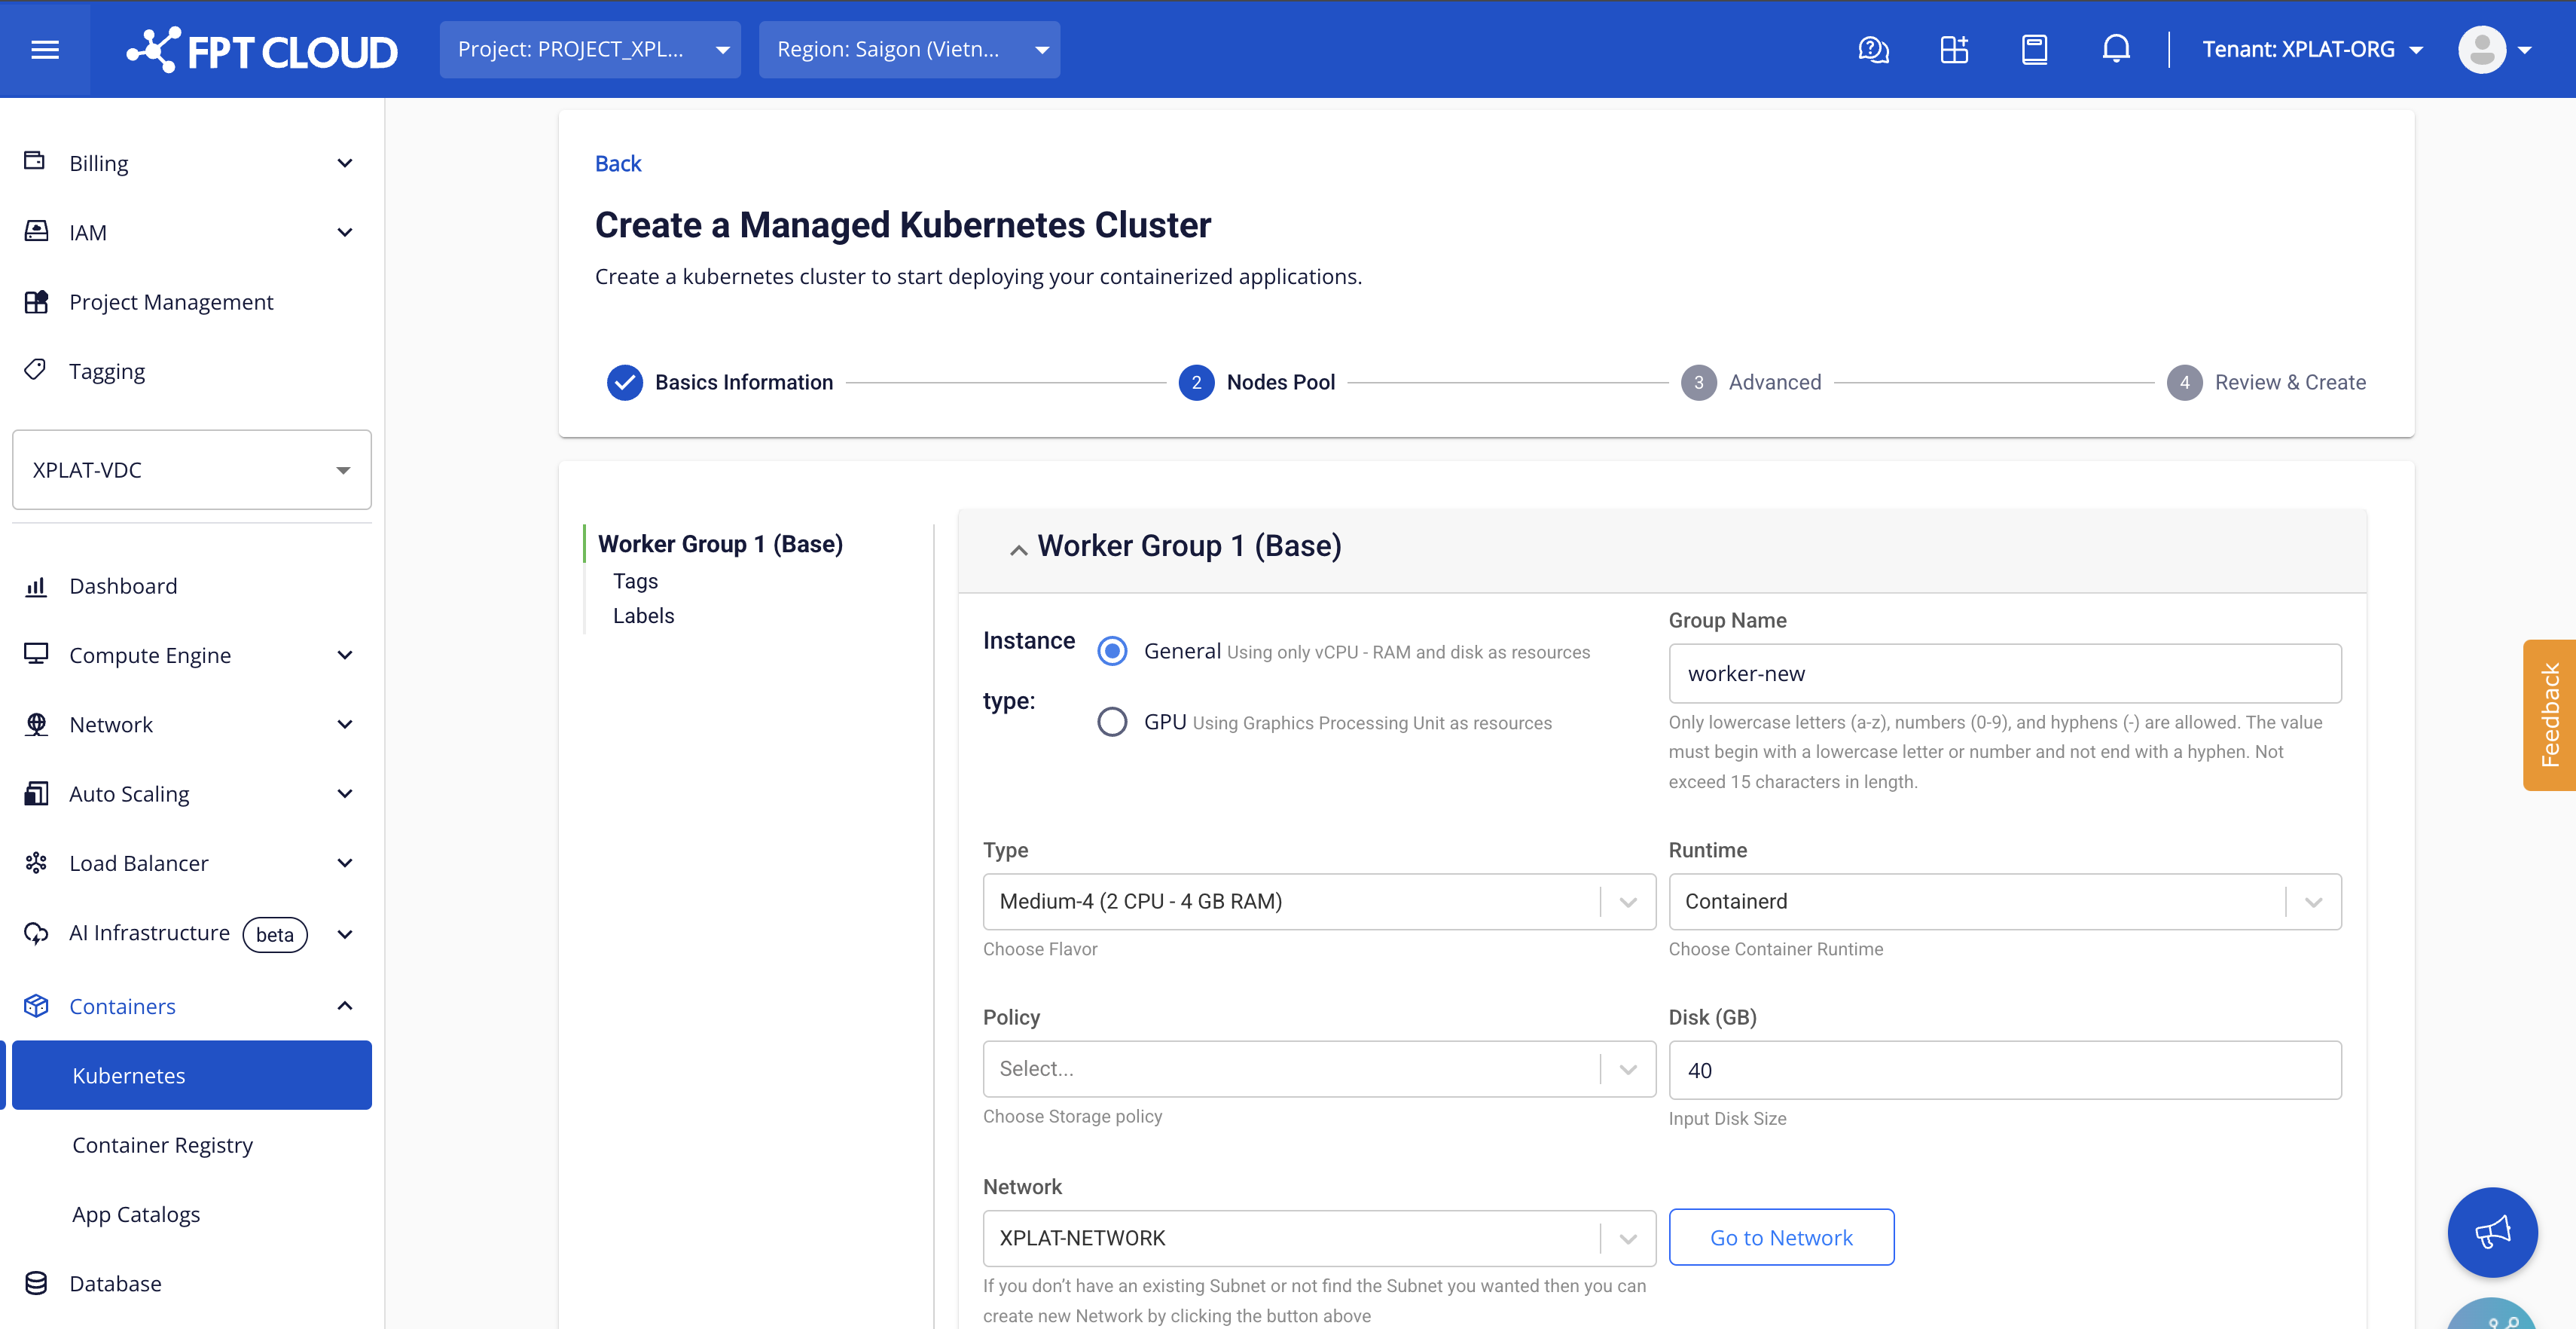
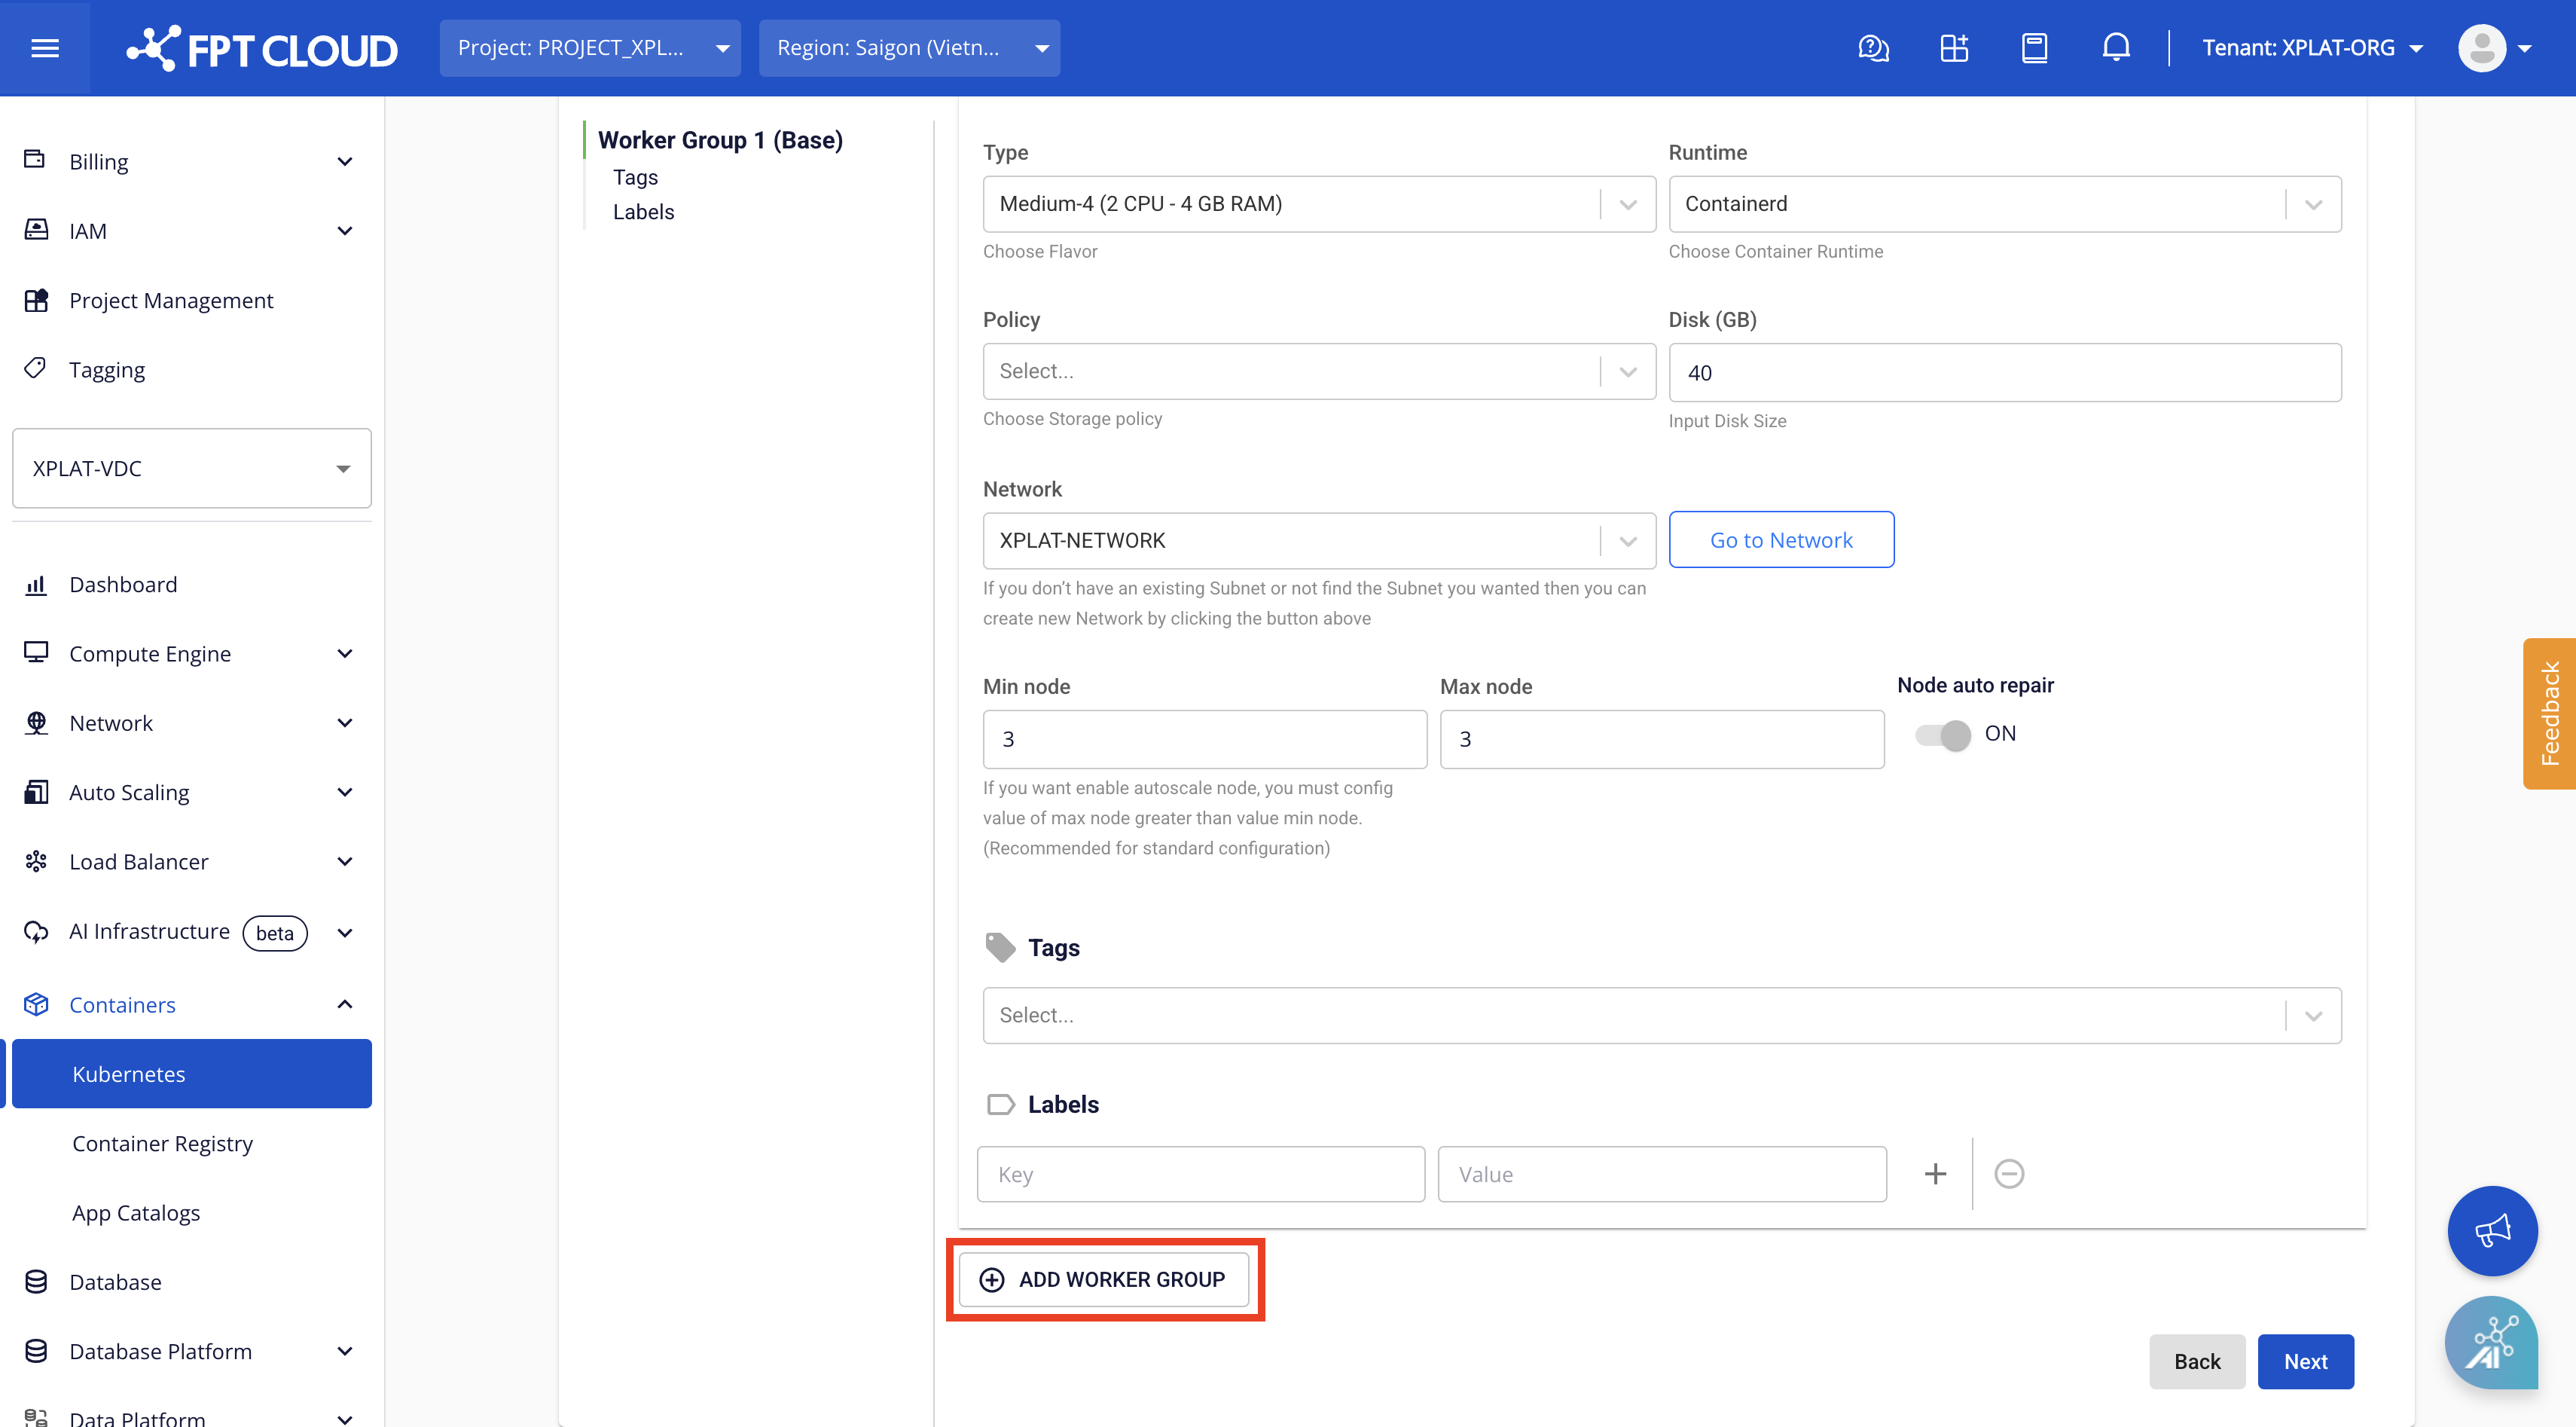
- Worker Group 1 (Base):
- Instance Type: Select the Instance type (CPU or GPU) for the Worker Nodes.
- Type: Select the configuration (CPU & Memory) for the Worker Nodes.
- Container Runtime: Select Containerd.
- Storage Policy: Select the Storage Policy type (corresponding to IOPS) for the Worker Node Disk.
- Disk (GB): Select the root disk size for the Worker Nodes.
- Network: The Subnet used to deploy the VMs of the Kubernetes Cluster.
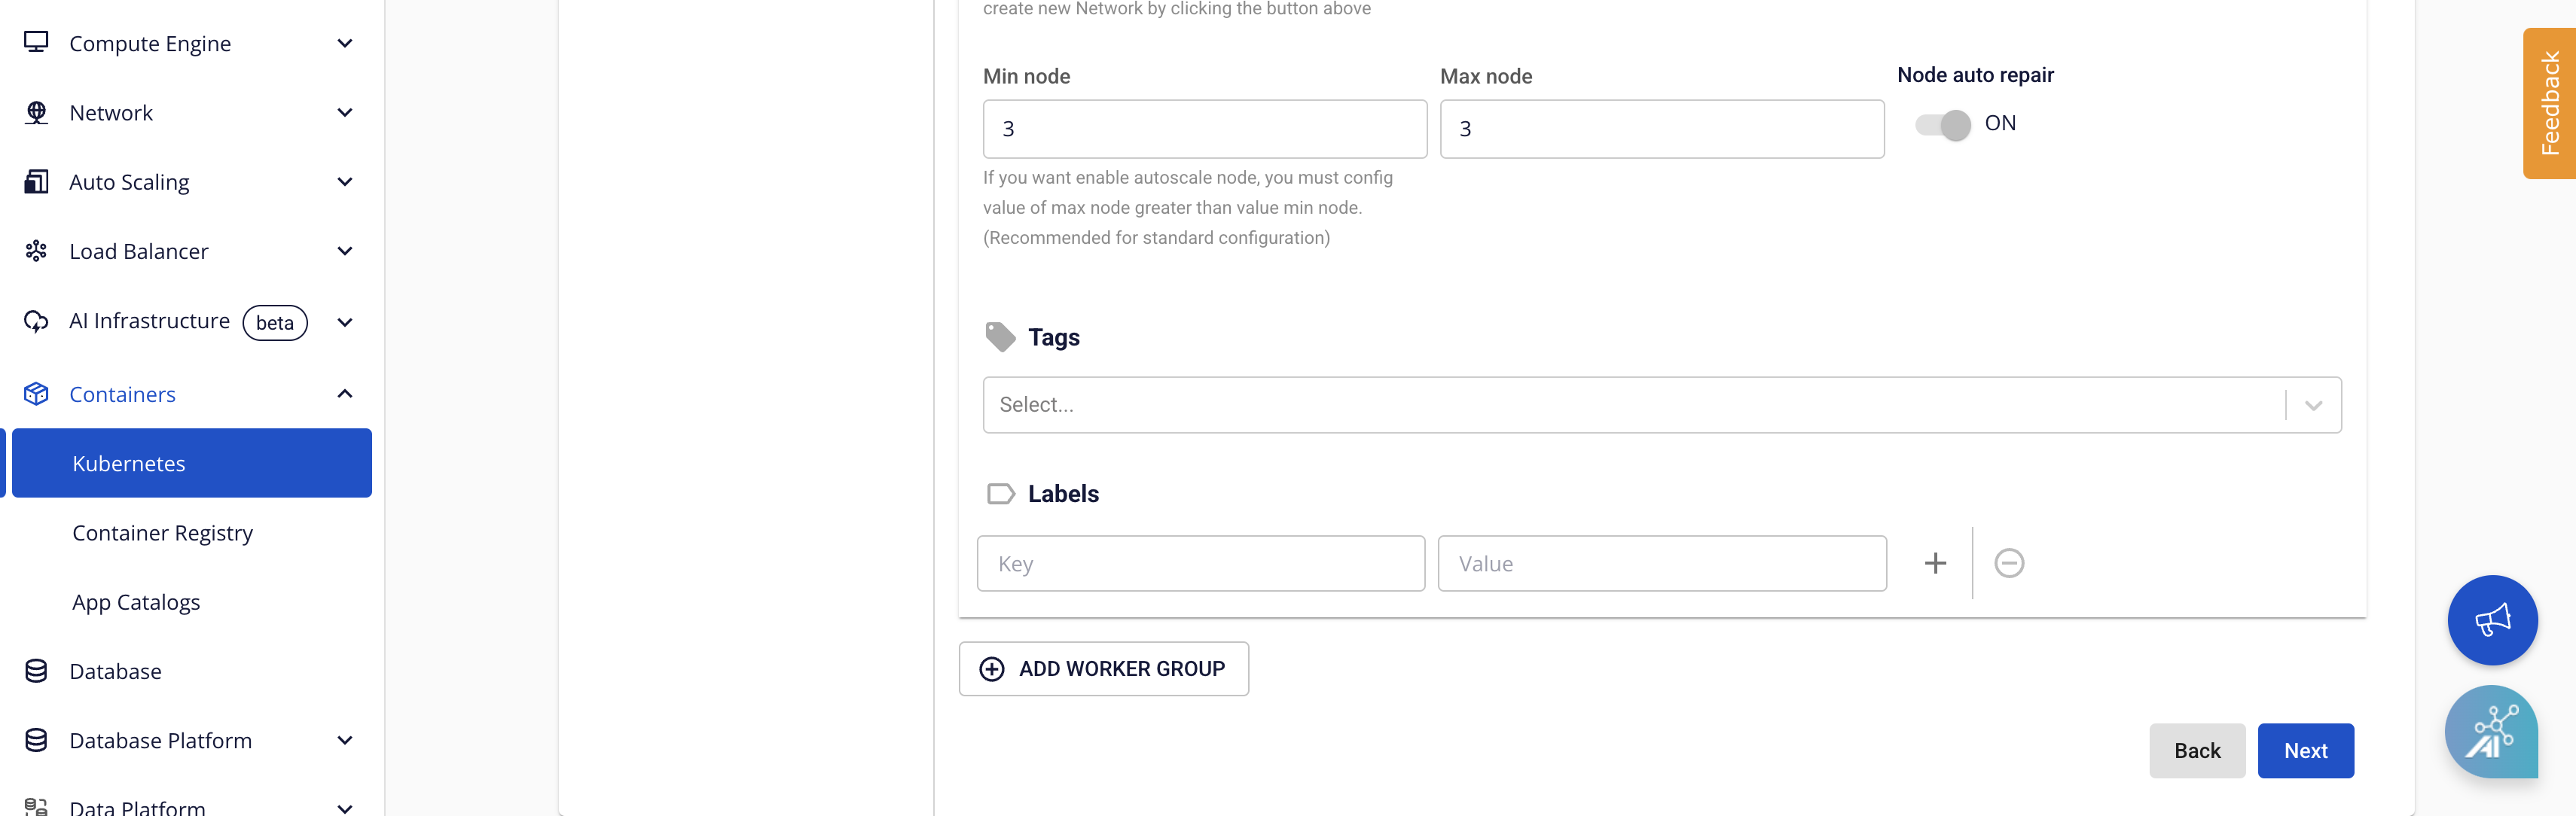
- Scale min: The minimum number of Worker Node VM instances for the k8s cluster. A minimum of 03 Nodes is recommended for Production environments.
- Scale max: The maximum number of Worker Node VM instances for a worker group in the k8s cluster.
- Label: Label the Worker Group.
- Worker Group n:
- Users can add additional worker groups when creating the k8s cluster by clicking the ADD WORKER GROUP button.

In addition, from Worker Group 2 onwards, users can configure taints for the worker groups to schedule applications on specific worker nodes. Taints can also be added, removed, and edited easily.
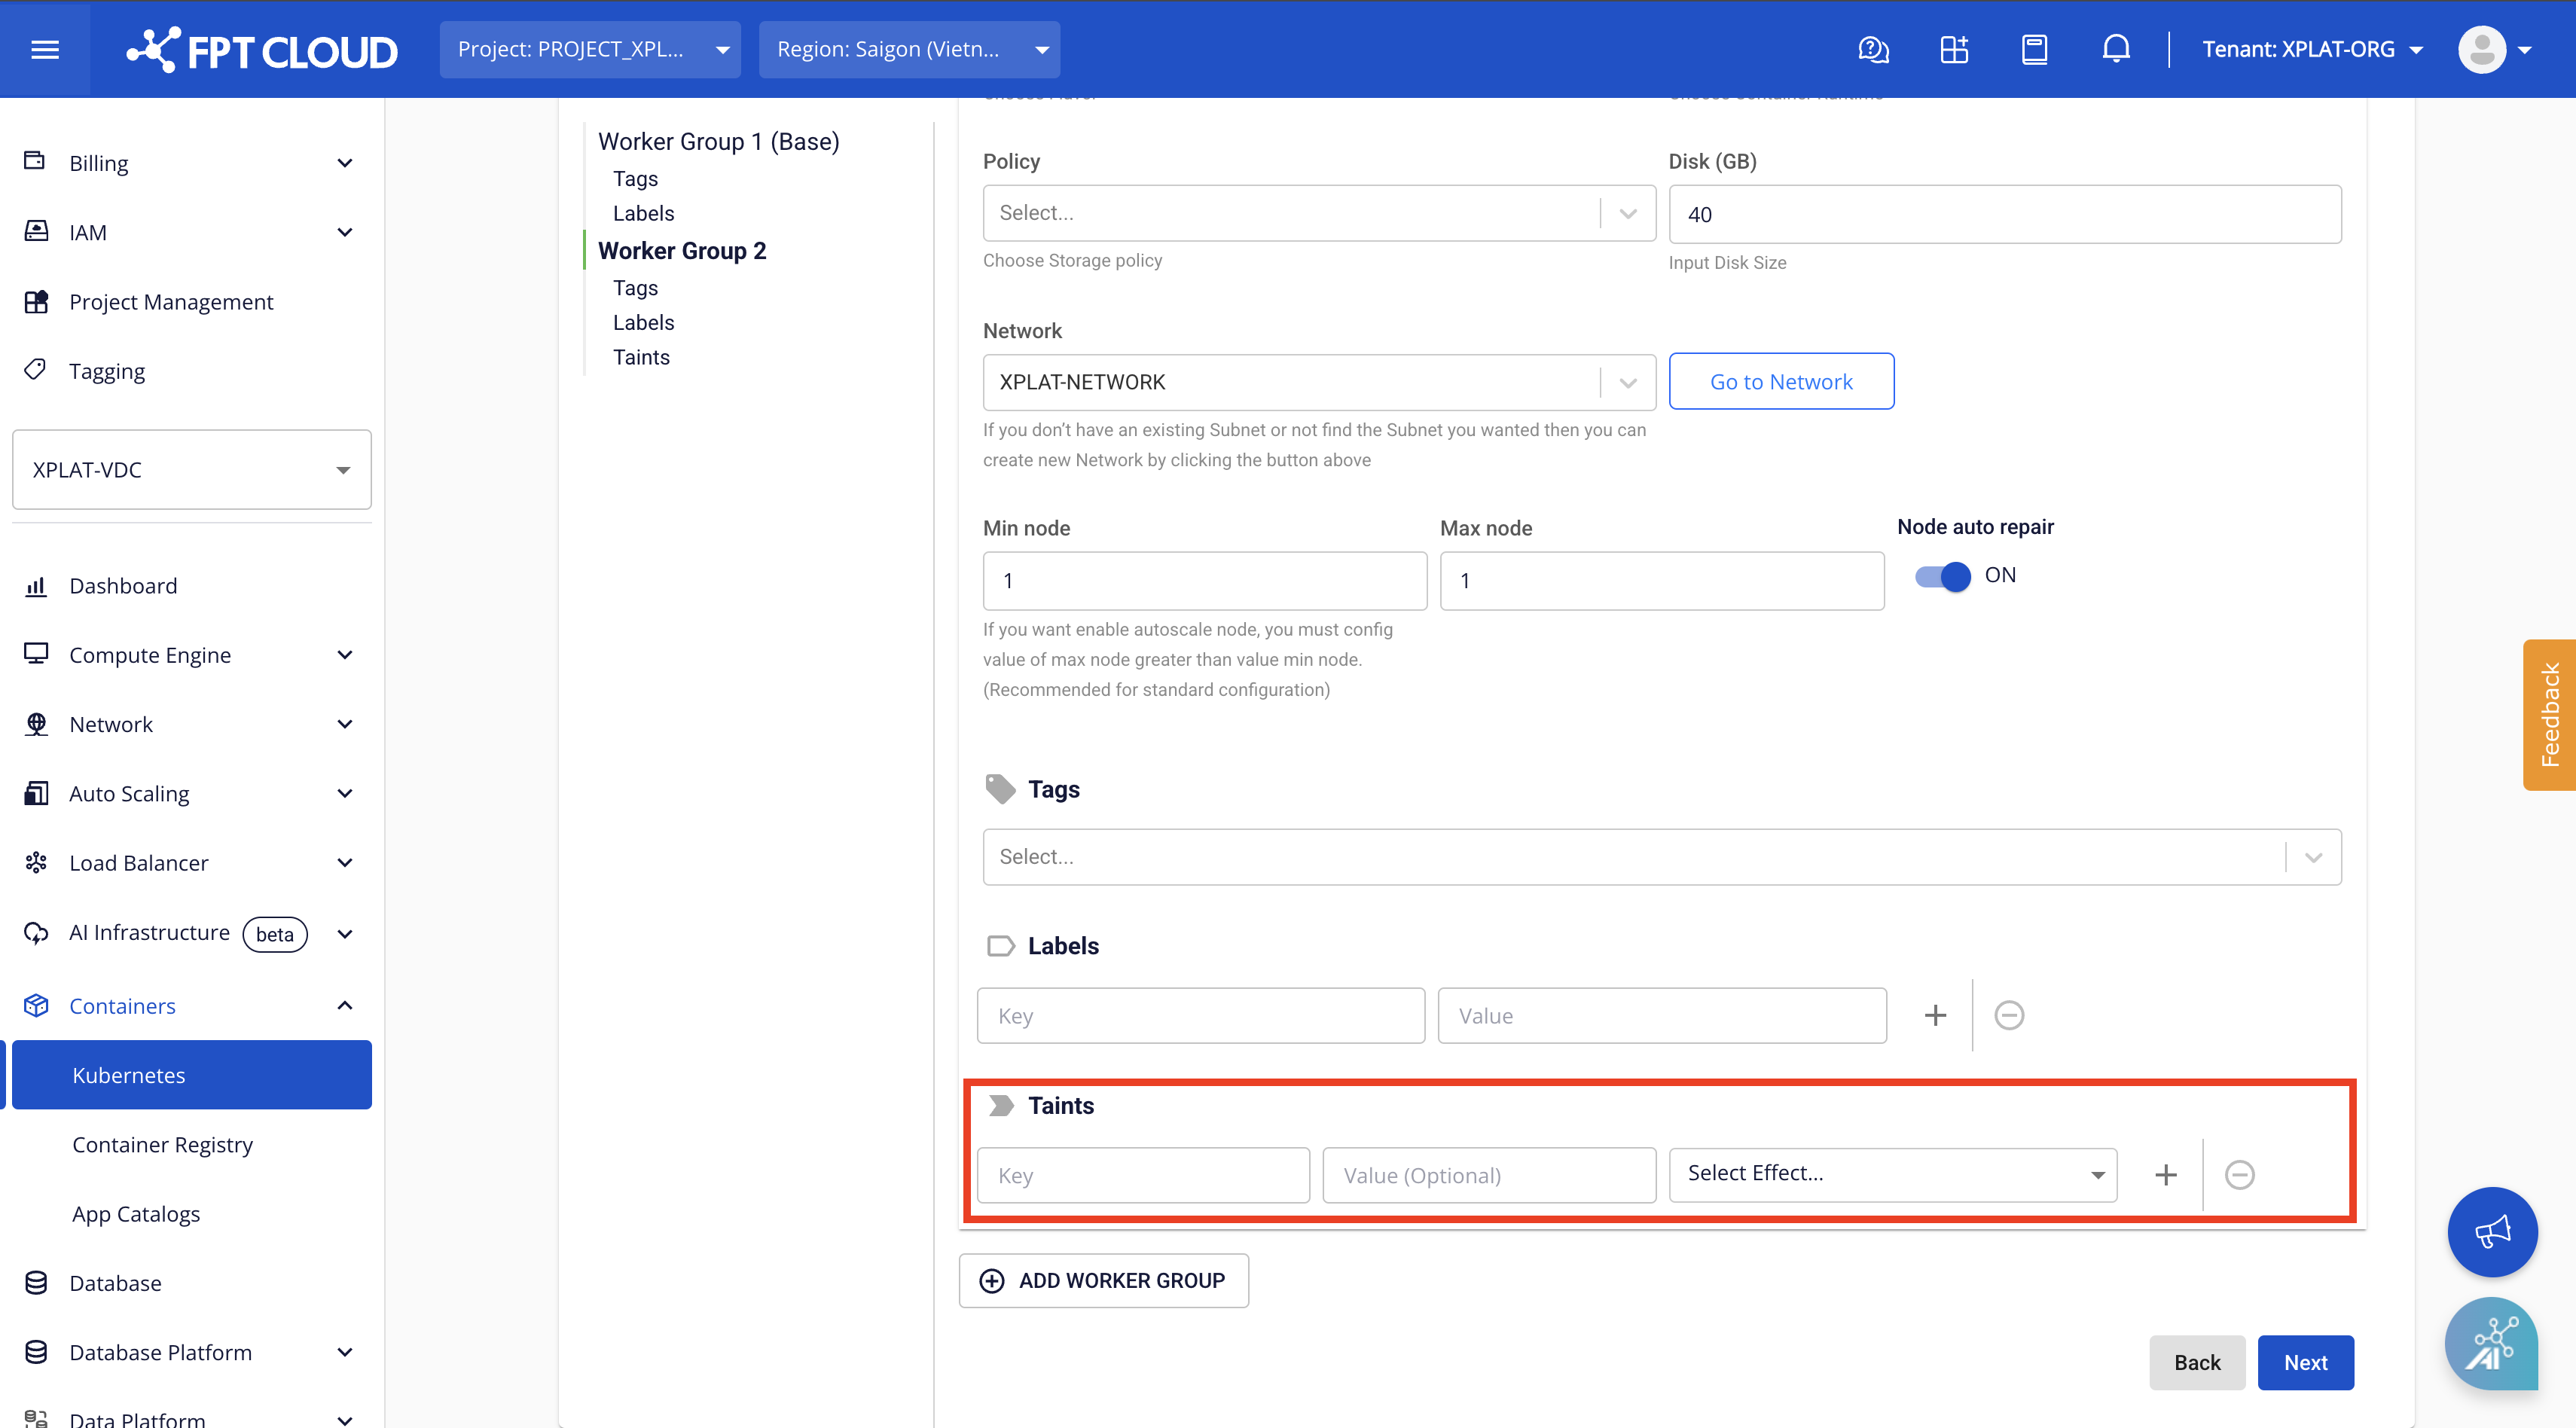
Note: When users configure labels/taints for a worker group on the Unify Portal, they cannot remove the label/taint for nodes in that worker group using kubectl (the system will automatically re-add the label/taint to the node according to the configuration on the Unify Portal). Therefore, label/taint configurations must be removed via the Unify Portal. Step 4: The Advanced tab contains advanced settings for users. In addition, FPT Cloud allows users to specify the subnet for the internal IP range of the LoadBalancer integrated in Kubernetes. If you do not need to customize these advanced parameters, leave the defaults.
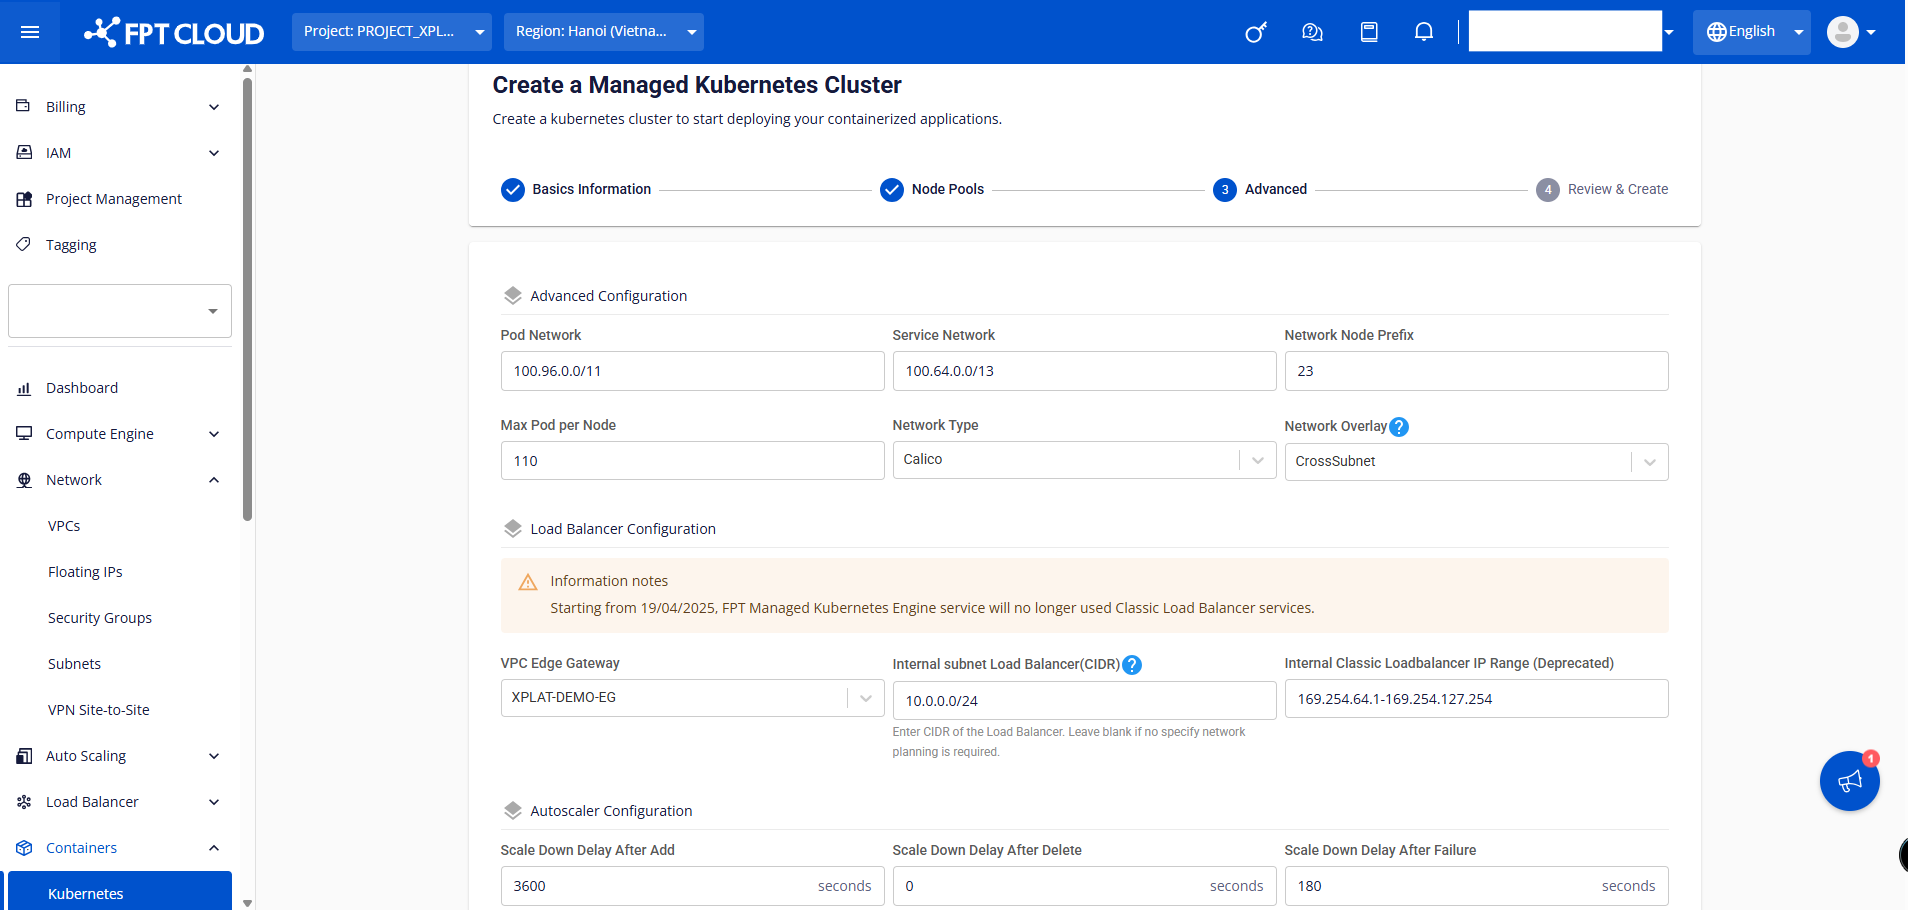
- Pod Network: The network used for Pods within the cluster.
- Service Network: The network used for Services within the cluster.
- Network Node Prefix: The Subnet Prefix for Pods within a Node.
- Max Pod per Node: The maximum number of Pods per Kubernetes Node.
- Internal subnet Load Balancer (CIDR): The CIDR used to allocate IPs for internal Load Balancers. It can be left empty if not used; the system will automatically allocate IPs in any subnet.
- Internal Classic Loadbalancer IP Range (Deprecated): The IP range for Classic Load Balancers, also known as LBv1 (allocation will be discontinued from 19/04/2025). How to configure a valid Internal subnet Load Balancer (CIDR):
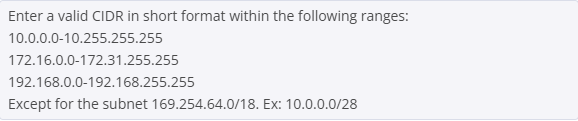
The CIDR range configured for the Internal subnet Load Balancer must not overlap with any subnet CIDR in the Network > Subnets tab. Step 5: On the Review & Create screen, the system will display the cluster information that the user previously configured, and check RAM, CPU, Storage resources, etc.
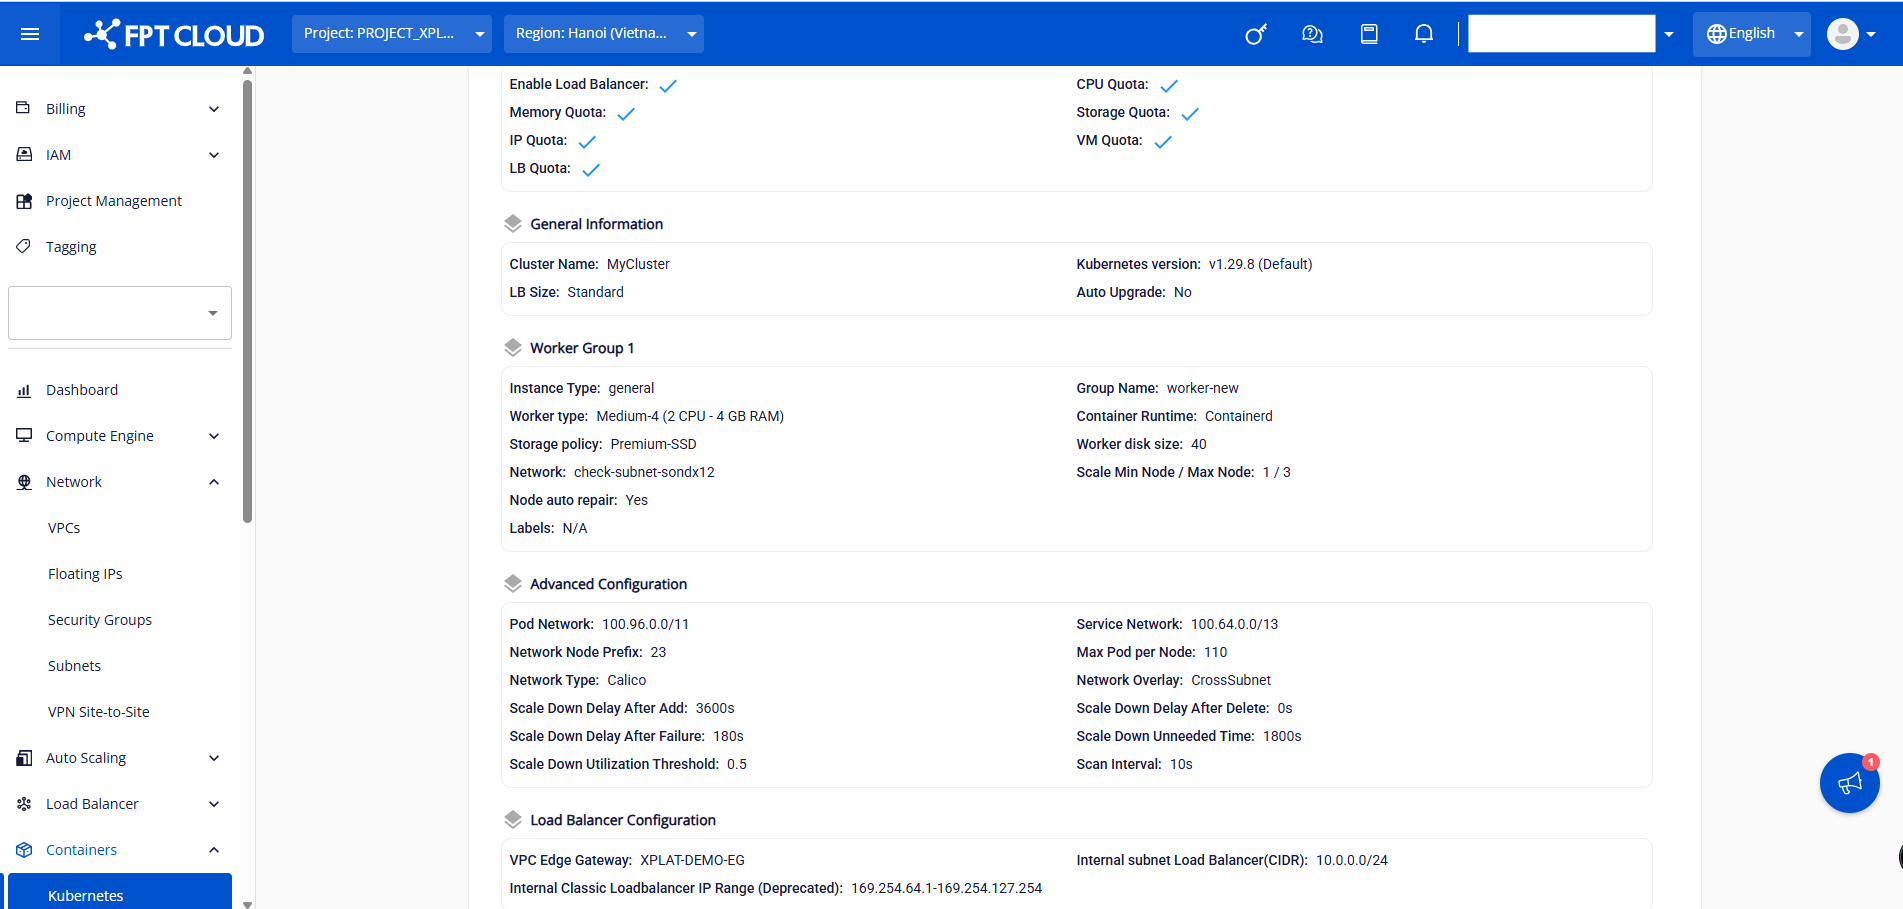
After the system successfully checks the resources, click the Create a Kubernetes button to proceed with creating the cluster.