Apache Kafka - Managing Kafka ACL
Kafka users allow applications and services to authenticate to a Kafka cluster through SASL mechanisms. Kafka users are managed at the cluster level in FPT Database Engine and are typically used by producers, consumers, and Kafka Connect.
The Manage Kafka user feature applies only to the Kafka engine and allows administrators to view, create, and update Kafka users. This feature is typically used to:
- Control application access to the Kafka cluster.
- Manage credentials securely on the cloud platform.
- Monitor and audit user operations through system logs.
1. Create a new Kafka user
To create a new Kafka user, follow these steps:
Step 1: Access the Kafka user management page
Log in to FPT Cloud Console. Select "Database Platform" > "Data Streaming" > click the cluster ID of the Kafka cluster to open the detail page. Select the "Configure Params" tab > select the "Kafka ACL" sub-tab. The Kafka user management page appears as follows:
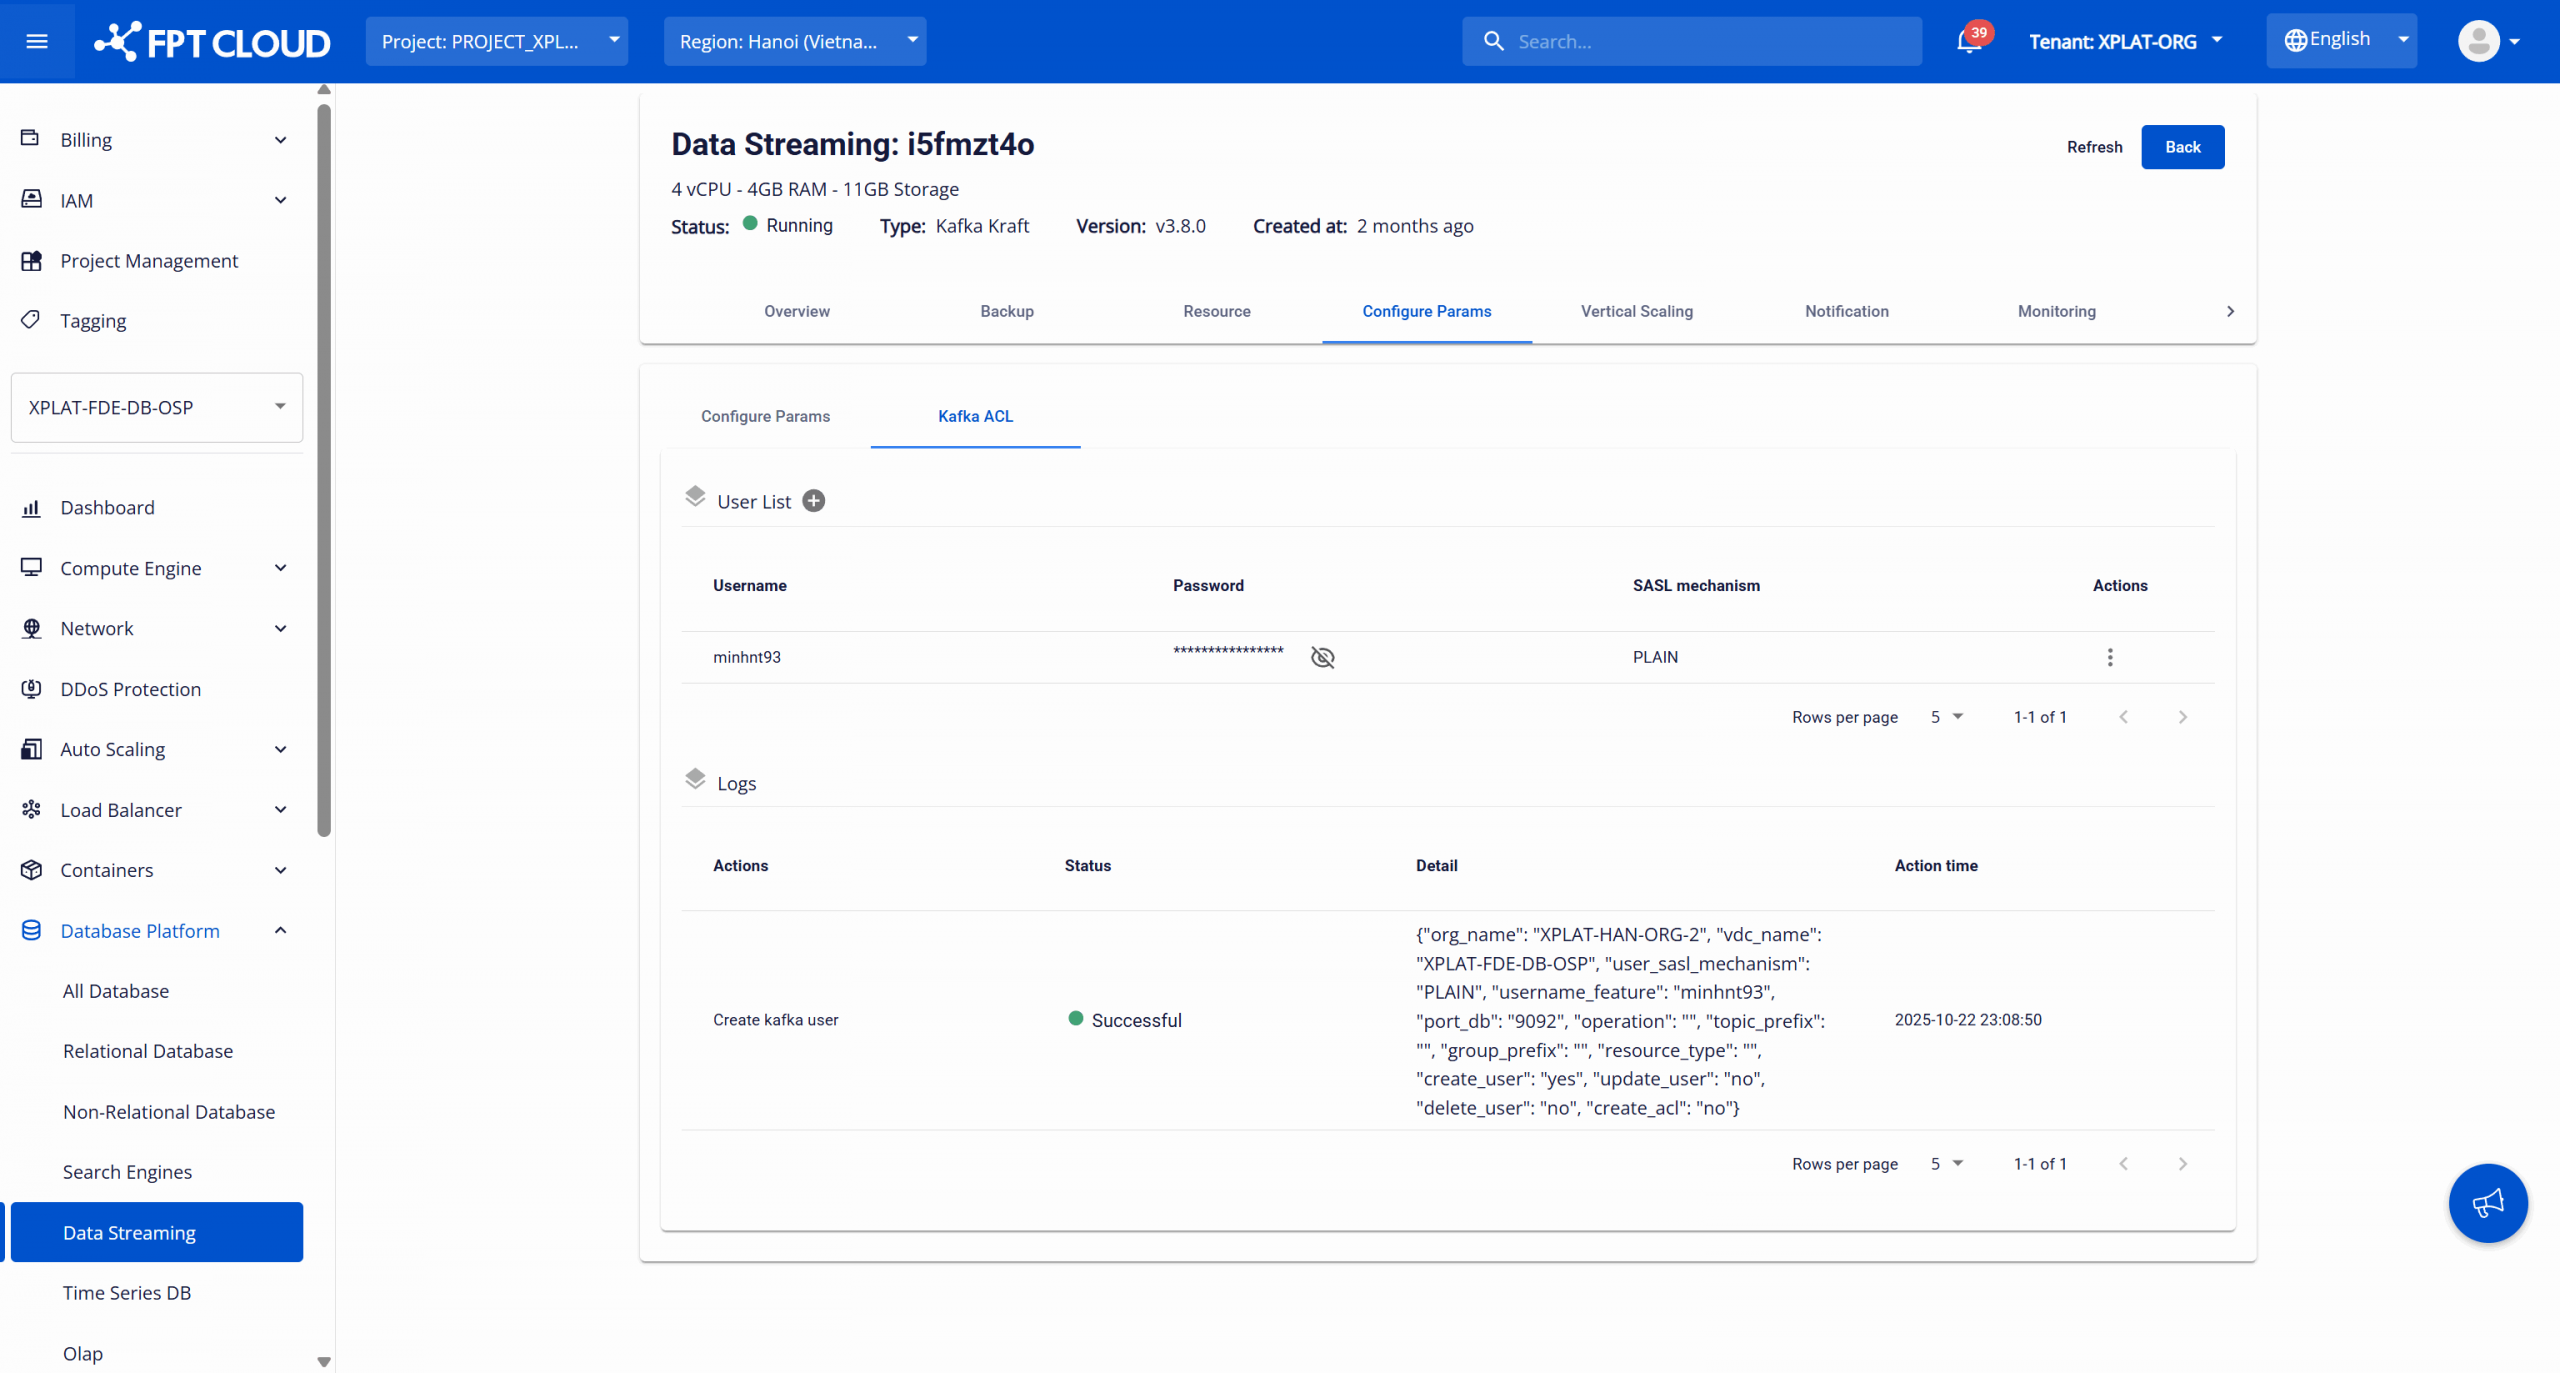
The "User List" section displays all Kafka users configured on the cluster. Information displayed includes:
- Username: The Kafka principal name.
- Password: Authentication password. Hidden for security reasons.
- SASL mechanism: The authentication mechanism (e.g., PLAIN).
Step 2: Create a new Kafka user
On the Kafka user management page, in the "User List" section, click the Add user icon (plus sign). The Create new user dialog will be displayed.
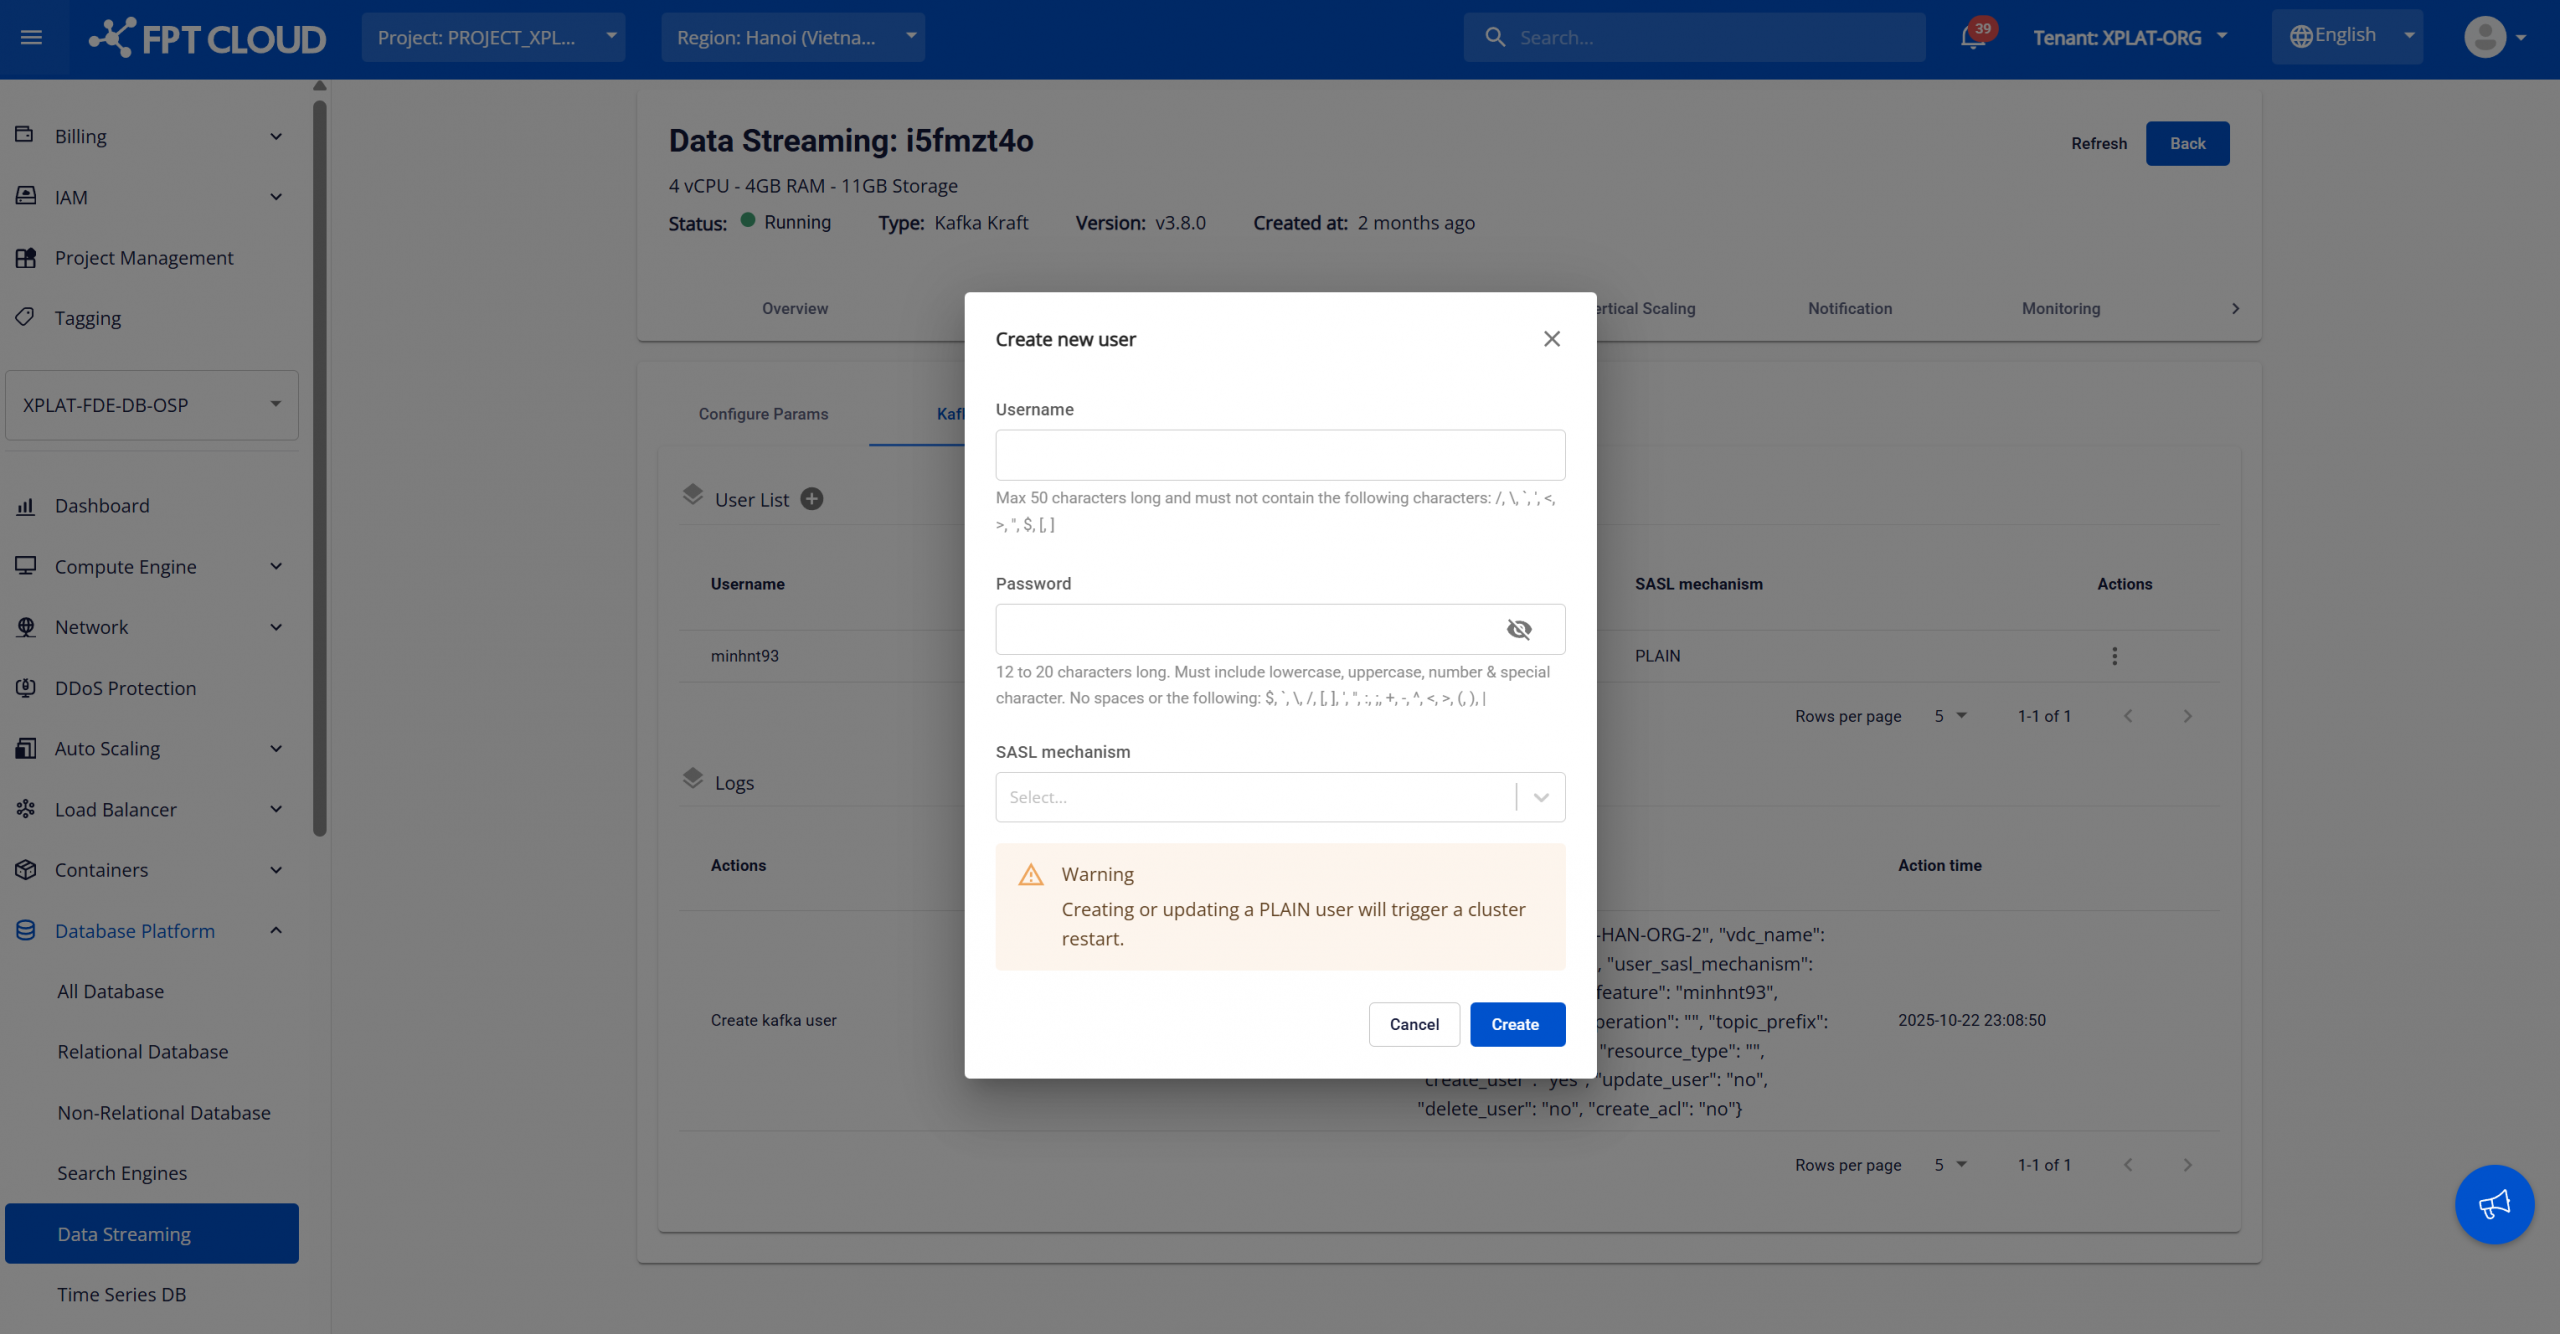
Enter the configuration information:
- Username: The username, used as the Kafka principal for authentication purposes. Maximum 50 characters, must not contain forbidden special characters (/ \ : * ? " < > | [ ]).
- Password: Create a strong password satisfying the following requirements:
- At least one lowercase letter.
- At least one uppercase letter.
- Minimum 12 characters, maximum 20 characters.
- At least one special character, except the following: $ \ / [ ] ' " : ; + - ^ < > ( ) |`
- At least one number.
- No spaces.
- SASL mechanism: Select the supported authentication mechanism. Options include: "PLAIN", "SCRAM-SHA256", "SCRAM-SHA512". Warning: Creating or updating a user using SASL/PLAIN will trigger a Kafka cluster restart. This may cause a temporary service disruption for producers and consumers.
After completion, click "Create" to create the Kafka user. The successfully created Kafka user will appear in the User list and can be used for:
- Kafka client configuration.
- Kafka Connect.
- ACL policies (if supported).
Best practices:
- Create Kafka users per application or service.
- Rotate passwords periodically.
- Avoid creating users during peak hours.
- Separate users for producers and consumers when possible.
When needed, you can perform the following operations on a created Kafka user:
- Update password: This feature allows changing the Kafka user's password. On the User List, click "Update Password" for the user to change. Enter the new password and click "Update" to save.
- Delete user: This feature allows removing unused Kafka users for cleaner system management. On the User List page, click "Delete" for the user to delete. Confirm the action in the warning dialog to complete.
- Grant ACL: Allows granting ACL permissions to a Kafka user. See detailed instructions in section "2. Assigning permissions to Kafka users".
2. Assigning permissions to Kafka users
The Kafka ACL feature allows administrators to assign detailed permissions to Kafka users when accessing topics and consumer groups in the Kafka cluster managed by the DBaaS.
ACL helps ensure:
- Secure access control.
- Enforcement of the least privilege principle.
- Isolation between applications and workloads.
ACL is applied at the cluster level and takes effect immediately after saving.
Note: If a Kafka user is not assigned an ACL, the user will have no access to any resources.
To assign permissions to a Kafka user, proceed as follows:
On the Kafka user management page, in the "User List" section, select the "Grant ACL" action for the user to assign permissions to. The Grant ACL dialog will be displayed.
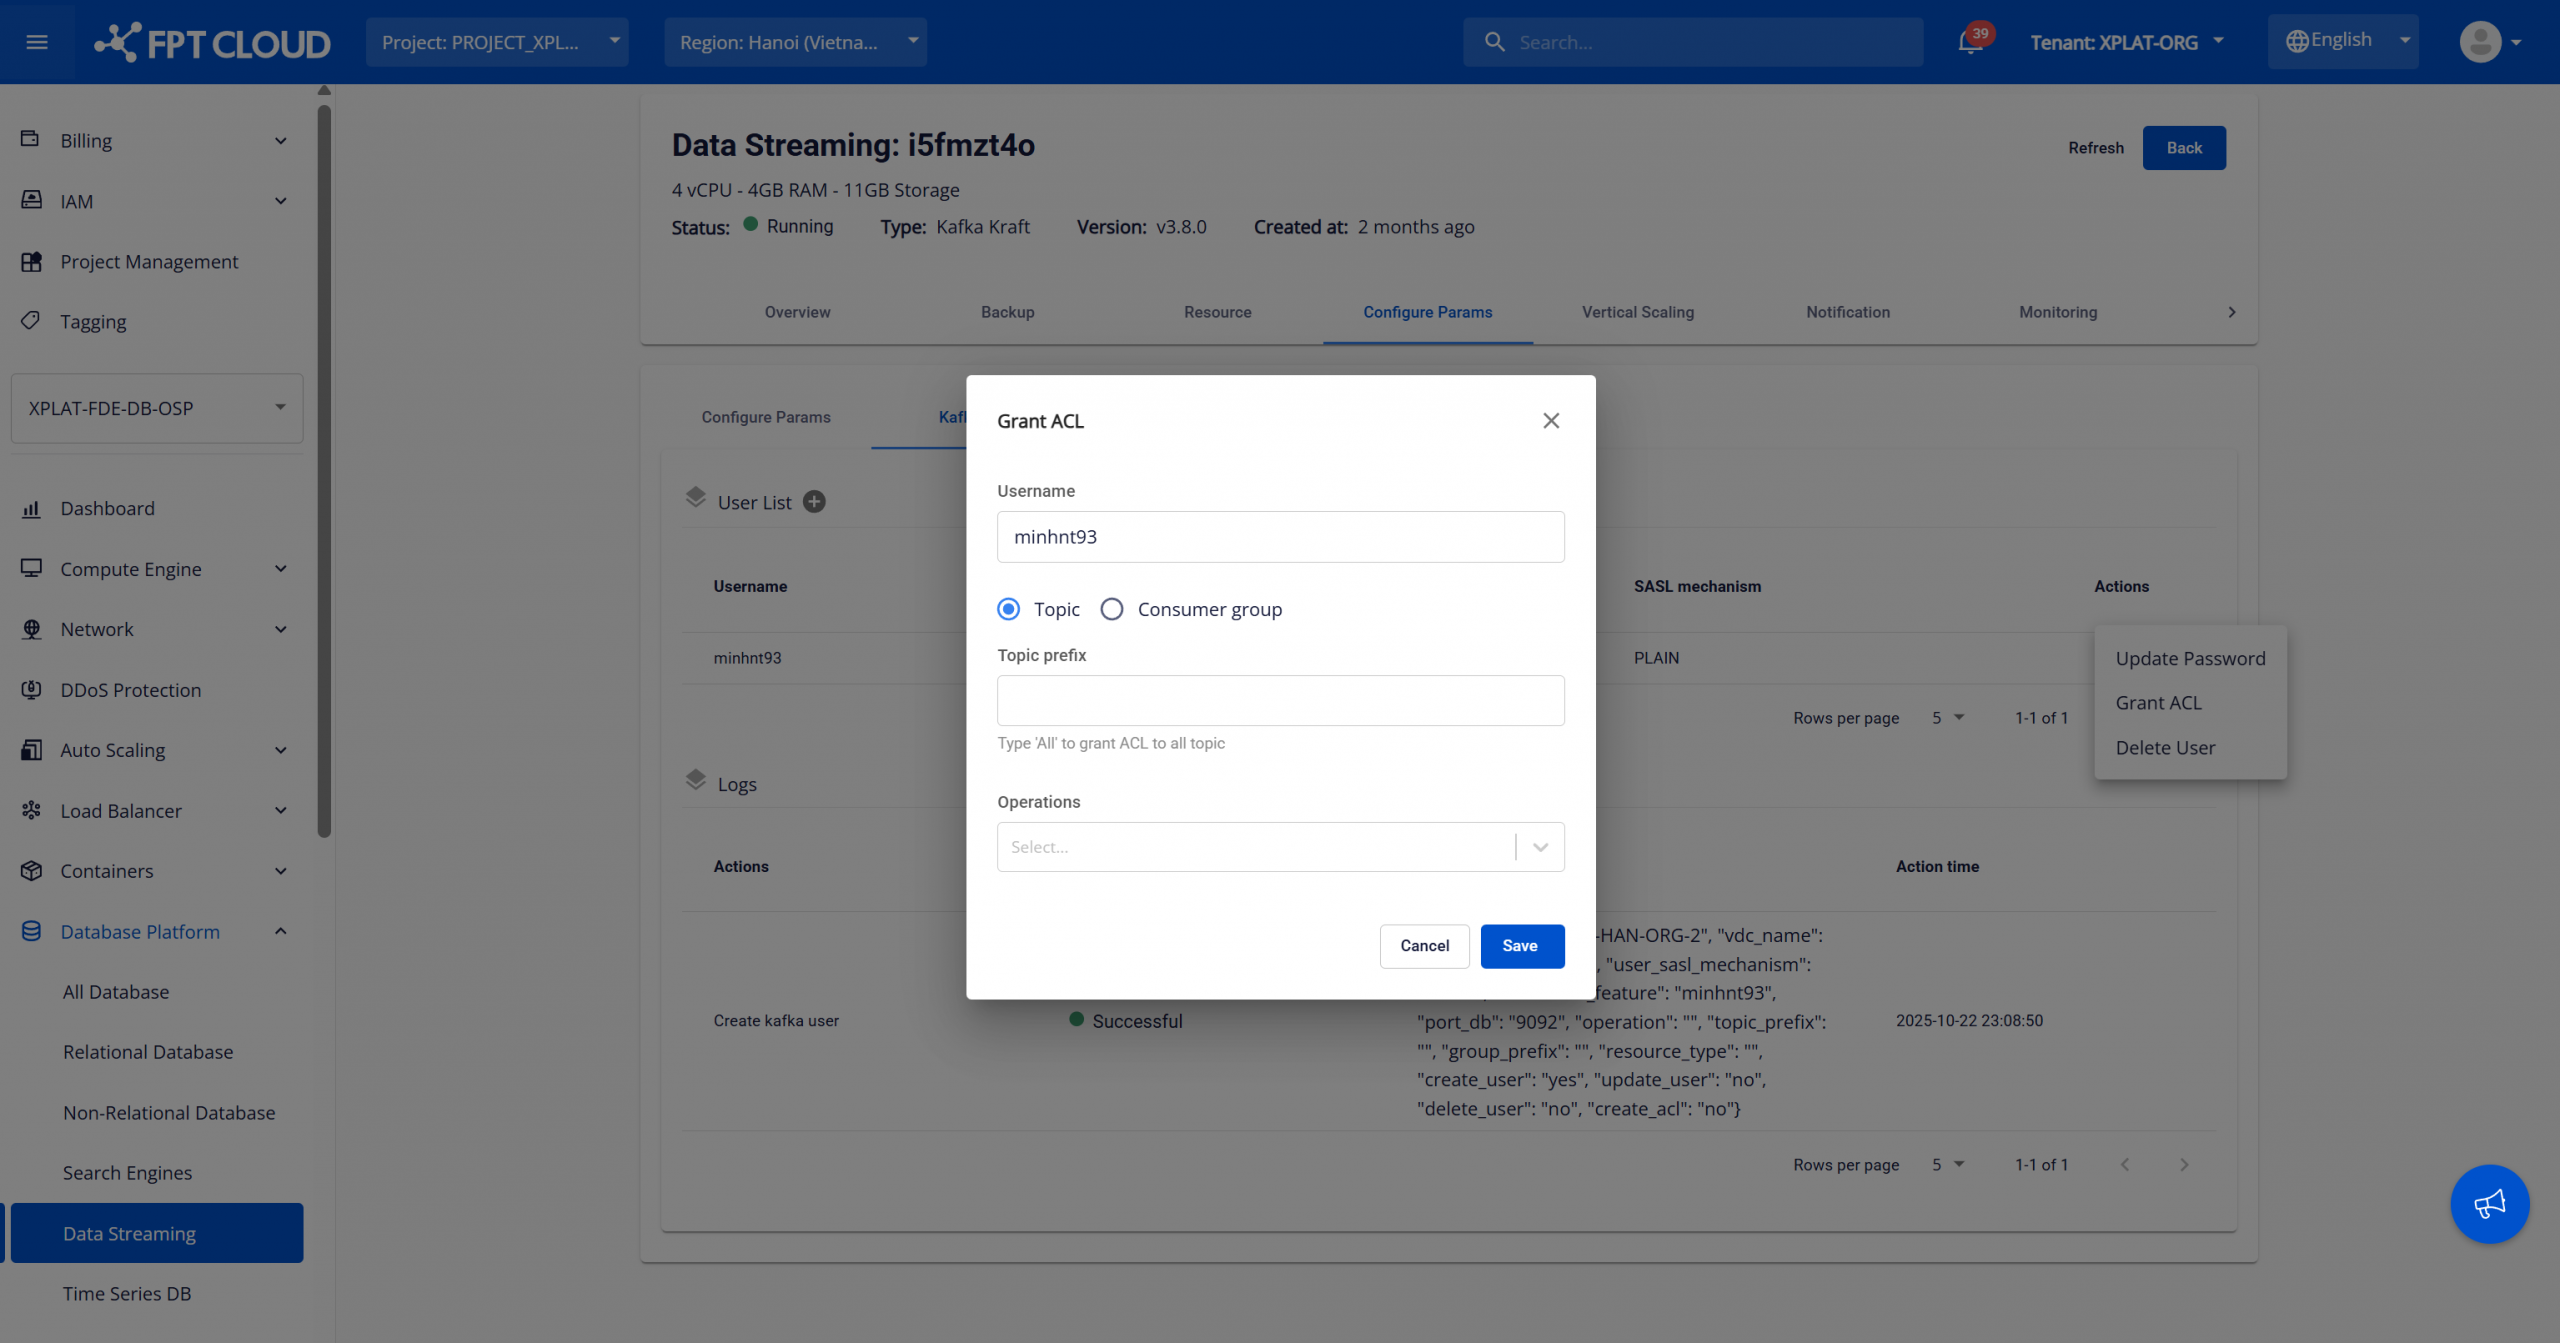
Enter the configuration information:
- Username: Displays the selected Kafka user. This field cannot be edited.
- Resource Type: Select the Kafka resource type to assign permissions for:
- Topic – Assign access permissions for Kafka topics.
- Consumer group – Assign permissions for consumer groups.
- Topic prefix / Group prefix: Enter the resource prefix. Applies permissions to all resources matching the prefix. Enter "All" to assign permissions for all topics or all consumer groups.
- Operations: Select one or more permitted Kafka operations, depending on the resource type:
- If the resource type is "Topic":
- All: Allows performing all operations.
- Alter: Allows editing DANGER parameters of the topic in Kafka UI.
- AlterConfigs: Allows editing non-DANGER parameters of the topic in Kafka UI.
- Read: Allows reading the topic content.
- Write: Allows writing data to the topic.
- If the resource type is "Consumer group":
- Delete: Allows deleting the group.
- Describe: Allows viewing detailed information about the group.
- Read: Allows reading group content.
- If the resource type is "Topic":
After completion, click "Save" to apply the ACL to the Kafka user. ACL takes effect immediately without restarting the Kafka cluster. A Kafka user can be assigned multiple ACLs.
Best practices
- Prioritize assigning ACL permissions by prefix. Prefix-based ACLs help manage permissions efficiently as the system scales.
- Separate ACLs for producers and consumers.
- Avoid granting full permissions unless necessary.
- Periodically review the ACL list.