Connect FCI to AWS via Virtual Private Gateway
This guide explains how to connect VPNaaS between the AWS and OPS platforms on the Unify portal.
- I. Configure VPN Site-to-Site on AWS/
- II. Configure VPN Site-to-Site on FCI Cloud/
In this example, we will create a VPN Site-to-Site connection using the parameters shown in the topology below: 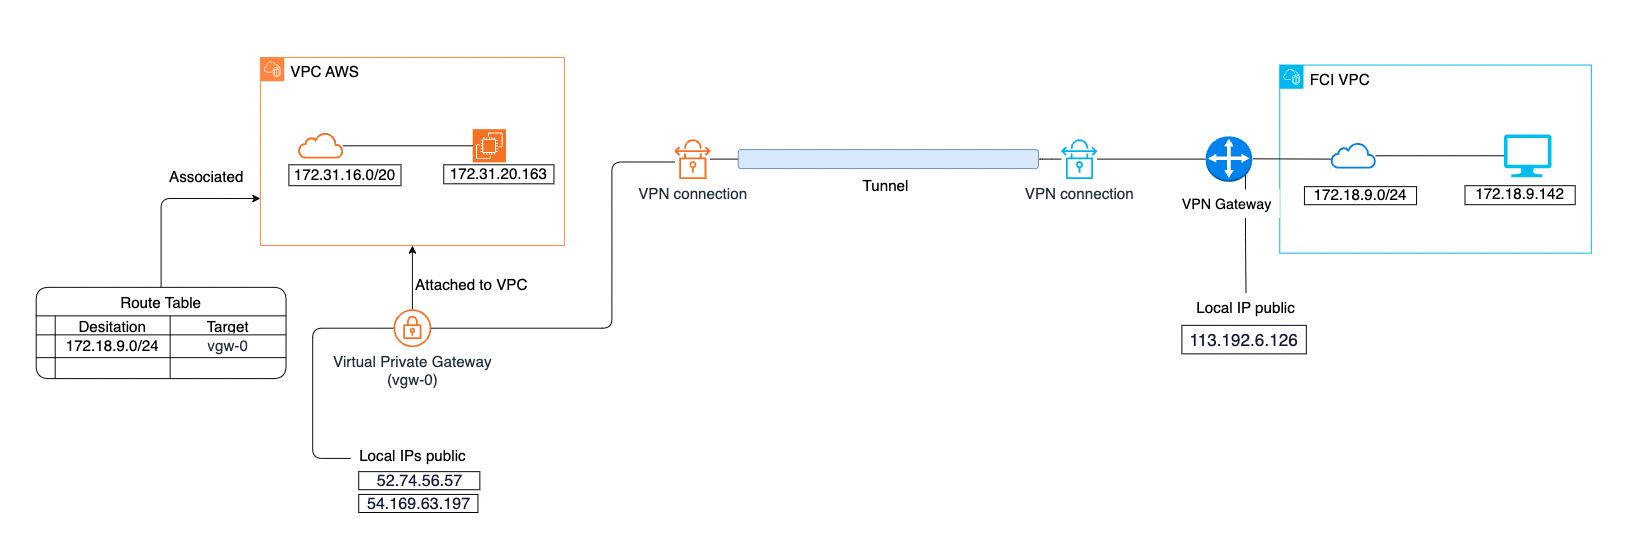
Configure VPN Site-to-Site on AWS
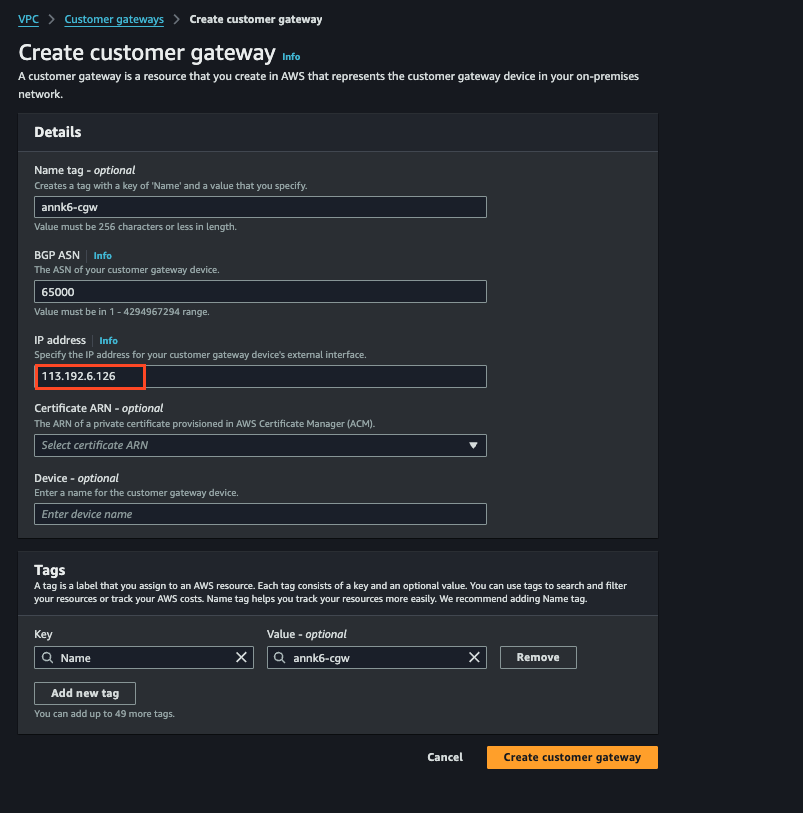
Step 1. Create a Customer Gateway. A Customer Gateway is a resource in AWS that represents the gateway device at the on-premises network. To create a Customer Gateway:
a. Go to: https://console.aws.amazon.com/vpc/ b. Select Customer gateways > Create customer gateway. Enter the required fields. For IP address, use the Local IP public of the FCI VPN Gateway.
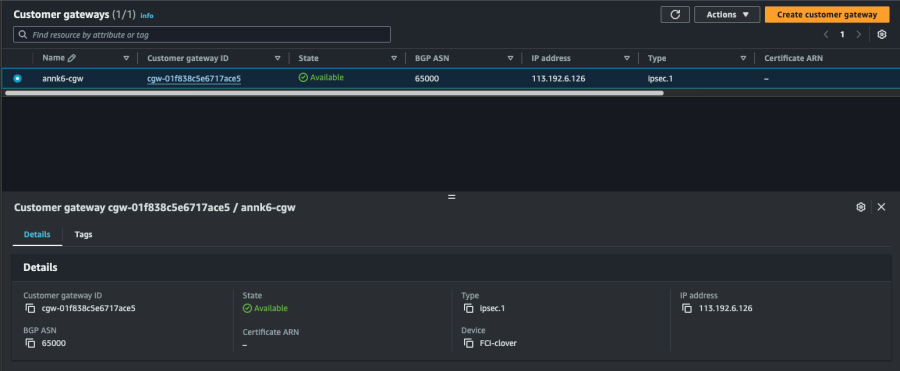
c. Select Create customer gateway. Details of the created Customer gateway:
Step 2. Create a Virtual Private Gateway. To create a Virtual Private Gateway:
a. On the navigation pane, select Virtual private gateways > Create virtual private gateway. 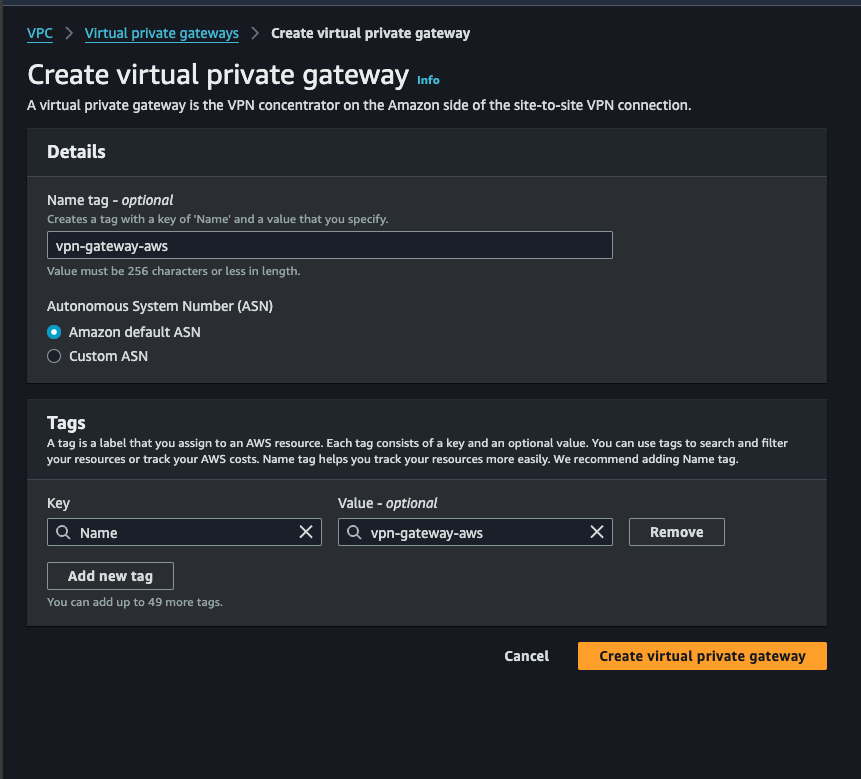
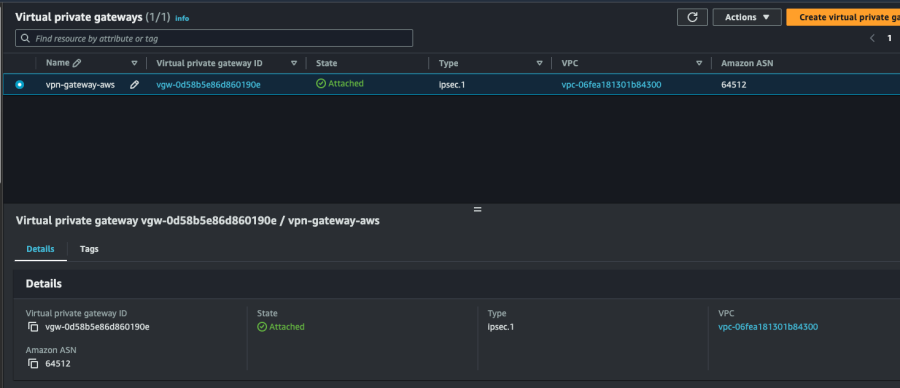
b. Select Create virtual private gateway. Result after creation:
c. Attach the Virtual private gateway to the VPC. 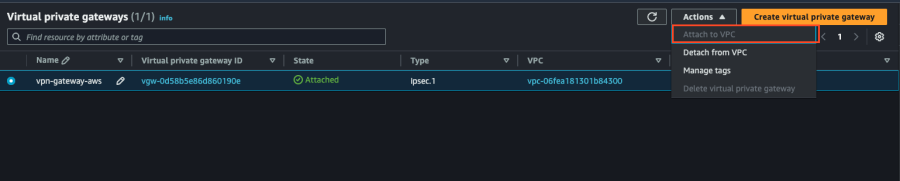
Step 3. Configure routing. Configure routing to direct traffic from the VPC (AWS) to the Customer Gateway (FCI) through the Virtual Private Gateway. Enable the route propagation feature on the route table to automatically add routes from the VPN connection to the route table.
a. On the navigation pane, select Route tables.
b. Select the Route table associated with the subnet.
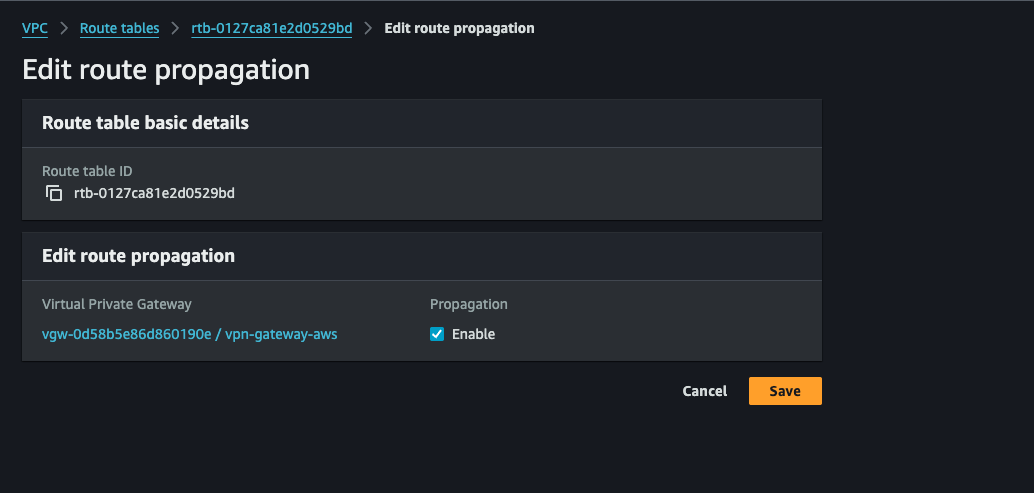
c. On the Route propagation tab, select Edit route propagation.
d. Select the Virtual private gateway created in the previous step > Enable Propagation, then select Save.

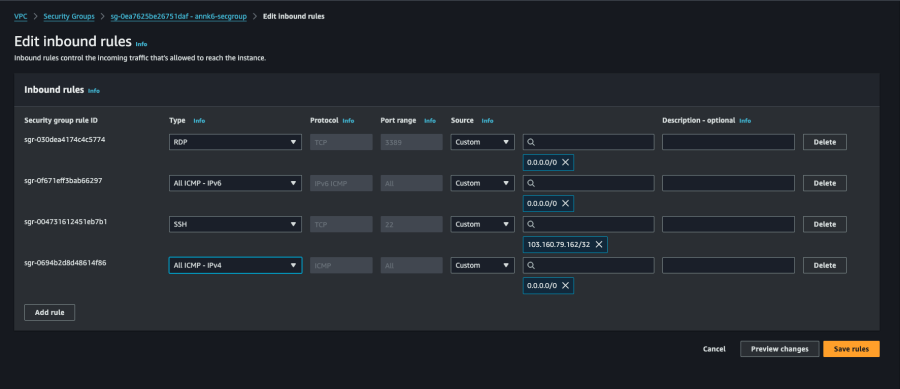
Step 4. Update Security groups. Update Security groups to allow SSH, RDP, and ICMP access. To add a rule to a Security group:
a. On the navigation pane, select Security groups. b. Select the security group for instances in the VPC you want to allow access to. c. On the Inbound rules tab, select Edit inbound rules. d. Add rules to allow inbound SSH, RDP, and ICMP, then select Save rules.
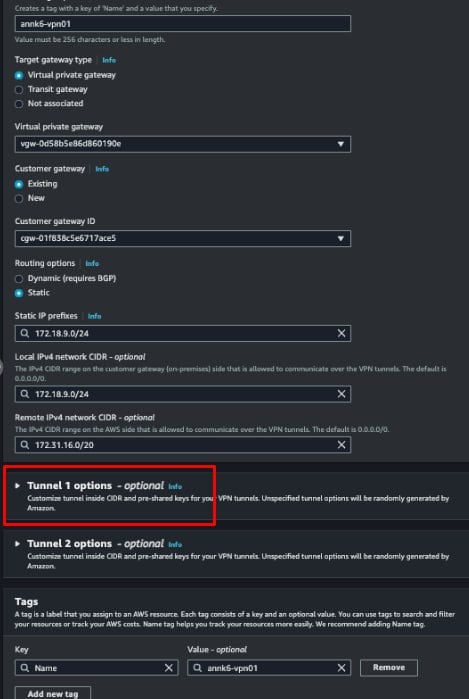
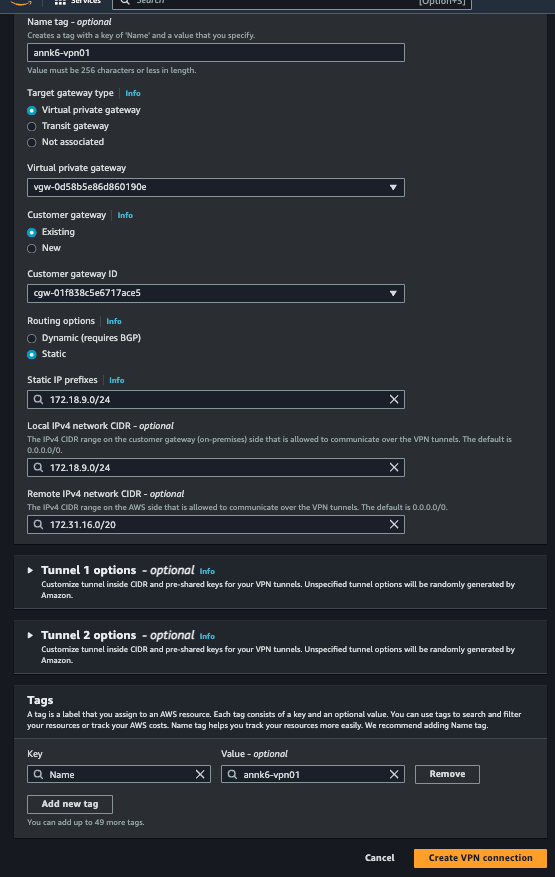
Step 5. Create a VPN connection. Create a VPN connection using the Customer Gateway combined with the Virtual Private Gateway created earlier. To create a VPN connection:
a. On the navigation pane, select Site-to-Site VPN connections. b. Select Create VPN connection. c. Set Target gateway type to Virtual private gateway. d. Select the VGW and CGW created earlier. e. For Routing option, select Static. For static IP prefixes, enter the FCI subnet range. g. Enter Local IPv4 network: enter the FCI subnet range. h. Enter Remote IPv4 network: enter the AWS subnet range, then select tunnel 1 options.
j. Select edit tunnel options to modify the tunnel parameters.
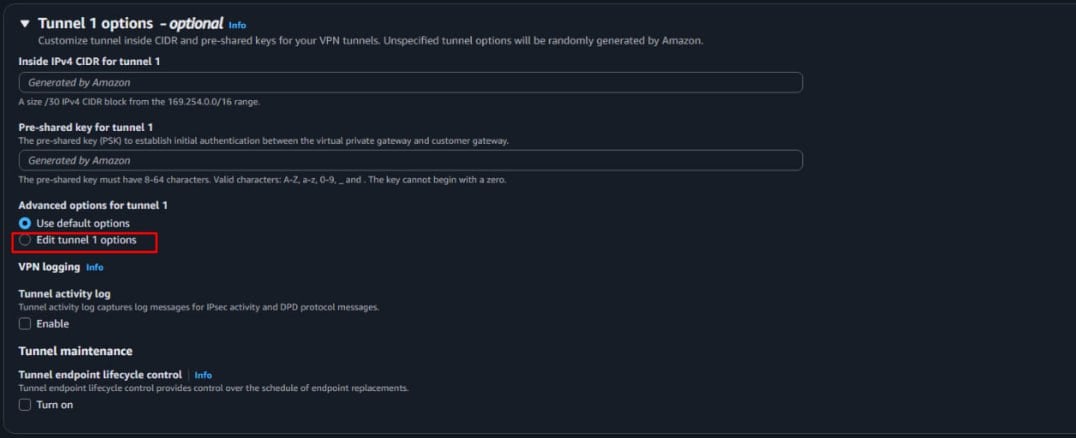
k. Edit the parameters for tunnel1 and tunnel2. Note: In this example, you do not need to enter values — AWS will automatically use the defaults of 28800 and 3600. (These values will be set on the FCI side to optimize the connection in later steps.)
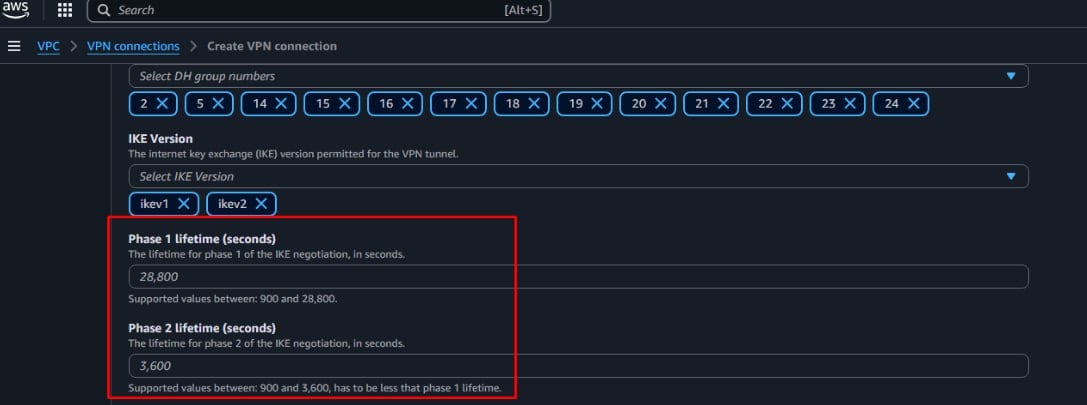
For the DPD timeout action, set it to restart mode (in this mode, when DPD times out, AWS will automatically restart the connection).

l. Select Create VPN connection.
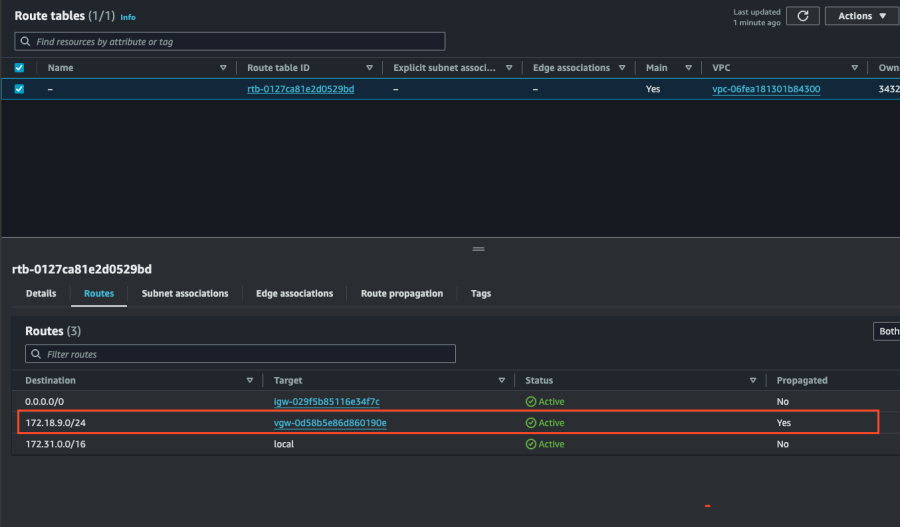
The VPN Connection is successfully initialized with status 'Available'.  Next, verify that the Route table is correctly configured.
Step 6. Download the configuration file. After creating the VPN connection, you can download a configuration file to use for configuration on the FCI VPC. To download the configuration file:
a. Go to the VPN connection page. b. Select the connection just created > select Download configuration. c. Select Vendor: pfSense, IKE version: IKEv1 > select Download.
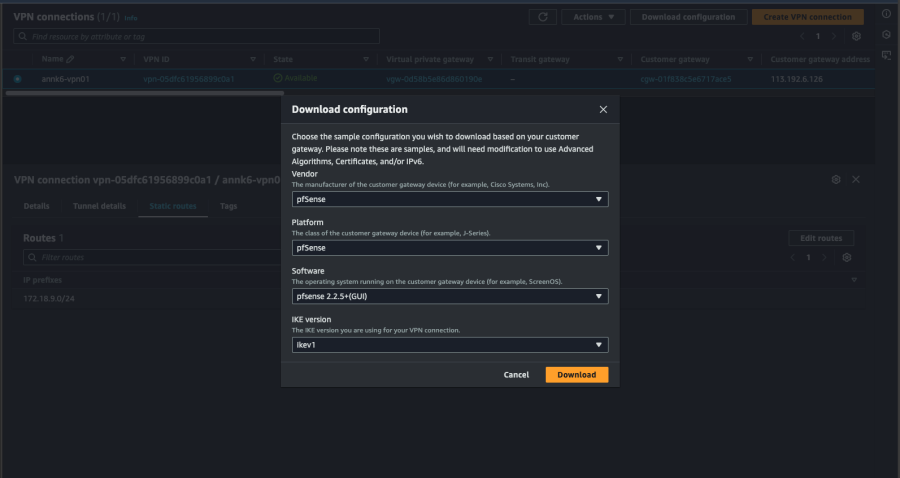
Use this configuration file to create the VPN Site-to-Site on the FCI side. 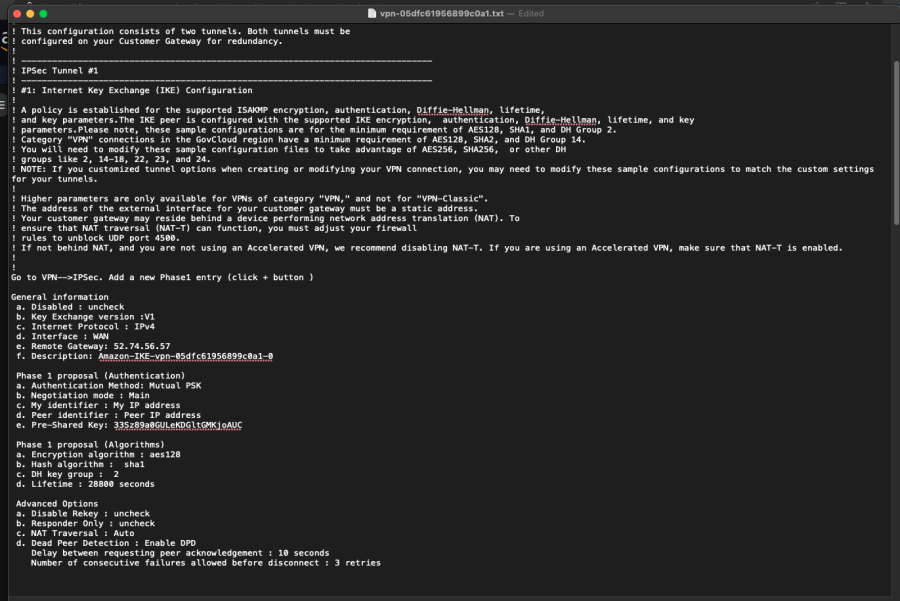
Configure VPN Site-to-Site on FCI Cloud
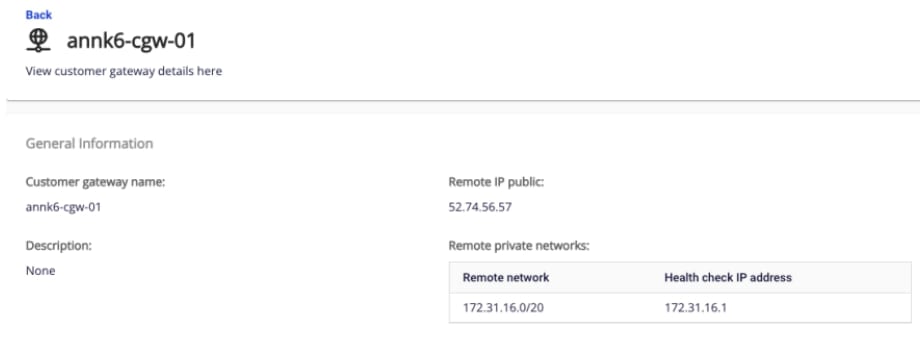
Step 1. Create Customer Gateways. Create a Customer Gateway with the following information:
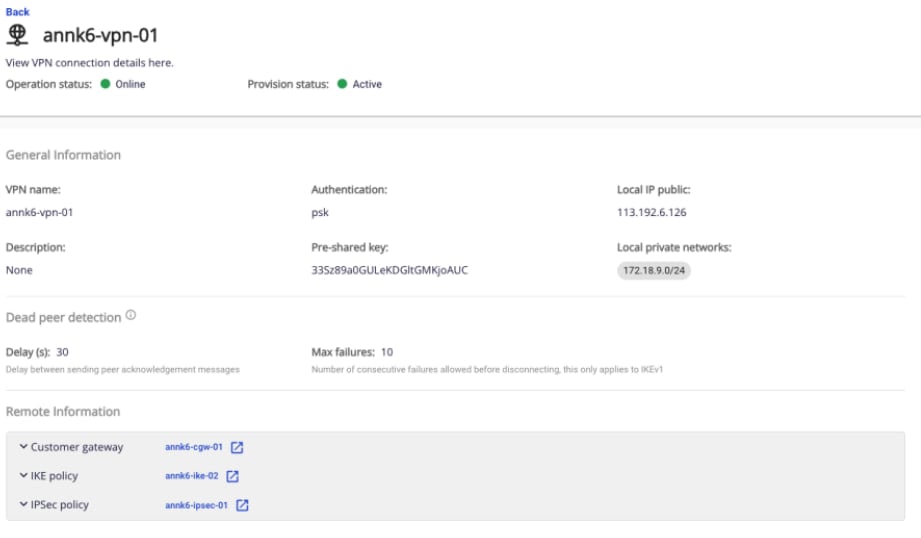
Step 2. Create a VPN connection. The VPN Connection parameters consist of three main sections:
- General information (general connection details)
- Remote VPN Information (encryption settings and customer-side information)
- Dead Peer Detection (number of automatic retries when a connectivity issue occurs)
Section 1: General information
Section 2: Remote VPN information
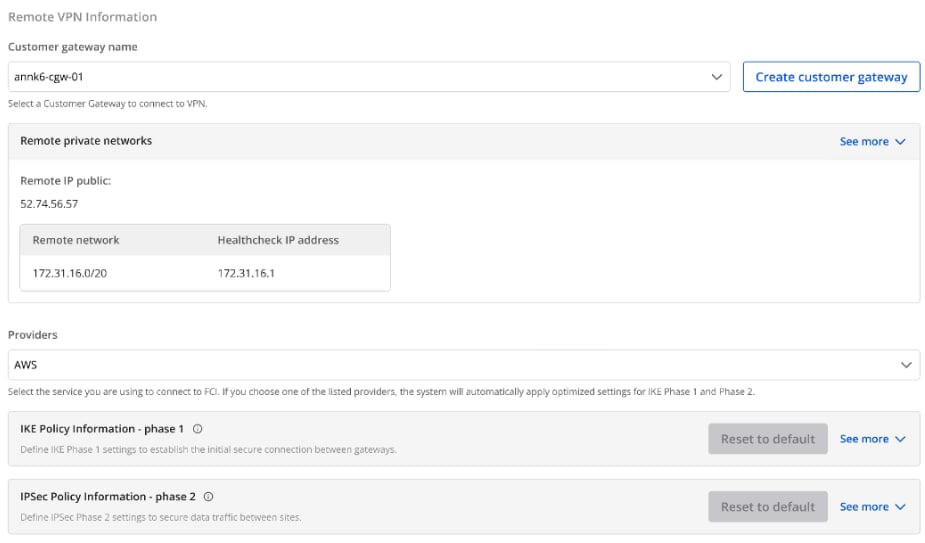
When you select Providers "AWS", the system automatically fills in the IKE and IPSec settings as follows:
For IKE:
- Encryption algorithm: aes-256
- Authorization algorithm: sha256
- IKE version: ikev2
- Lifetime units: seconds
- Lifetime value: 28800
- DH Group: GROUP_14
- Phase 1 negotiation mode: main
For IPSec:
- Encapsulation mode: tunnel
- Encryption algorithm: aes-256
- Authorization algorithm: sha256
- Lifetime units: seconds
- Lifetime value: 3600
- Perfect forward secrecy (PFS): GROUP_14
- Transform protocol: esp
Section 3: Remote VPN information
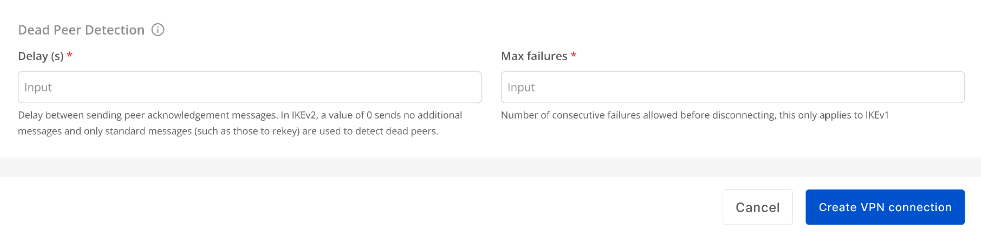
Enter the Delay and max failure values, then select Create VPN Connection. After a successful connection, the Operation status of the VPN connections on the FCI Cloud side will be Online.

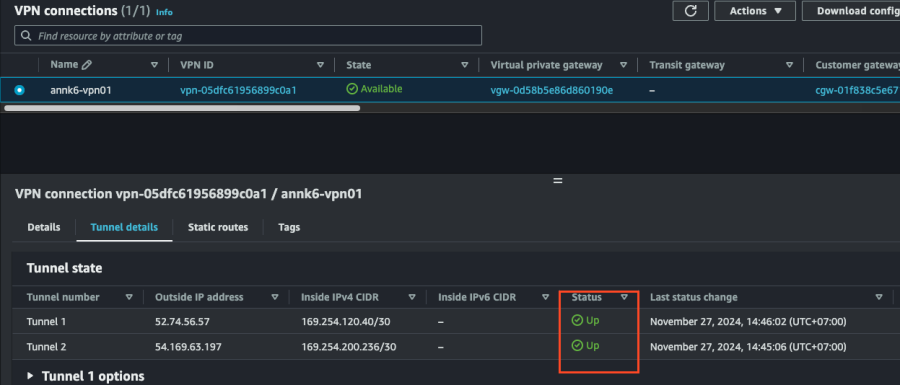
- Check the connection status on AWS: Go to VPN connections > select the VPN connection > select Tunnel details. If the connection is successful, the tunnel status will be UP.
- Verify the result.

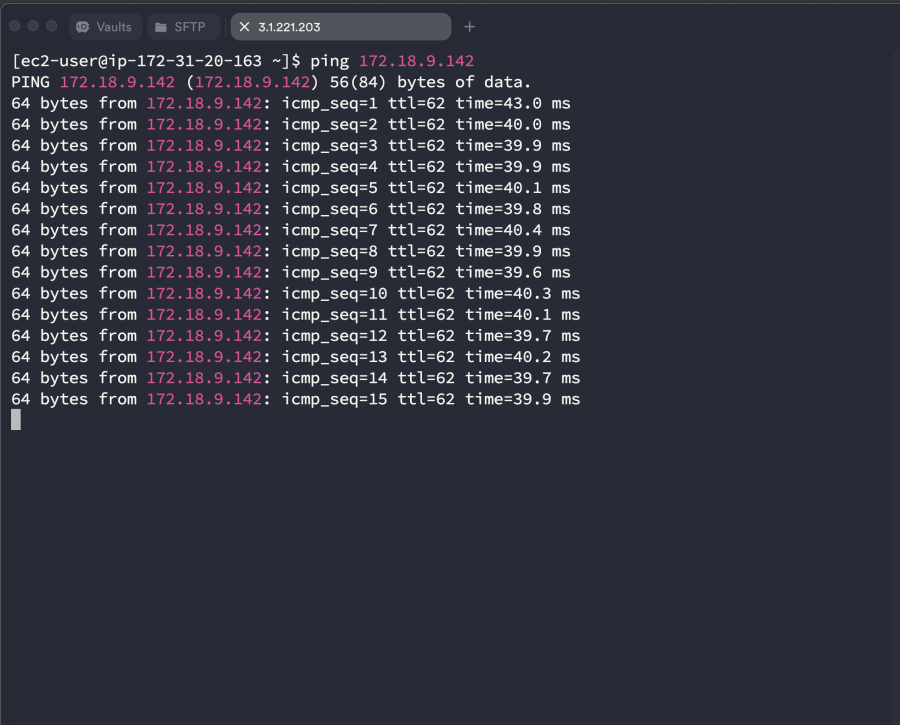
Start VMs in each VPC using the network ranges configured in the VPN Site-to-Site, then ping the VMs from each side.
Ping result from FCI to AWS

Ping result from AWS to FCI Cloud