Create NAT rule
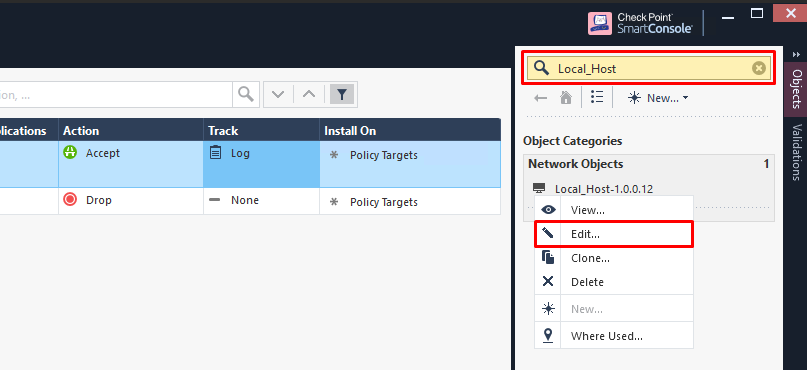
Step 1: In the Object Pane (F11) > find the object to SNAT > right-click and select Edit.
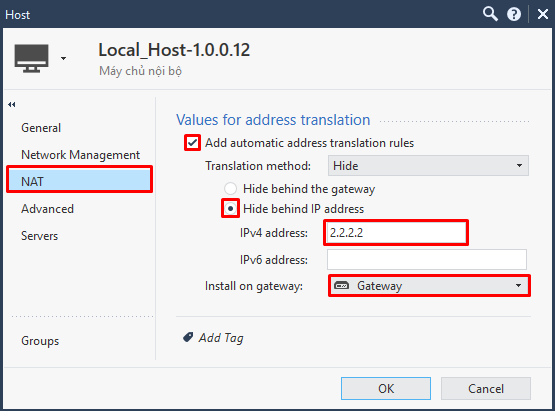
Step 2: In the menu, select NAT > check Add automatic address translation rules > check Hide behind IP address > enter the SNAT IP > select the gateway to apply.
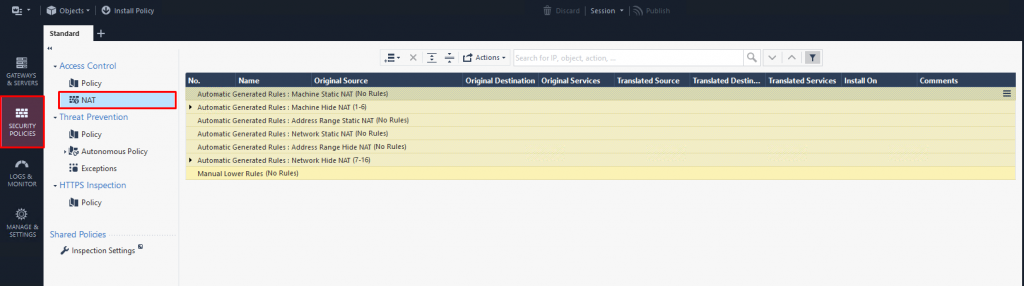
Step 3: In the menu, select Security Policies (Ctrl + 2) > select Access Control > select NAT > verify the rule was created.

Step 4: Install Policy.
Step 1: In the menu, select Security Policies (Ctrl + 2) > select Access Control > select NAT.
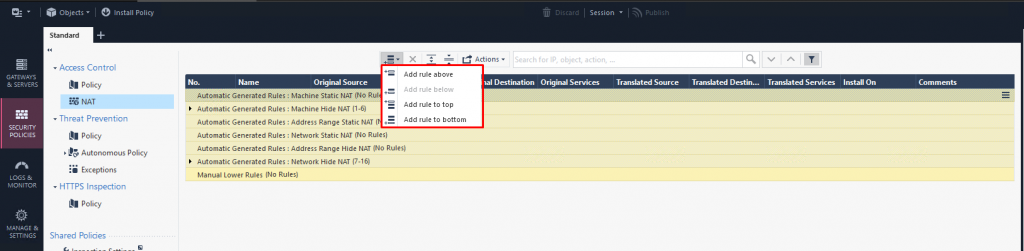
Step 2: Click Add rule above / to top / to bottom to insert the rule at the appropriate position.
Step 3: Configure the new rule:

- Name:

- Original Source (source IP before NAT):

- Original Destination (destination IP before NAT):

- Original Services (service/port before NAT):

- Translated Source (source IP after NAT):


Keep original source IP.
- Translated Destination (destination IP after NAT):

- Translated Services (service/port after NAT):

- Install On (device containing the NAT rule):


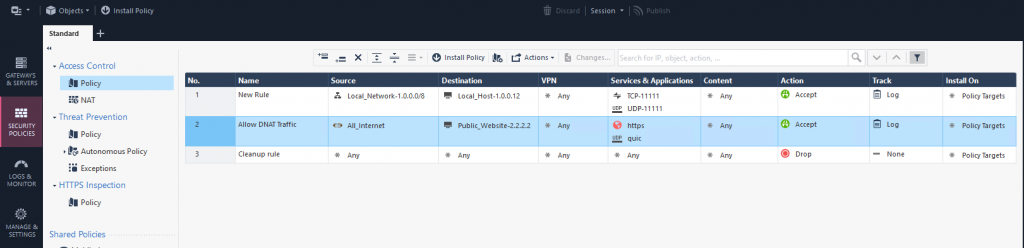
DNAT rule after creation:

Step 4: Create a firewall rule to allow the DNAT connection.
Step 5: Install Policy.