Configure Storage Disk for a Windows Virtual Machine
Configure Storage Disk for a Windows Virtual Machine
After attaching a Storage Disk to a virtual machine on the FPT Portal, Linux machines will automatically detect the new disk. For Windows machines, users need to remote into the virtual machine to complete the disk configuration.
Step 1: Access the virtual machine.
Step 2: Open Disk Management on Windows using one of the following methods:
-
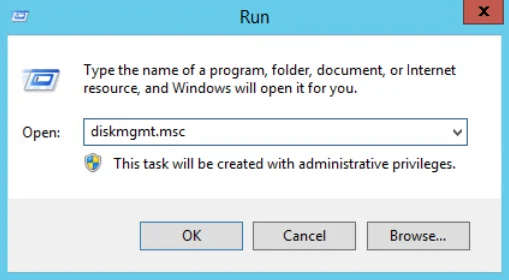
Press the Windows + R key combination, type diskmgmt.msc, and press Enter.
-
Click the Start button, type diskmgmt.msc in the search box, and select Disk Management.
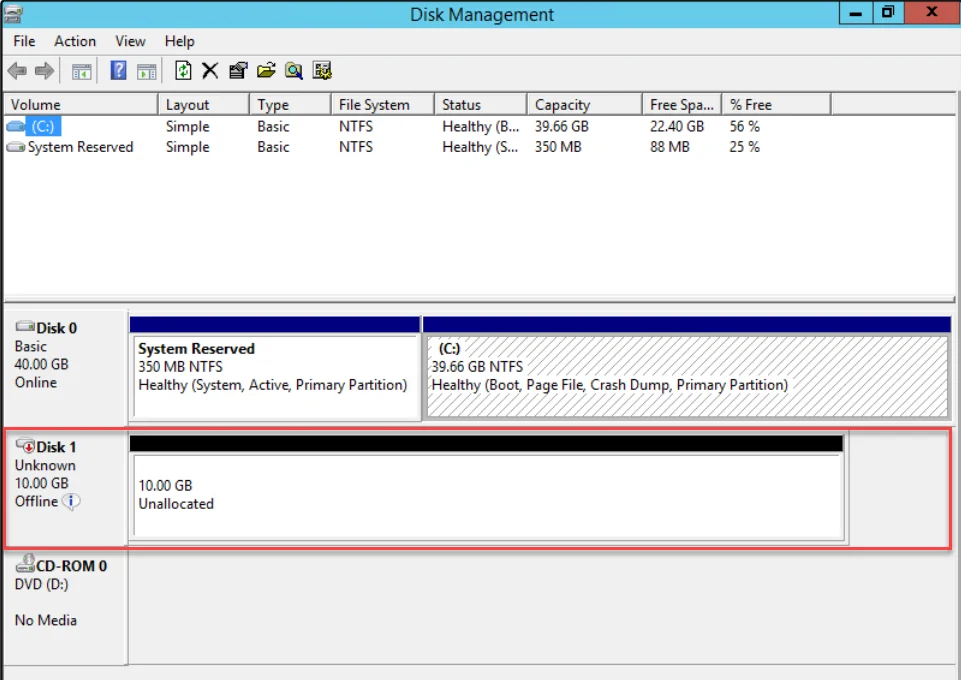
Step 3: Disk Management will display all hard drives on the virtual machine, including the newly attached disk with Offline status.
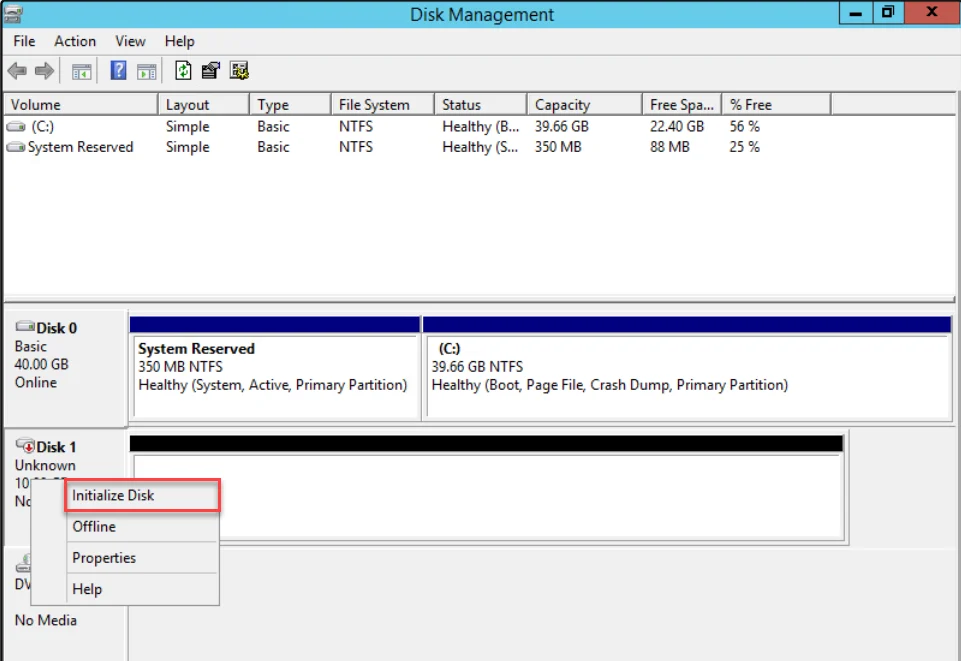
Step 4: Select Online from the Disk menu by right-clicking the disk icon.

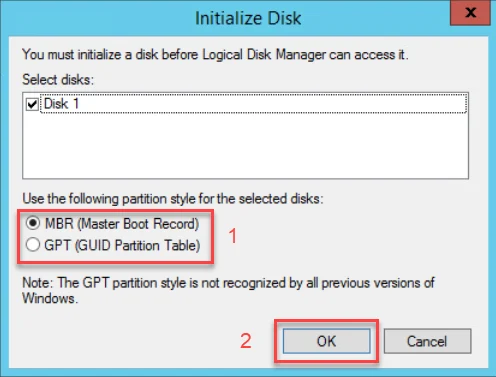
Step 5: The disk will switch to Online and Not Initialized status. Right-click the disk icon and select Initialize Disk.
Step 6: Select the appropriate Partition style and click OK.
Step 7: Right-click on the unallocated space of the disk and select New Simple Volume.

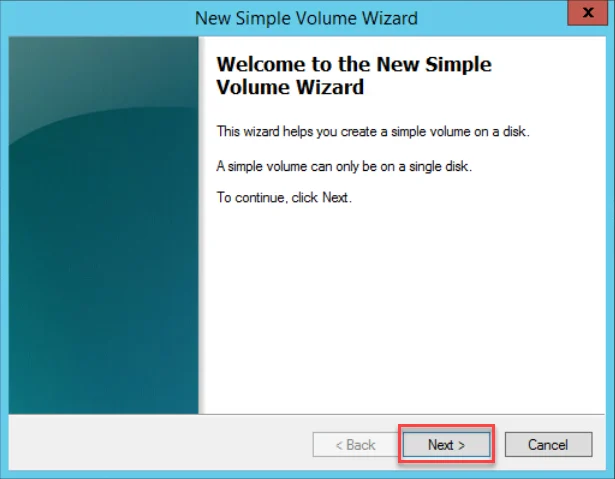
Step 8: Click Next in the New Simple Volume Wizard that appears.
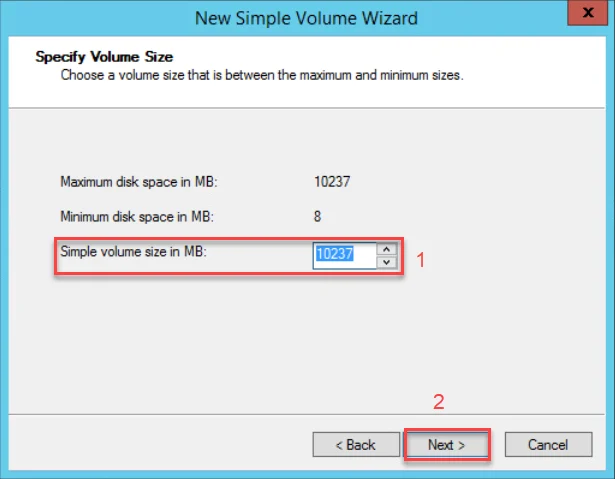
Step 9: Enter the desired disk size in the Simple volume size in MB field and click Next.
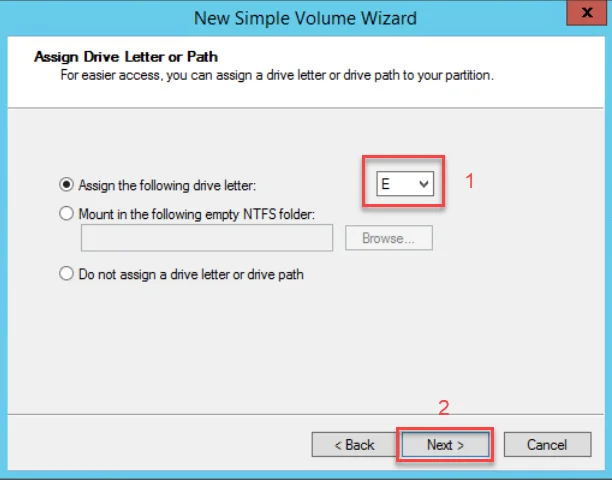
Step 10: Select a drive letter in the Assign the following drive letter section and click Next.
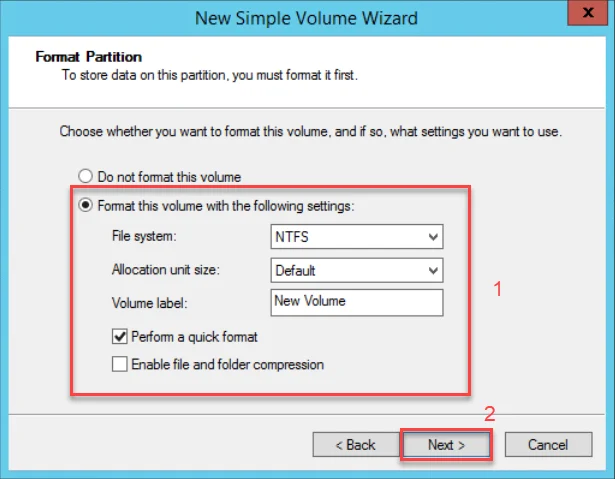
Step 11: Select Format this volume with the following settings and fill in the following information:
- File System: Select NTFS format for the fastest formatting process. You can also select another type if preferred.
- Allocation unit size: Select Default.
- Volume label: Enter a name for the disk.
Click Next to proceed to the next step.
Step 12: Click Finish to complete.
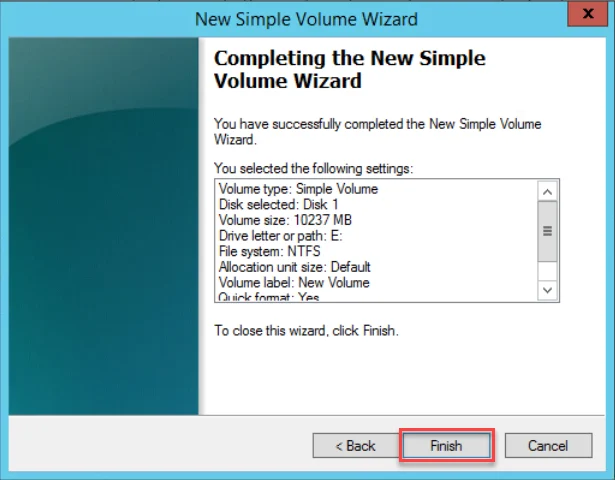
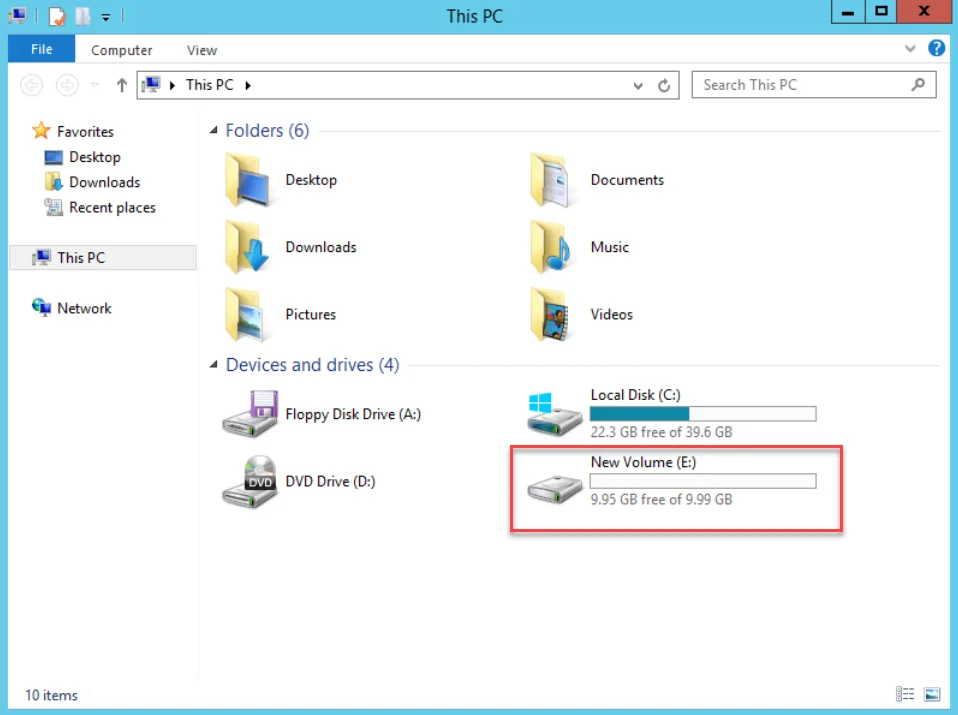
The new disk has been successfully configured for the Windows virtual machine from the attached storage.
If you cannot complete Steps 1 through 6 through the standard GUI, you can use the following CMD commands as an alternative: Go to Start > cmd (Run as administrator)
Diskpart > list disk > select disk > online disk > attributes disk clear readonly > Exit
Then continue from Step 7 following the instructions above.