Back Up a Server with Snapshot
Back Up a Server with Snapshot
A Snapshot is an action that captures the current state of a virtual machine at a specific point in time, producing copies that contain the entire system contents at that moment.
If you need periodic storage at multiple points in time, please refer to the FPT Backup service.
Users can choose the moment when the system is running most stably to create a Snapshot. Later, if any software in the system fails and cannot be recovered, or important data is accidentally deleted, users simply need to restore the virtual machine to the point in time when the Snapshot was created to resolve the issue.
Initialize and Manage Snapshots from a Virtual Machine
1. Create a Snapshot
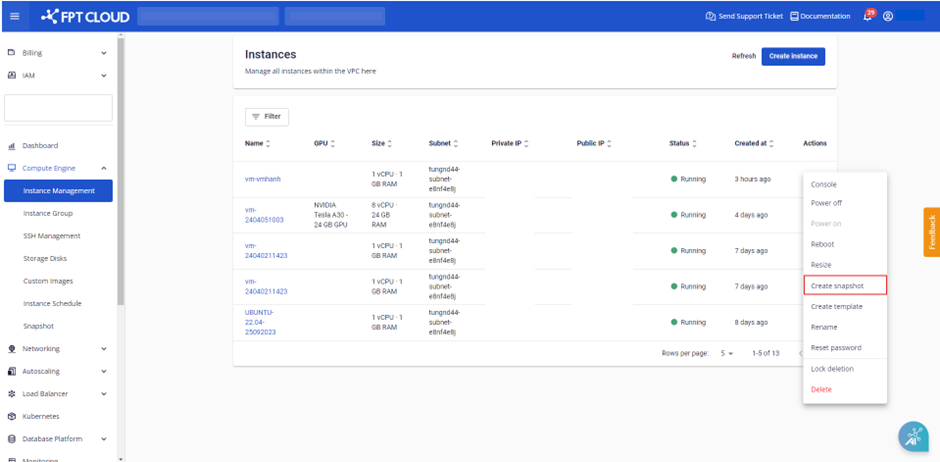
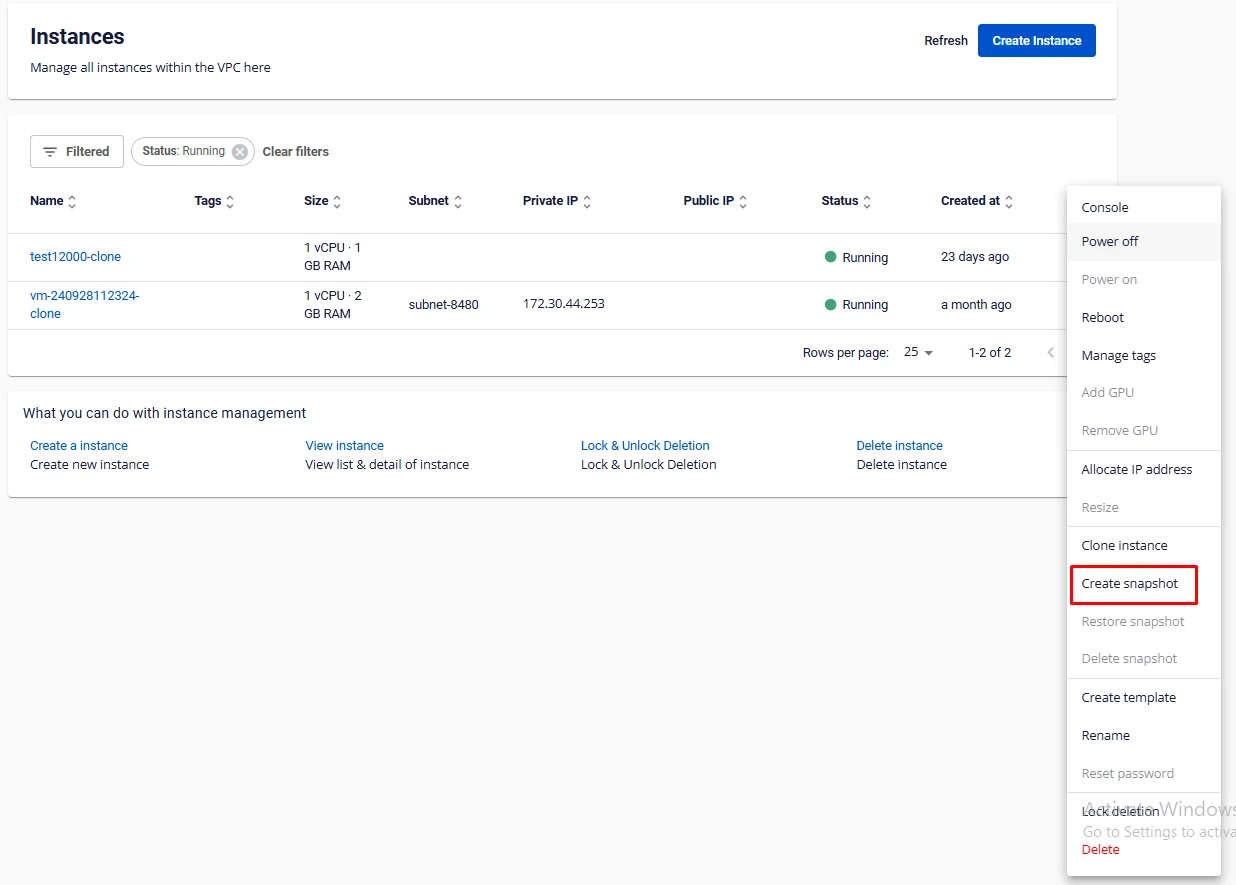
Step 1: In the menu, select Instance Management. Under the Actions section for the virtual machine you want to snapshot, select Snapshot > Create snapshot.
Step 2: Click Create snapshot to display the Create instance snapshot modal.
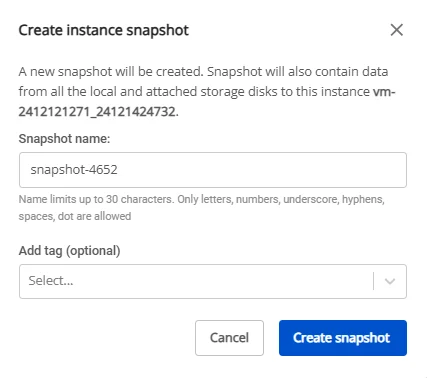
Step 3: Click Create snapshot to create the snapshot. After confirming the snapshot creation, the system will verify resources, create the snapshot image, and report the processing result.
2. Launch a Virtual Machine from a Snapshot
Step 1: In the menu, select Snapshot. Under the Actions section for the snapshot, select Launch as Instance.
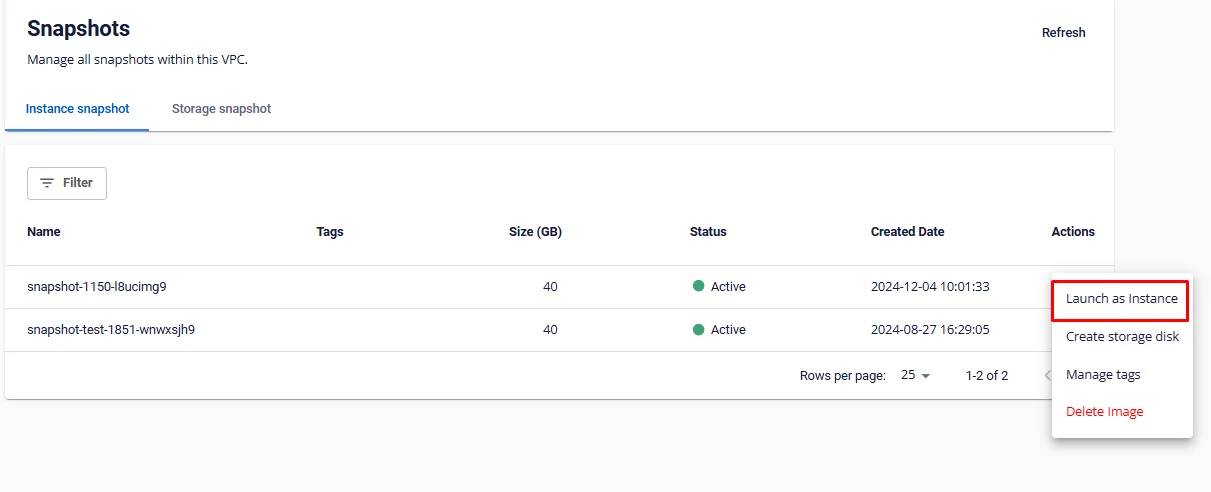
Step 2: The Create instance modal from snapshot will appear.
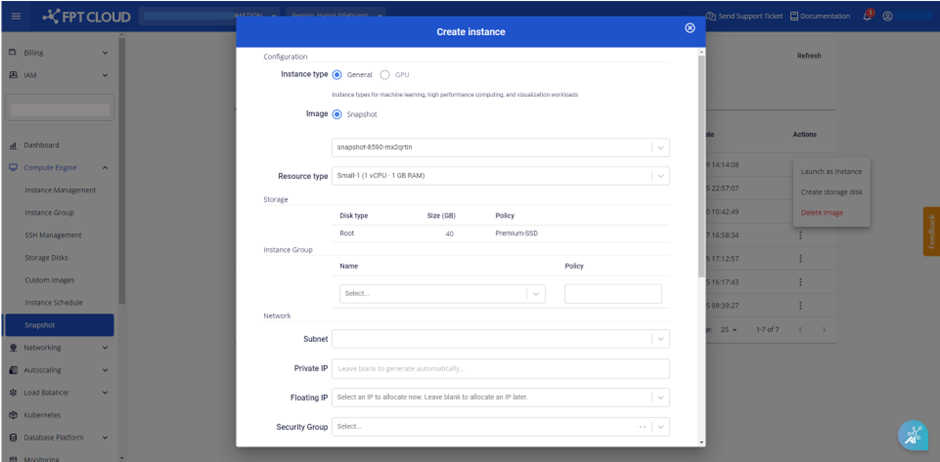
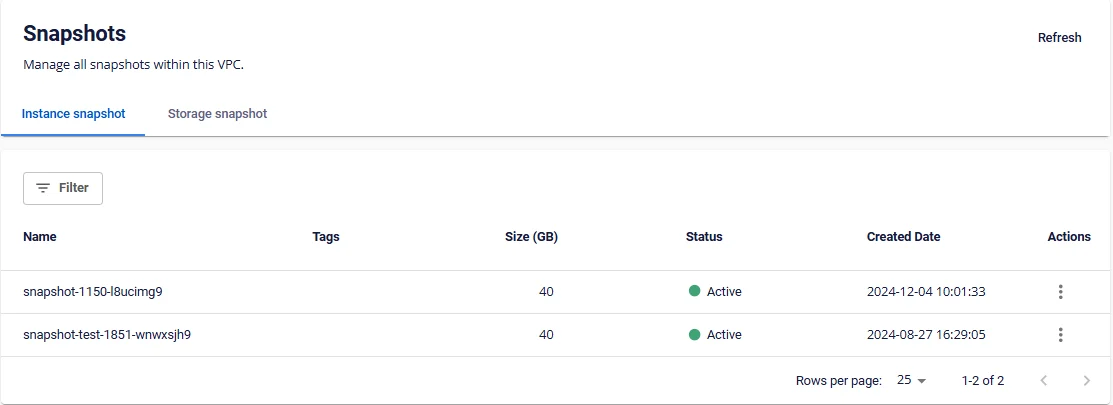
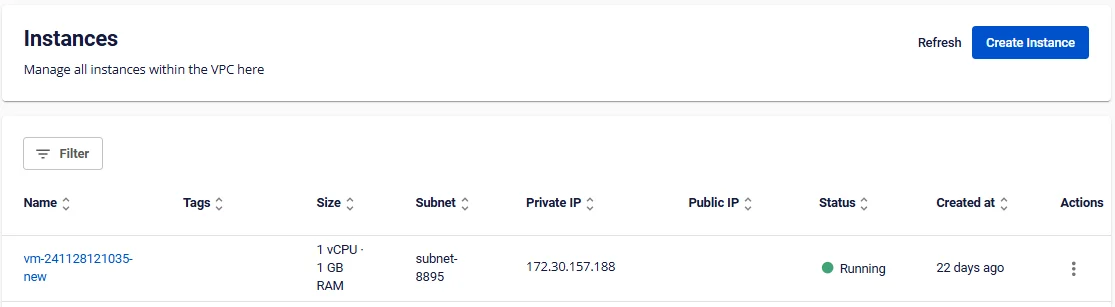
Step 3: The virtual machine is created successfully from the snapshot. The system displays the virtual machine on the Instance Management screen.
3. Delete a Created Snapshot
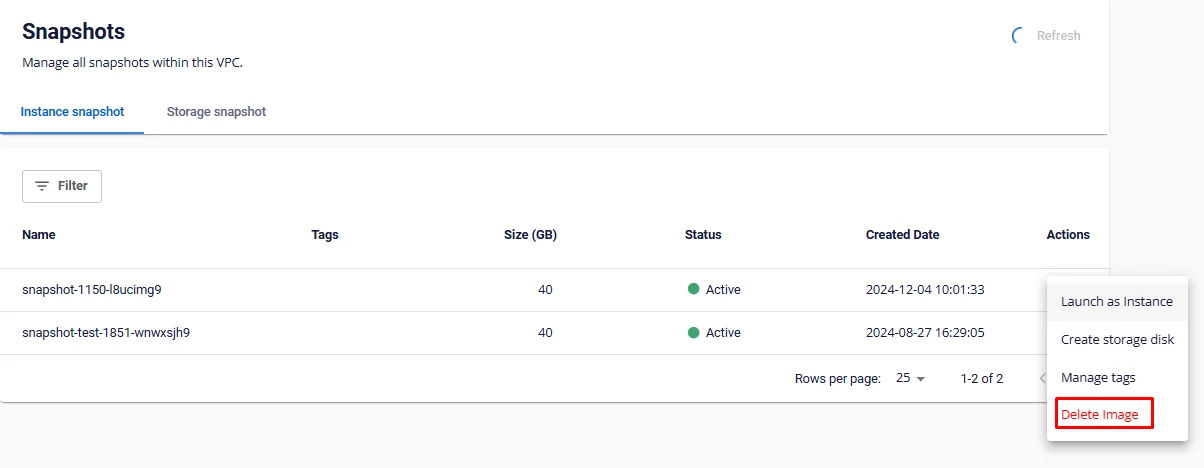
Step 1: In the menu, select Snapshot. Under the Actions section for the snapshot, select Delete Image.
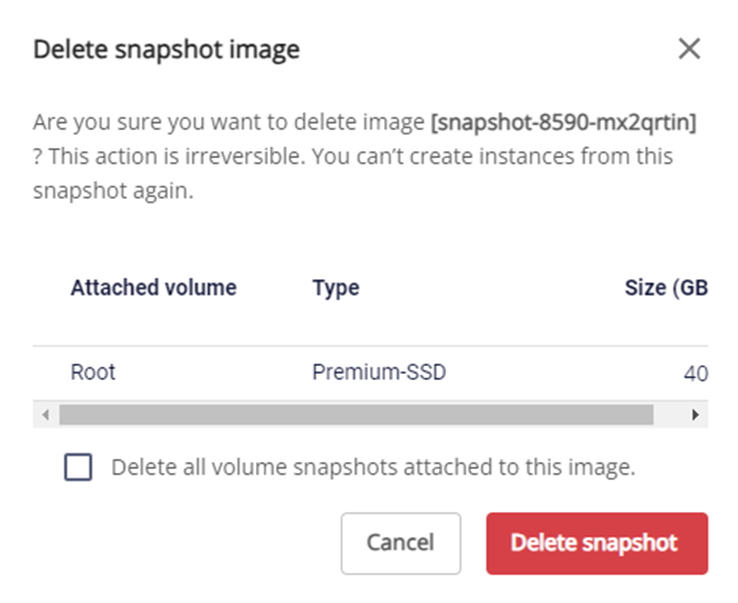
Step 2: Click Delete snapshot.
After confirming the deletion, the system will delete the image and return the snapshot resources to the VPC. Users will be notified when the snapshot deletion is complete.
If the user checks the "Delete all volume snapshots attached to this image" checkbox, snapshots created from storage disks attached to that virtual machine will also be deleted.
Initialize and Manage Snapshots from a Storage Disk
1. Create a Snapshot
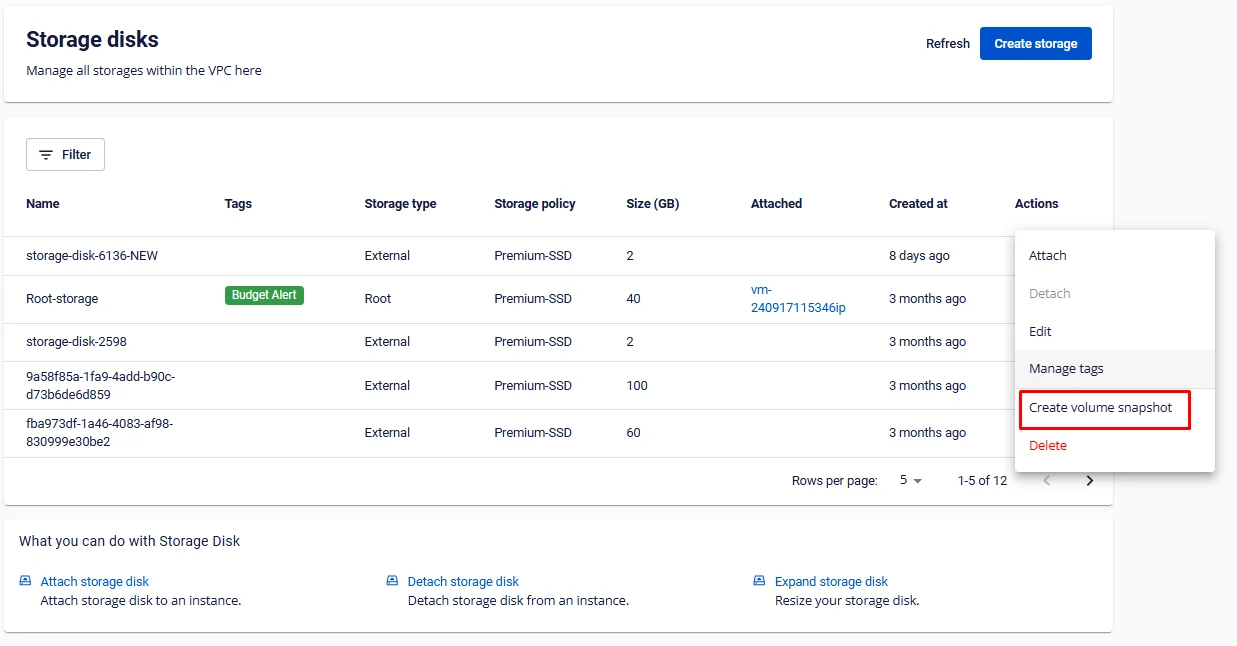
Step 1: In the menu, select Storage Disk. Under the Actions section for the virtual machine you want to snapshot, select Snapshot > Create volume snapshot.
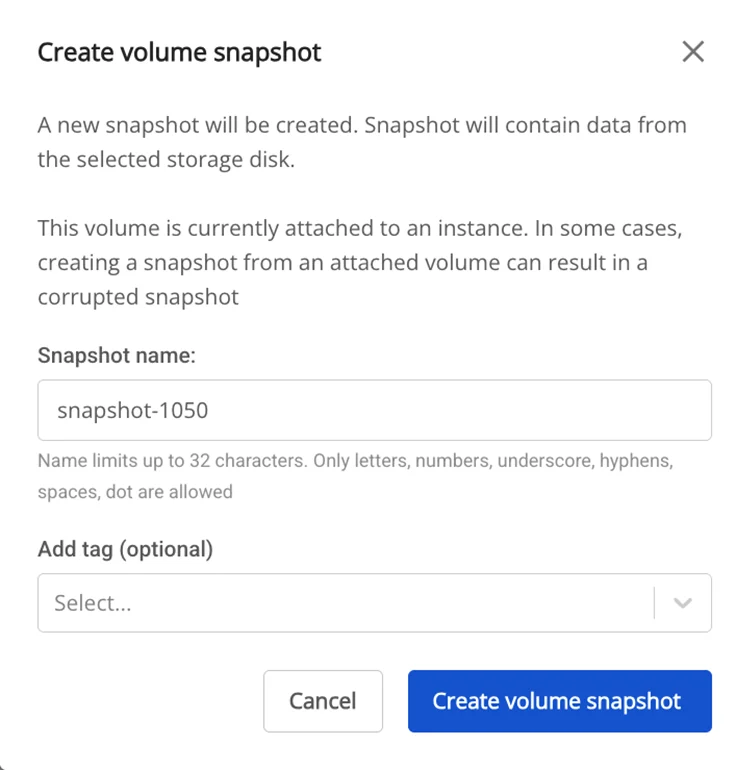
Step 2: Click Create volume snapshot to create.
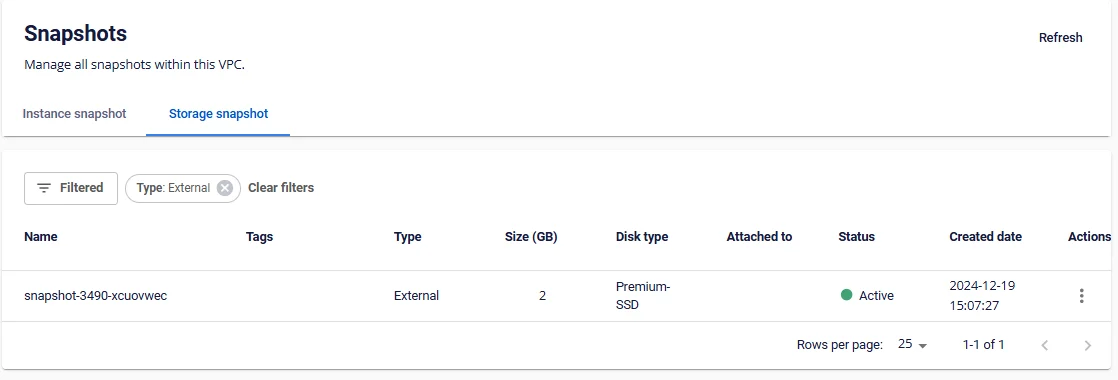
Step 3: The snapshot is created successfully and displayed on the Snapshots screen under the Storage snapshot section.
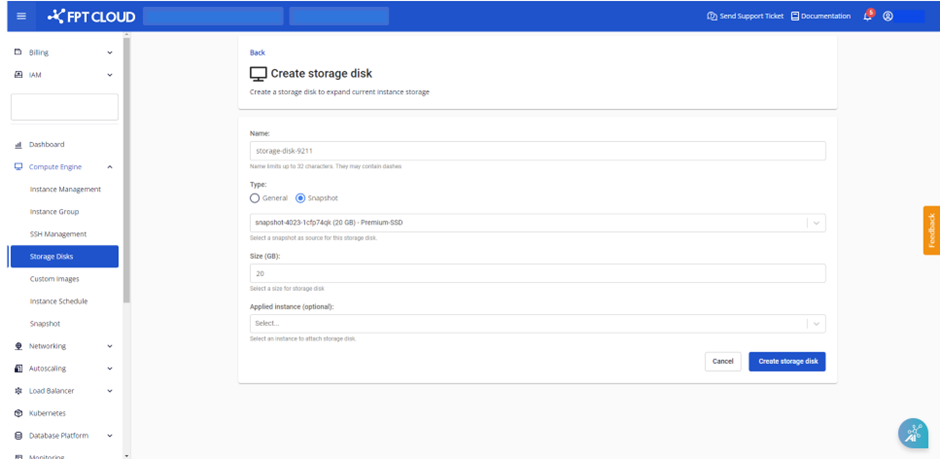
2. Create a Storage Disk from an Existing Snapshot
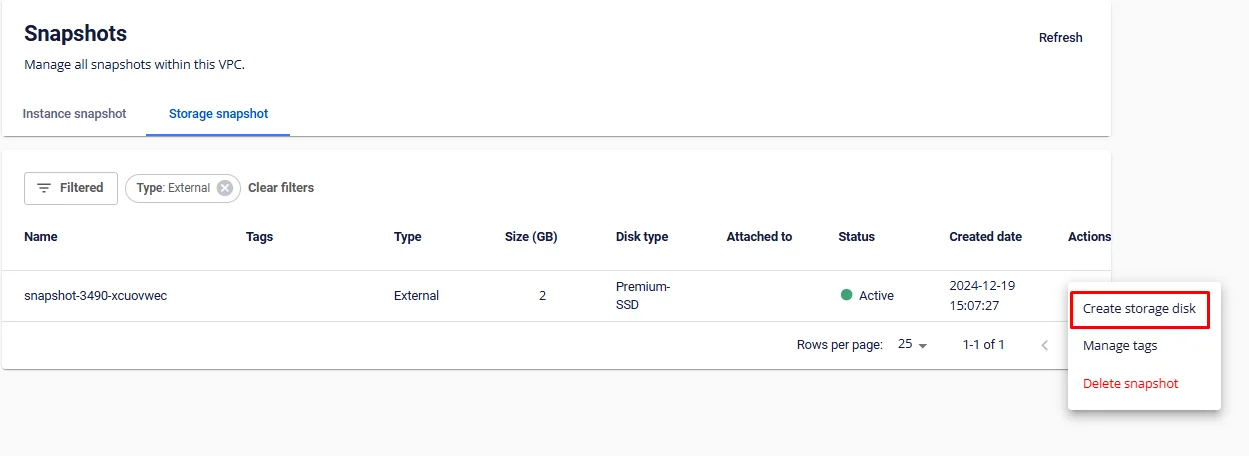
Step 1: In the menu, select Snapshot. Under the Actions section for the snapshot, select Create storage disk.
Step 2: Click Create storage disk to create.
3. Delete a Snapshot Created from a Storage Disk
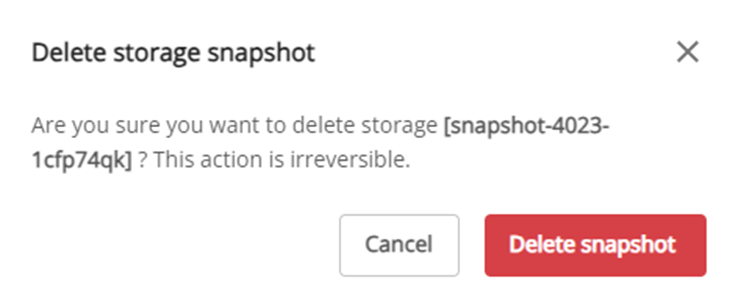
Step 1: In the menu, select Snapshot. Under the Actions section for the snapshot, select Delete Snapshot.
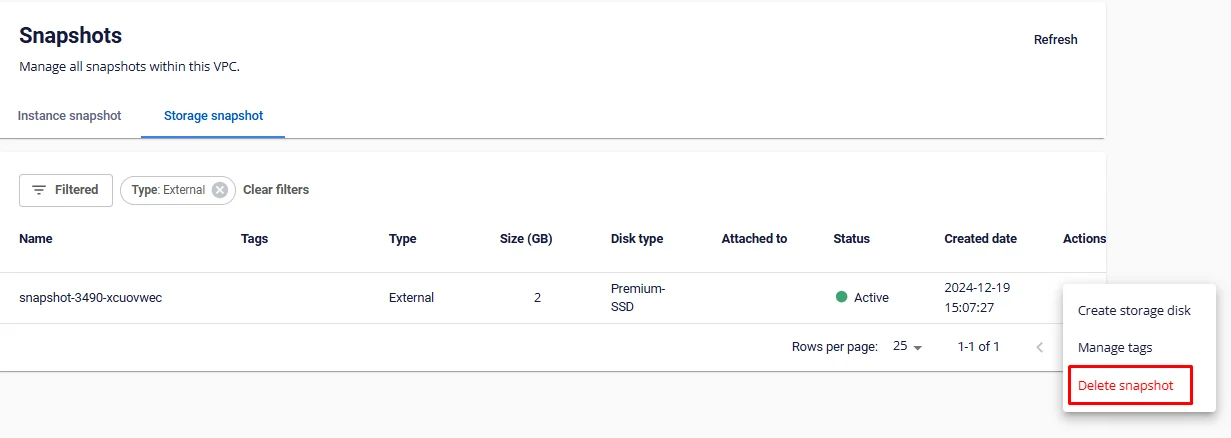
Step 2: Click Delete snapshot to proceed with deletion.
Initialize and Manage Snapshots for the Specific Service Type
1. Create a Snapshot for a Virtual Machine
Step 1: In the menu, select Instance Management. Under the Actions section for the virtual machine you want to snapshot, select Create snapshot.
Step 2: Click Create in the confirmation popup to proceed with the snapshot creation.

After confirming the snapshot creation, the system will verify resources, create the snapshot image, and report the processing result.
On average, creating a snapshot takes approximately 30 minutes, depending on the machine type and the current data on the virtual machine. Users will be notified when the snapshot creation is complete.
Note: Each instance can have 1 snapshot created and stored. The most recently created snapshot will overwrite the previously created snapshot for that instance.
2. Restore a Virtual Machine from a Snapshot
Note: This operation can only be performed on instances that have successfully created a snapshot. Please verify that the required instance has a snapshot before proceeding.
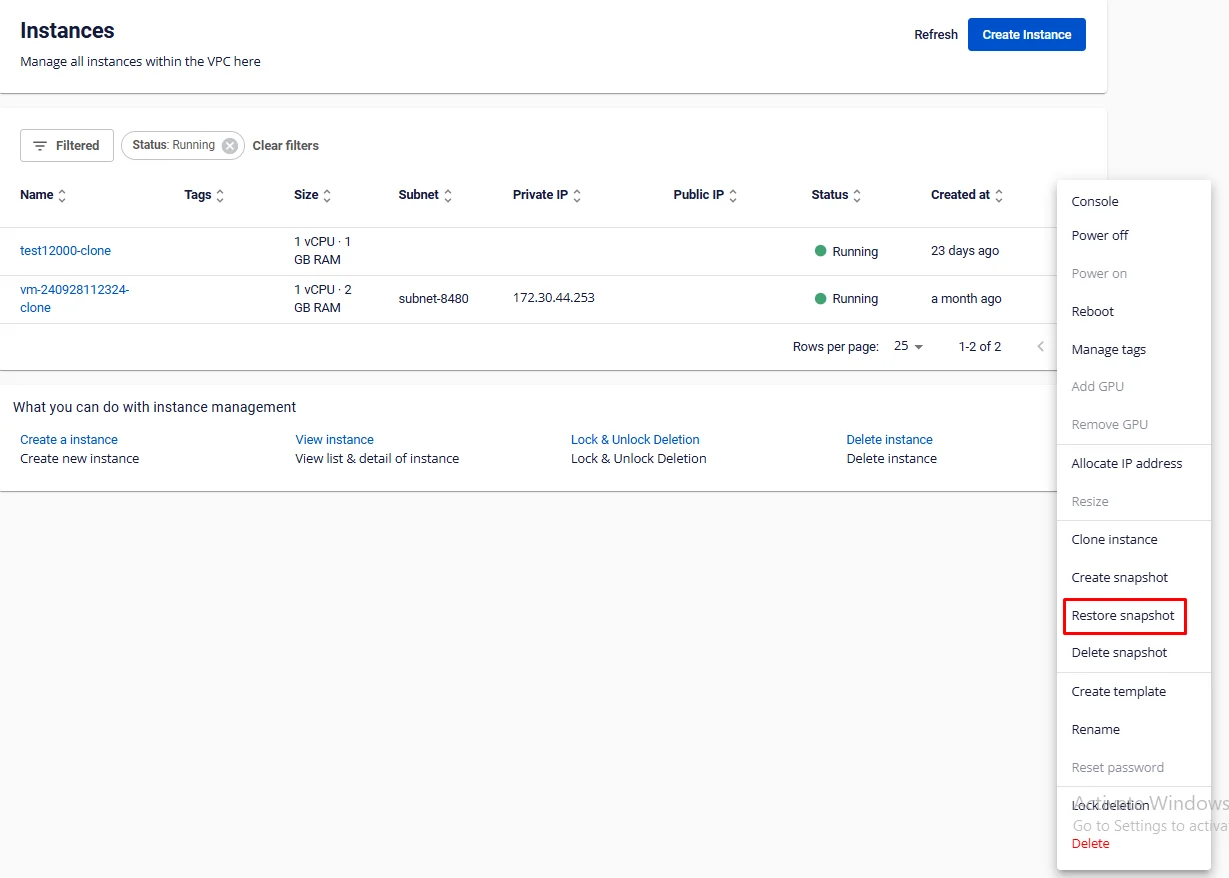
Step 1: In the menu, select Instance Management. Under the Actions section for the virtual machine you want to restore, select Restore snapshot.
Step 2: Click Restore instance in the confirmation popup to proceed with the restoration.
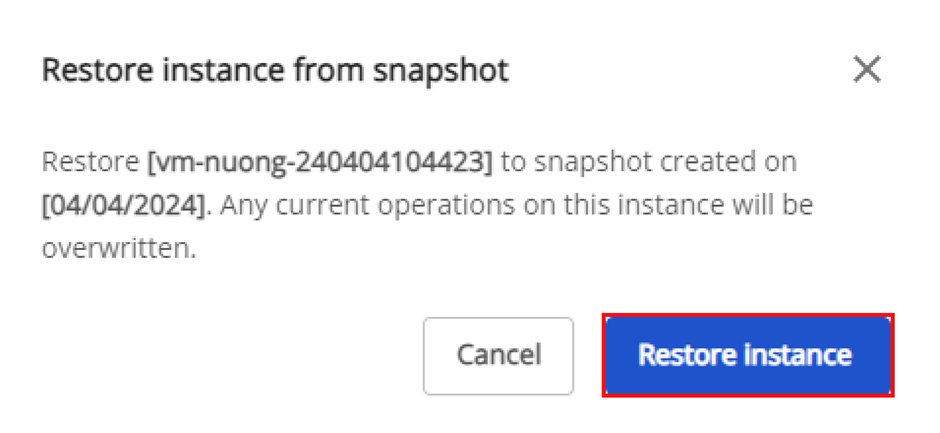
After confirming the restoration, the system will restore the virtual machine after verifying the snapshot data. On average, restoring a virtual machine from a snapshot takes approximately 30 minutes, depending on the machine type and the current data. During this process, the virtual machine may be shut down and users will be unable to interact with it until the restoration is complete.
Users will be notified when the restore process is complete and the virtual machine is back online.
3. Delete an Instance Snapshot
Note: This operation can only be performed on instances that have successfully created a snapshot. Please verify that the required instance has a snapshot before proceeding. Deleted snapshots cannot be recovered.
Please exercise caution when performing this operation.
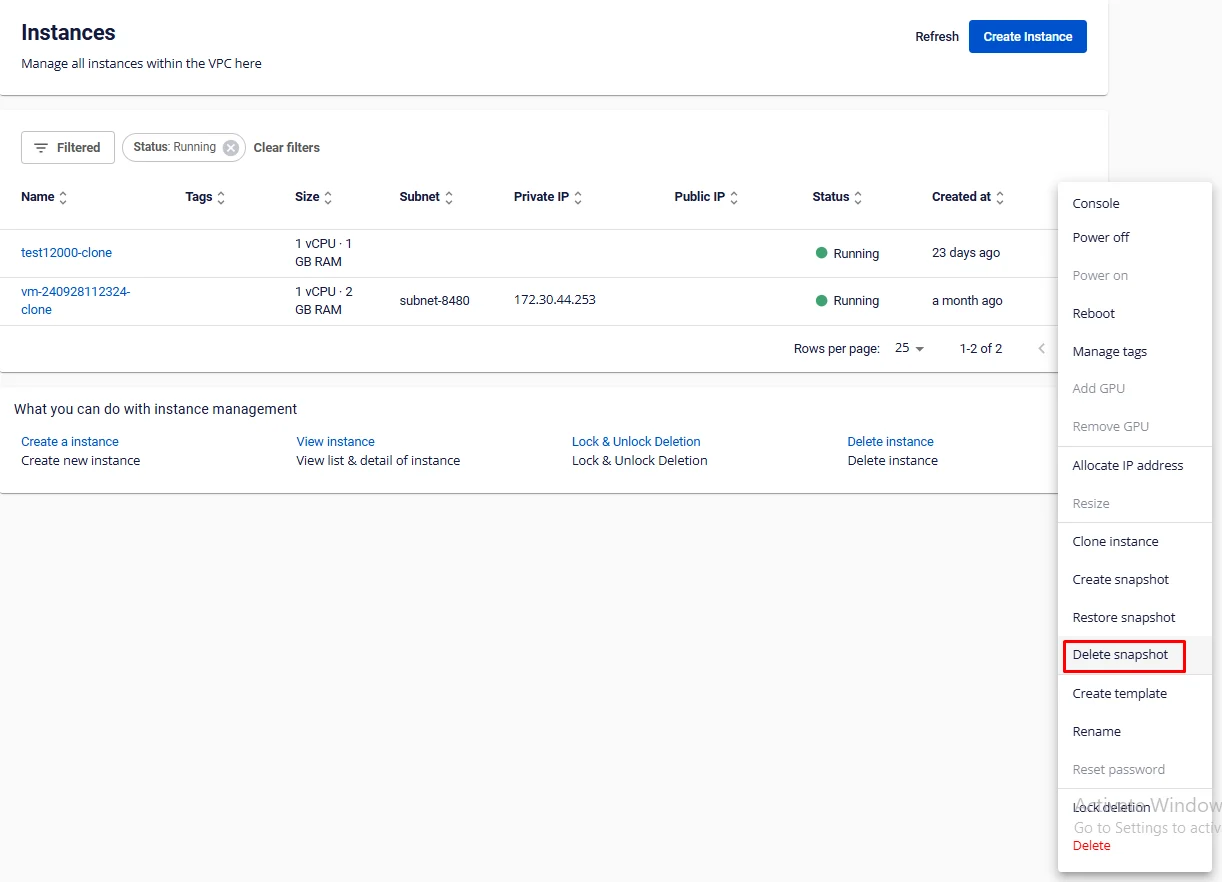
Step 1: In the menu, select Instance Management. Under the Actions section for the virtual machine whose image you want to delete, select Delete snapshot.
Step 2: Click Delete snapshot.
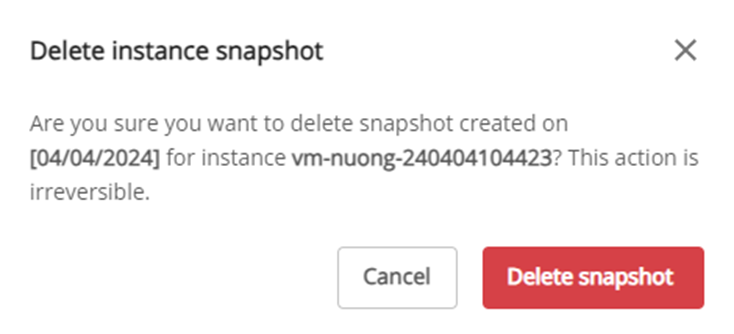
After confirming the deletion, the system will delete the image and return the snapshot resources to the VPC. Users will be notified when the snapshot deletion is complete.