Create a New Virtual Machine
Create a New Virtual Machine
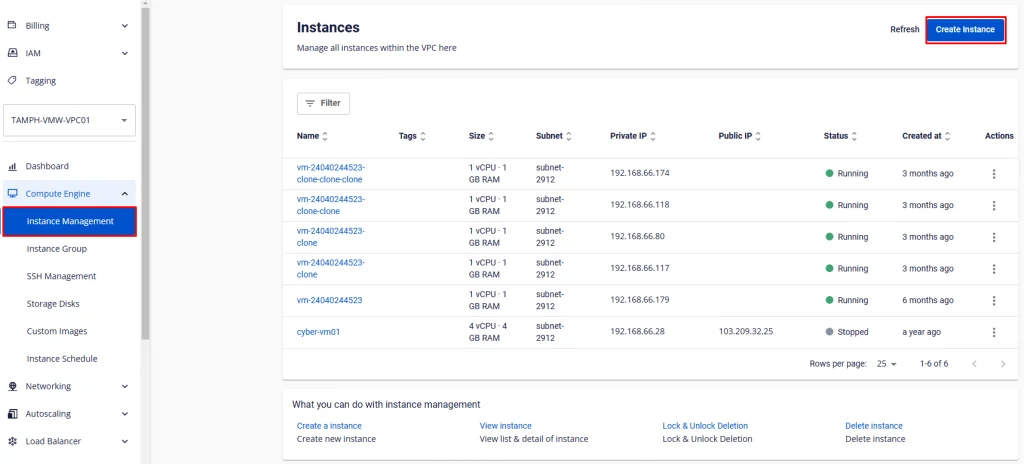
Step 1: In the menu, select Compute Engine > Instance Management, then click Create instance.
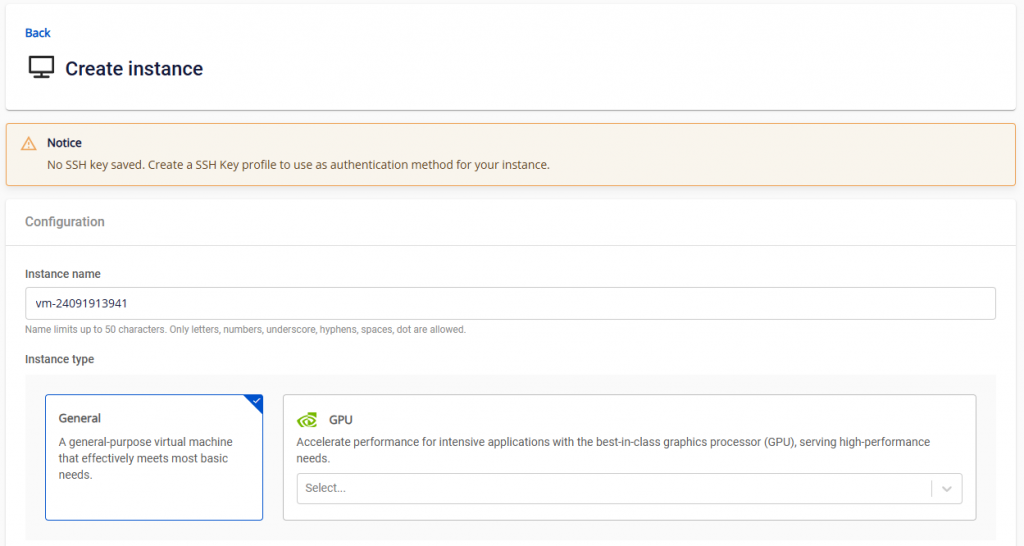
Step 2: Configure the virtual machine according to your needs with the following options:
-
Instance Type: Users can choose the machine type that best suits their needs. Currently there are 2 common types: General and GPU.
- General is a machine type that serves basic needs well.
- GPU serves needs that require high performance (High Performance Computing), Machine Learning, etc.
-
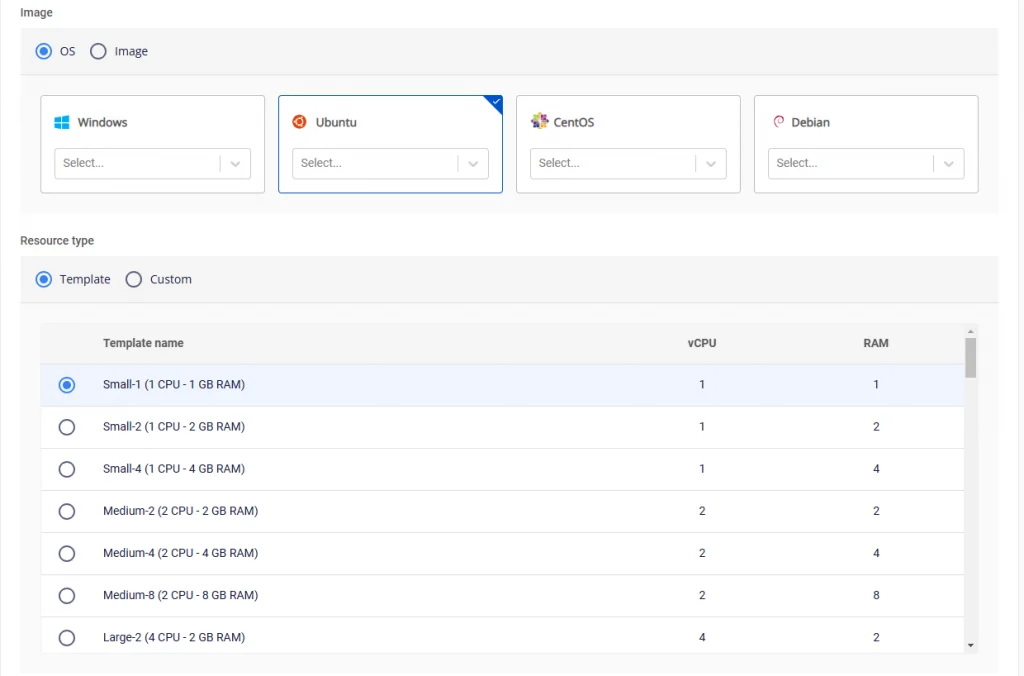
Image: Select the main OS that suits your needs. Each OS group includes different versions. The default is the latest version. Users can customize as needed by uploading their own ISO files or creating a virtual machine from previously initialized templates.
-
Resource type: Each machine type has different CPU and RAM configurations, or users can create a custom configuration.
-
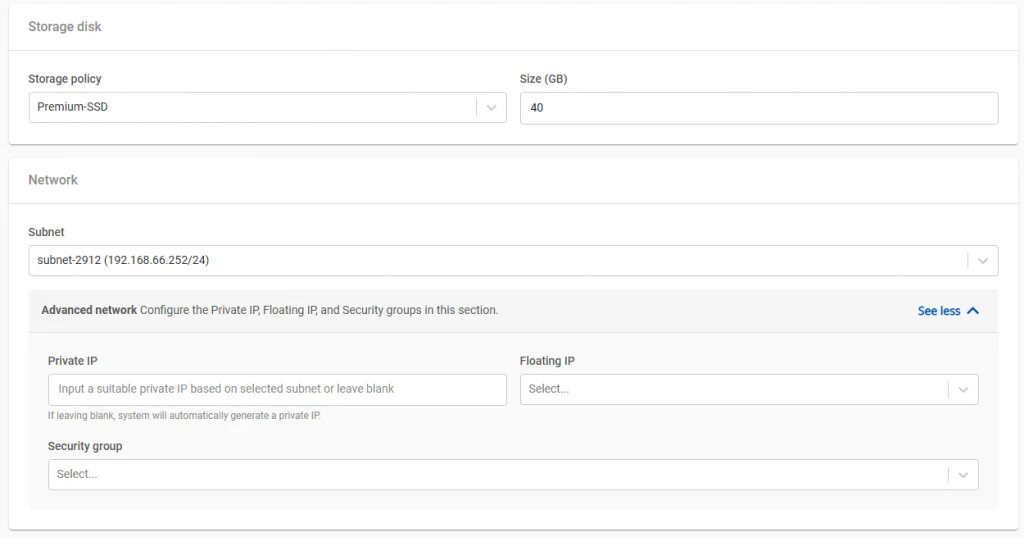
Storage: Storage attached to the virtual machine includes:
-
Storage Policy: Storage type
-
Size: Storage size
-
-
Instance group: Users can optionally choose an Instance group to configure the placement of the virtual machine on the physical host.
-
Subnet & Private IP: Users select a network to ensure the virtual machine has connectivity to the resources and network services it needs to operate. This allows the virtual machine to communicate with other devices on the network and access external resources such as the internet. Users can enter a private IP address for the virtual machine or the system will auto-generate one based on the selected subnet (if this field is left blank).
-
Security Group: Users select a security group to control traffic to and from the virtual machine. Users can leave this field blank and configure it later.
-
Instance name: Enter the virtual machine name for easy management. This will also be the hostname of the virtual machine.
-
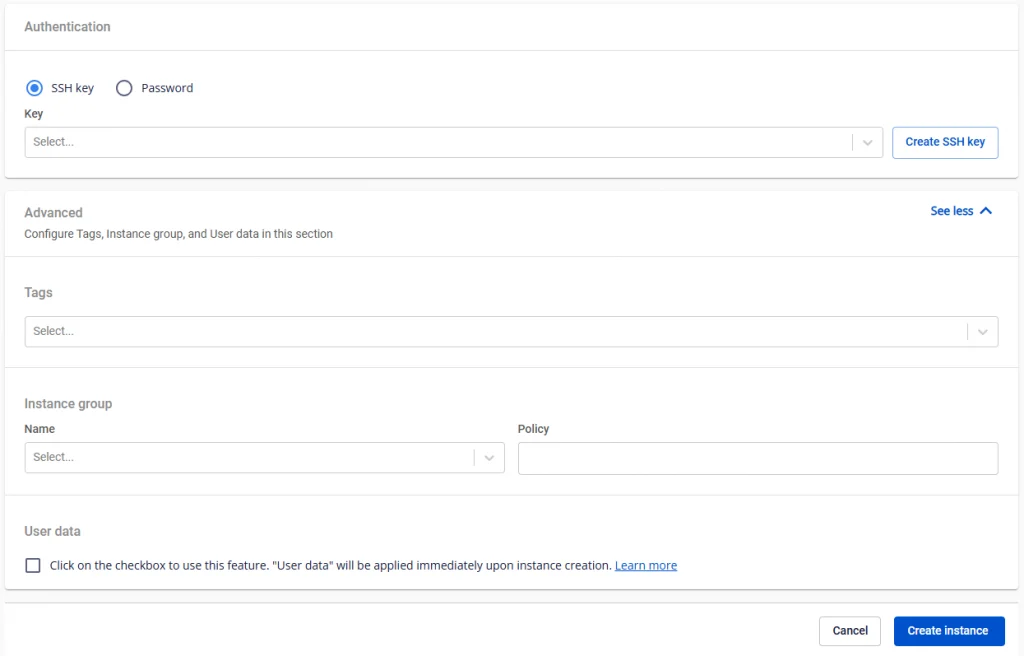
Authentication type: Standard (Username/Password) or SSH key.
-
If SSH Key is selected, the system will use the most recent SSH key (can be changed).
-
If using the Standard method, users should remember and keep the password secure in a safe location.
-
-
User data: Contains the cloud-init script. When the virtual machine boots, cloud-init will read the metadata provided by the cloud and initialize the system based on it. Cloud-init is commonly used to set up networking, storage, SSH keys, and other parts of the system. Note: If the virtual machine is initialized with a Windows operating system, a reboot is required to run the scripts from cloud-init.
Sample cloud-init script: With this sample script, the system will automatically create user "testcloudinit" with password "Abc123" and user "testcloudinit2" with password "abc@123Abc123". [code] Copy#cloud-config users: - name: testcloudinit sudo: ALL=(ALL) NOPASSWD:ALL lock_passwd: false shell: /bin/bash passwd: $6$rounds=4096$V6anciWl30$xKbcljqks1gUkMiM80pyKzhvyhn7U1n.jXcGCUfkUlX.rnllUWKUrmDEzekhhhP8aERSylRuC7gfDhJ32Xv0A1 - name: testcloudinit2 groups: sudo lock_passwd: false shell: /bin/bash plain_text_passwd: abc@123Abc123 - hostname: testcloudinit
[/code]
Note for Windows: Cloud base init script format will be used. Sample script: [code] Copy#cloud-config users: - name: testcloudinit primary_group: Administrators groups: Administrators passwd: abc@123Abc123 [/code]

Step 3: Click Create Instance to create the virtual machine. The system will display a confirmation, verify resources, and proceed with the initialization of the new virtual machine based on the selected configuration.
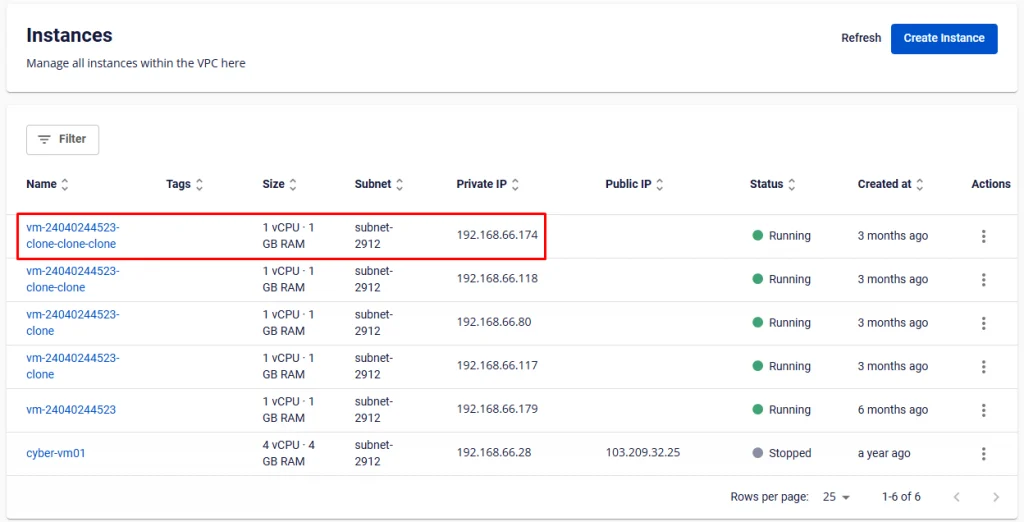
After successful initialization, users can see the newly created virtual machine and check its information on the management dashboard. Each virtual machine will display complete information about its name, configuration (RAM, CPU, Storage), IP address, and operating status (Off/On/Suspended) on the panel.
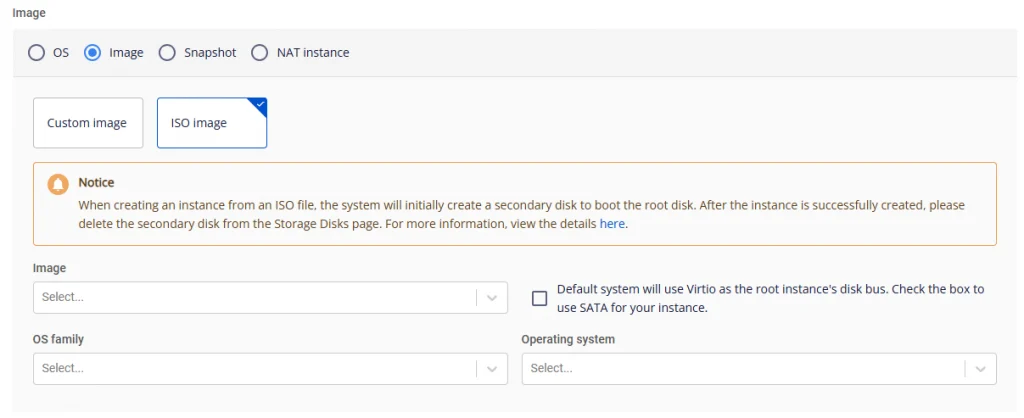
Notes When Creating a Virtual Machine from an ISO File
The Unify Portal system currently supports customers creating virtual machines from ISO files.
1) Notes when creating a virtual machine from an ISO file
-
When creating a virtual machine from an ISO file, the system will automatically create an additional disk to boot for the Root volume. Do not delete this disk while creating the virtual machine.
-
The customer needs to leave the disk with a minimum capacity equal to or greater than the ISO file size. The system will round up to the nearest whole unit (Example: a 0.5 GB file requires 1 GB; a 1.5 GB file requires 2 GB; a 2 GB file requires a minimum of 2 GB).
Note: Delete the temporary disk after creating the machine from the ISO file
- Users should delete the boot disk after the machine has been successfully created. (The disk must be un-mounted from the virtual machine before deletion.)
2) Support for SATA disk bus for the Root volume
-
The system defaults to using the Virtio disk bus for the Root volume. However, for some older ISO files that are not supported by Virtio, users need to switch to SATA mode by checking the corresponding checkbox.
-
Note that using the SATA disk bus may reduce disk performance, so this feature should only be used when your ISO file is not compatible with Virtio. Please refer to the manufacturer's documentation to select the appropriate mode.