Elasticsearch Sink Connector
Create a connector with Type: sink, Database: Elasticsearch
Pre-condition: CDC service status is Healthy
Steps to create a connector:
Step 1: From the menu bar, select Data Platform > select Workspace Management > select Workspace name
Step 2: Under My services, select CDC service
Step 3: On the CDC service detail screen > Select the Connectors tab > click Create a connector
Step 4: Fill in the Connector Information screen:
- Name (required): connector name
Note: The connector name may contain lowercase letters a-z or digits 0-9. Spaces are not allowed; use "-" as a separator instead.
-
Type (required): select sink
-
Database (required): select Elasticsearch

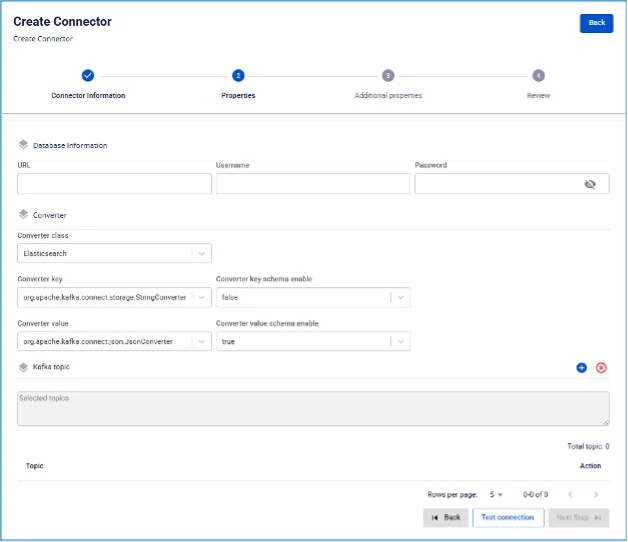
Step 5: Click Next in the top-right corner to proceed to the Properties screen
- Database Information
Enter Database information
* **URL**: Access URL

* **Username**: Username

* **Password**: Password
Click Test Connection to verify the connection from Workspace to the entered Elasticsearch
-
Converter
-
Converter key: select the key value for the converter
-
Converter key schema enable: select whether to use schema in the Converter key
-
Converter value: select the value for the converter
-
Converter value schema enable: select whether to use schema in the Converter value
-
-
Kafka topic
-
Click the '+' button to retrieve topic information
-
Note: limited to a maximum of 100 topics
-
Step 6: Click Next to proceed to the Additional Properties screen
-
Task:
- Number of tasks: Maximum number of tasks that can run in parallel
-
Map table: Map topics to data tables in the target database
-
Create new: Choose to create a new table or select from existing tables in the target database
-
Index: Select an index if not creating a new one, or enter an index name if creating a new one
-
-
Error Tolerance:
- Mode:
- None: The Connector stops processing if an error occurs

Step 7: Click Next in the top-right corner to proceed to the Review screen
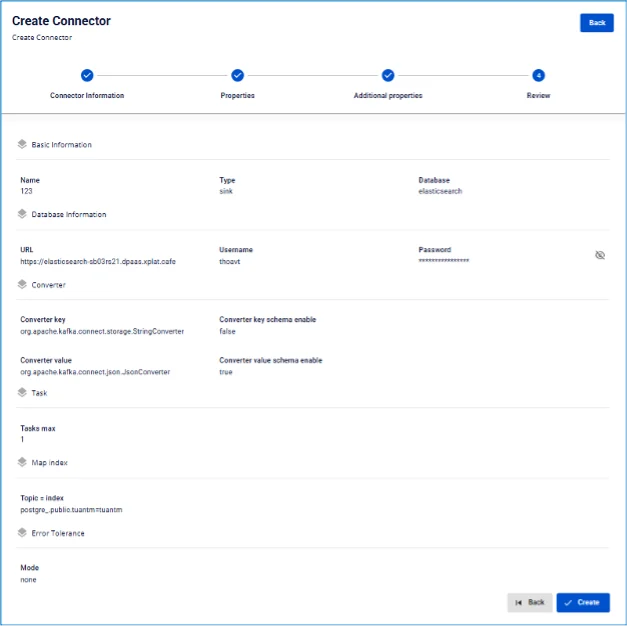
Step 8: Review the information, then click Create to complete the connector creation